
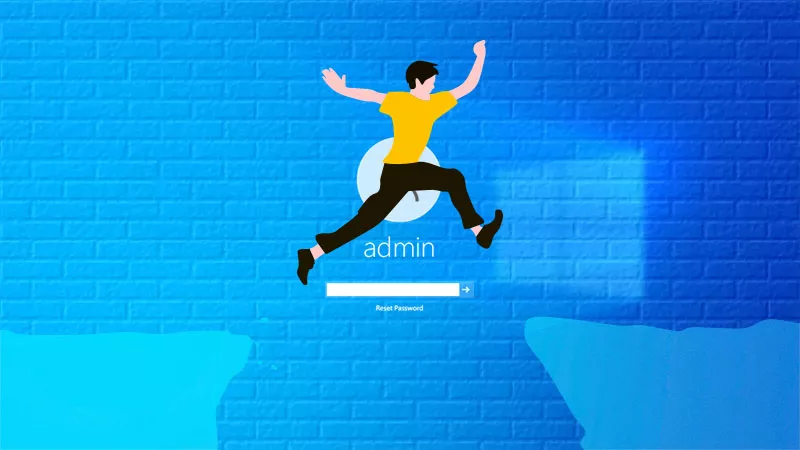
2 Ways to Automatically Skip Windows 10 Login Screen with Password
It seems troublesome that you must enter the password once the computer is not used for a while. So, skipping the Windows 10 login screen is recommended, but just for situations where security is less of a concern, such as on a home computer that is always in a safe environment. However, setting an account password is necessary for someone. In case of forgetting Windows admin or user password, you can create a password reset disk within only one second and use it to reset the password when locking out of the computer.
- How to Automatically Skip Windows 10 Login Screen
- Part 1: Bypass Login Screen Windows 10 with Password (2 Ways)
- Part 2: Skip Windows 10 Login Screen without Password (Recommended)
Part 1: Bypass Login Screen Windows 10 with Password
Automatically signing in Windows operating system can let you enjoy fast startup and avoid being unable to access the computer. With the built-in feature netplwiz or Local Group Policy Editor, it’s easy to disable the login screen. Here’s how:
Way 1: Bypass Windows 10 Login Screen by Using Netplwiz
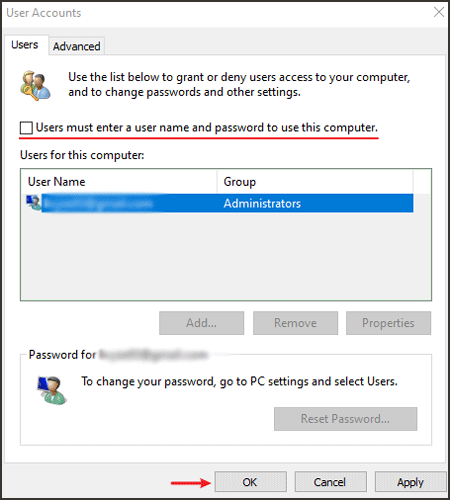
By default, the “Users must enter a user name and password to use this computer” option is selected in Windows. Therefore, you’ll need to uncheck it to enable the auto-login. If the checkbox disappears, find ways to restore it.
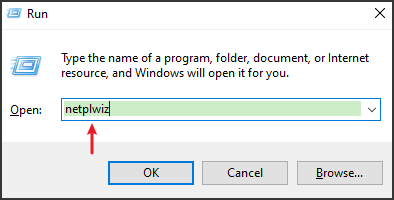
Step 1: Press Win + R key together to open the Run box. Then type in netplwiz and click OK.
Step 2: After opening the User Accounts dialog box, choose a user account and deselect Users must enter a user name and password to use the computer. Next, click the OK button.
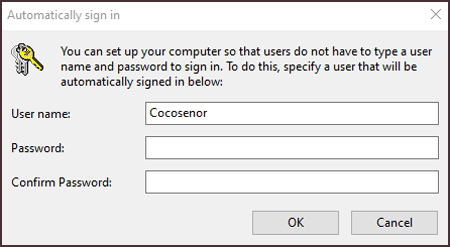
Step 3: Confirm the username of the account used for automatic login and enter the password if you have. After that, click the OK button again.
Step 4: Restart your personal PC. When done, the specified user won’t be asked for a password.
Way 2: Open Local Group Policy Editor to Skip Login Screen
If the above-mentioned method is of no use, open Local Group Policy Editor to bypass login screen. This tool can assist you in managing all Windows system settings.
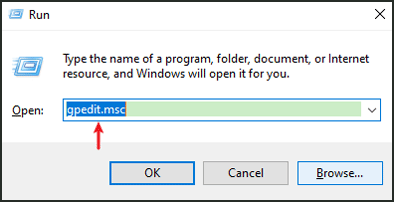
Step 1: Press Win + R and enter gpedit.msc in the Run box.
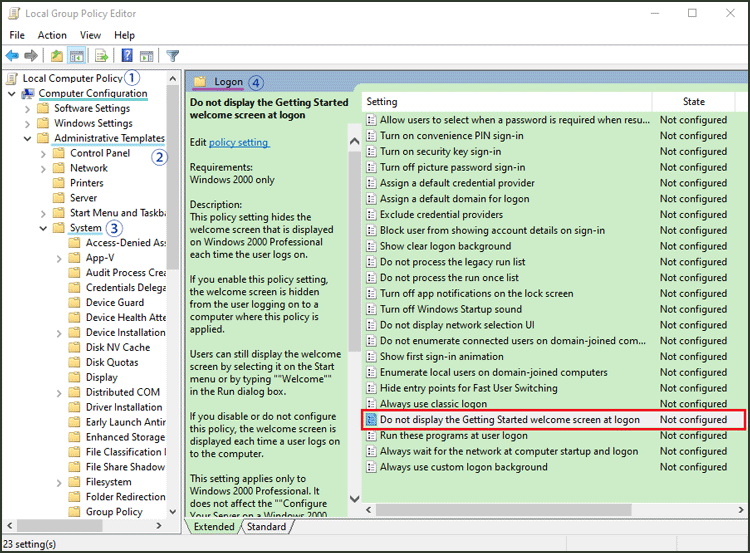
Step 2: In the left pane, click Computer Configuration > Administrative Templates > System > Logon. Then Double-click Don’t display the Getting Started welcome screen at logon.
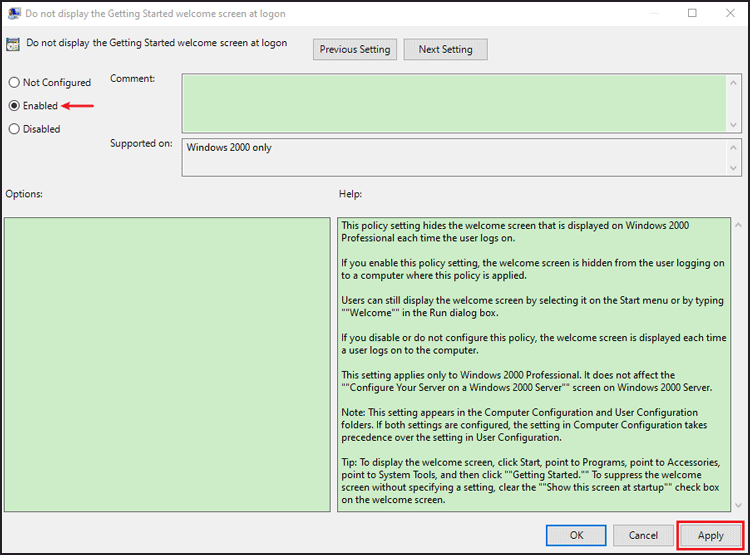
Step 3: Select Enabled and tap on Apply. Now you can log in to Windows 10 without a password.
Part 2: Skip Windows 10 Login Screen without Password
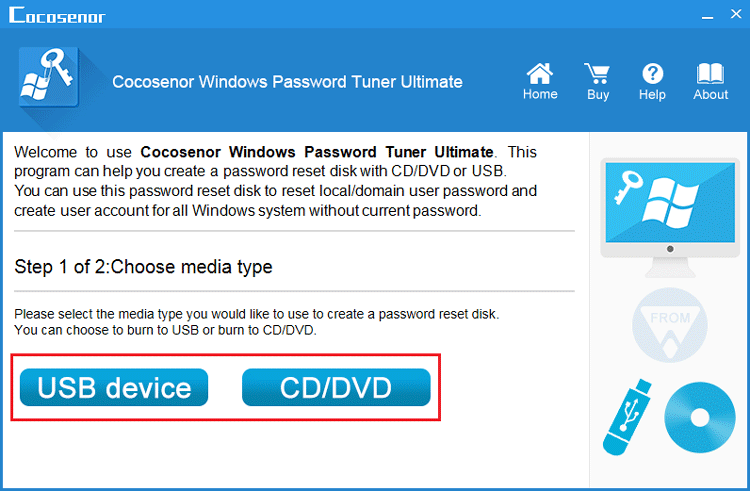
After removing the sign-in screen, bringing the device outside may not be very secure and setting a password can always protect your PC. But forgetting the password will be a hassle, you need to create a password reset disk via Cocosenor Windows Password Tuner.
Step 1: Download and install it on the desktop.
Step 2: Insert a removable storage device (like USB drive, CD/DVD) into the computer.
Step 3: Launch the software, select media type to create a password reset disk.
Step 4: Choose the device from the drop-down menu, and then click on Begin burning. When prompting you to format the USB drive, select Yes.

Step 5: Tap on OK when notified Burning successfully. Then eject the bootable disk.
Note: If you forget the password one day, use this disk to set the locked computer to boot from it. Next, follow onscreen instructions to reset the password when Windows Password Tuner program comes up.
Related Articles
- How to Find the Administrator Password on Windows 10
- Windows 10 Forgot Login Password Reset without Disk or Microsoft account
- 6 Ways to Reset Admin Password in Windows 10 Safe Mode
- 3 Ways to Bypass Administrator Forgotten Password on Windows 10
- Windows 10 login without password – bypass it with 9 tips