
Fixed -- Users Must Enter a User Name and Password to Use This Computer Checkbox Missing
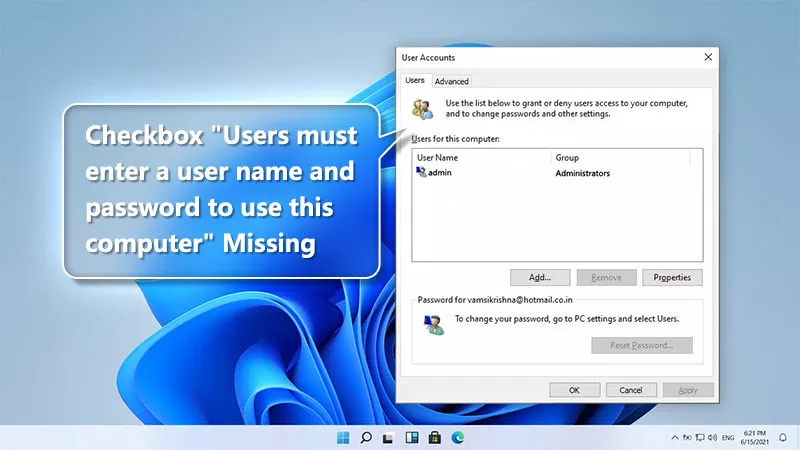
“I can’t remove the administrator password requirement. I have tried netplwiz and get the proper screen but there is no option to uncheck Require PW.” From answers.microsoft.com.
Have you noticed that you have the same question as him? The “Users must enter a user name and password to use this computer” checkbox is missing from your Windows 10/11 User Accounts settings. If yes, you can disable Windows Hello sign-in (although it helps you skip entering the account password and sign in to the device more easily), or edit Registry to get the option back.
- Contents:
- Solution 1: Launch Settings to Enable the Auto Login Option
- Solution 2: Display the Checkbox by Using Registry Editor
Solution 1: Launch Settings to Enable the Auto Login Option
First, ensure that your settings are configured correctly. When updating Windows 10 to the newer version, you most probably have enabled Windows Hello Face, PIN or Fingerprint. This is why the checkbox disappeared. So, you should manually disable the new feature to restore the checkbox and get the auto login.
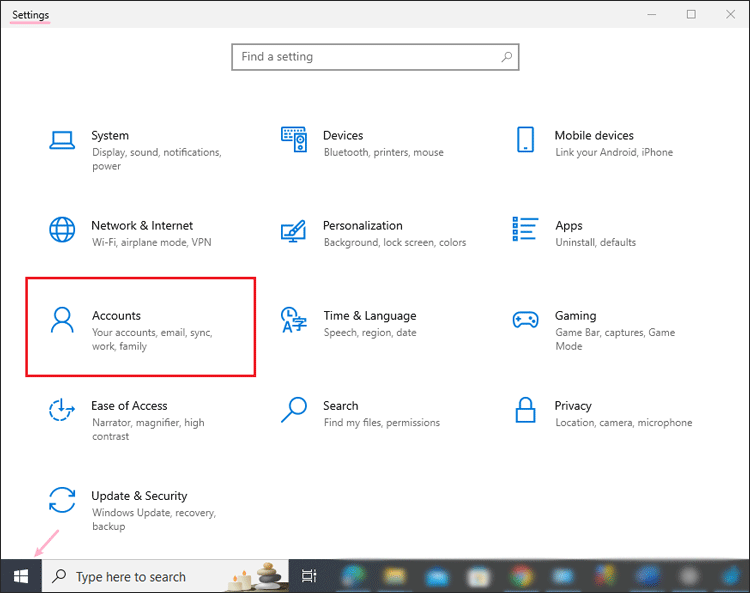
Step 1: Click the Start menu and open Settings. Scroll down to and tap on Accounts.
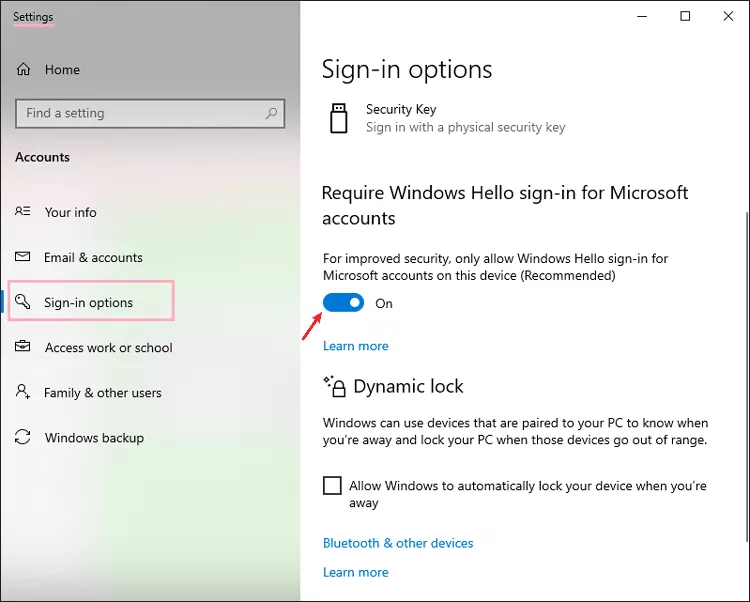
Step 2: Choose Sign-in Options on the left side of the window.
Step 3: Look for the option titled Require Windows Hello sign-in for Microsoft accounts or Make your device passwordless. Toggle off this button: For improved security, only allow Windows Hello sign-in for Microsoft accounts on this device (Recommended).
Solution 2: Display the Checkbox by Using Registry Editor
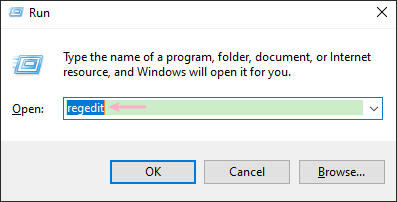
If the “Users must enter a user name and password” option is still missing after adjusting your Settings, you may need to open Registry Editor to force the checkbox to appear. Fortunately, this way editing Registry is always useful for the problem no matter which way you choose to sign in.
Step 1: Press Win + R keys together to launch Run box. Now type regedit and click OK or press Enter.
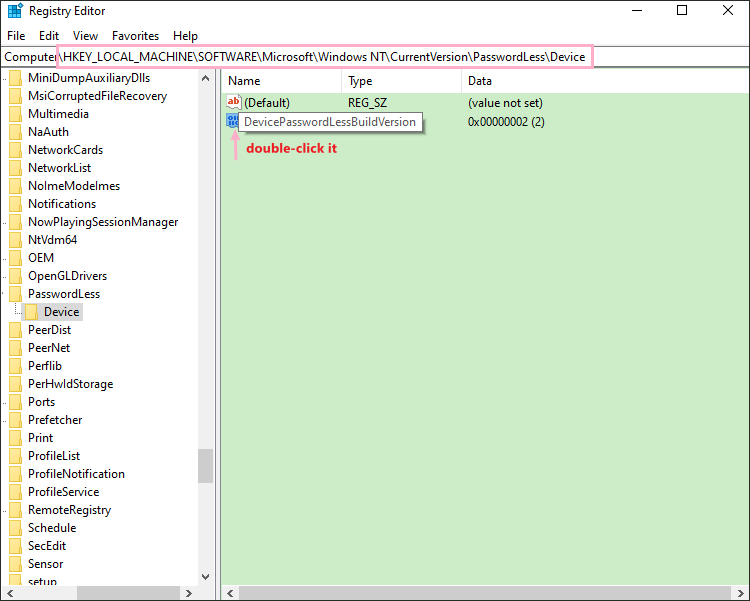
Step 2: After launching Registry Editor, navigate to the location by copying and pasting this:
HKEY_LOCAL_MACHINE\SOFTWARE\Microsoft\Windows NT\CurrentVersion\PasswordLess\Device
Step 3: In the right-side pane, double-click DevicePasswordLessBuildVersion DWORD to open it.
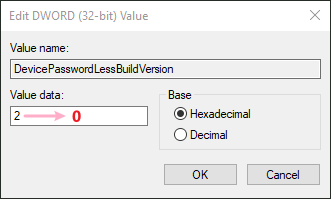
Step 4: Change its value to 0 and tap on the OK button.
Step 5: If the netplwiz missing checkbox doesn’t show up after editing Registry, you can restart the computer and run netplwiz command again to check whether it is here.
Note: If you are unable to handle Registry changes, open Command Prompt to achieve it. Just type in the following command and press the Enter key:
reg ADD "HKLM\SOFTWARE\Microsoft\Windows NT\CurrentVersion\PasswordLess\Device" /v DevicePasswordLessBuildVersion /t REG_DWORD /d 0 /f