4 ways to remove Microsoft account or Local account from Windows 10
When you want to sell or give your Windows 10 PC device to others, you may need to erase the personal information data from this PC, including deleting your own user account. Or there are several user accounts on your PC device, you just want to remove the odd ones. Here are several ways to remove the Microsoft or Local account from Windows 10.
First, make sure you are really want to remove this account from Windows 10, because after the account is deleted, some personal data and files with it will be erased too. If you just want to convert the Microsoft account to Local account, or switch the Local account to Microsoft account, see the article Sign in Windows 10 with Local Account Instead of Microsoft Account or Switch Local Account to Microsoft Account on Windows 10.
- Ways to remove Microsoft or Local account from Windows 10:
- Way 1: From Accounts settings
- Way 2: From Control panel
- Way 3: Use "netplwiz"
- Way 4: Use Command Prompt
Attention!
To remove an account from Windows 10, first you need to sign out of this account and login with another administrator account. If you don't have another administrator account, create an Microsoft or Local administrator account in Windows 10 first.
All the ways below are based on you have logged in with another administrator account. And the ways to remove Microsoft account and Local account in Window 10 are the same, no matter you want to remove the local account or Microsoft account, just go on, and choose the appropriate way to deal with your issue.
Way 1: From Accounts settings
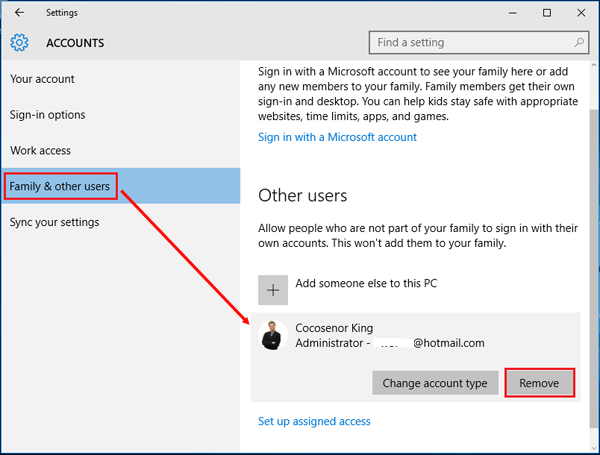
1. Click on Start → Settings → Accounts → Family & other users.
2. On the right panel, click on the user account you want to remove, and click on Remove button.
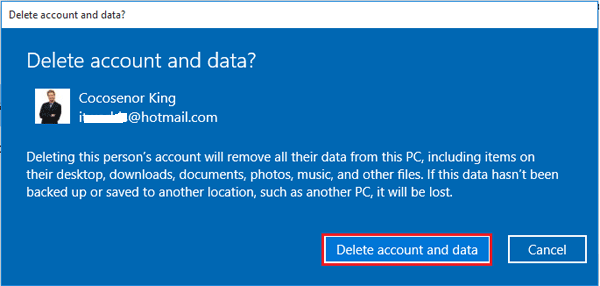
3. Click on "Delete account and data", and then this account will be removed from your PC soon.
Tips:
Deleting this account will remove all its data from this PC, including items on their desktop, downloads, documents, photos, music, and other files. If want to keep files of it, backup the files to another PC, or choose the next way - remove the user account from Control Panel.
Way 2: From Control panel
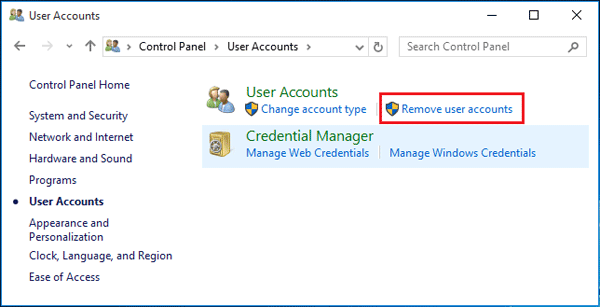
1. Right-click on Start, select Control Panel → User Accounts → Remove user accounts.
2. Click on the user account that you want to remove.
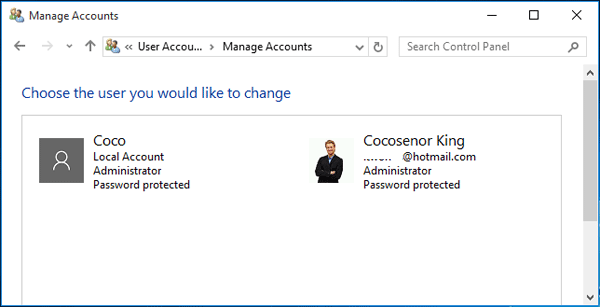
3. Click on "Delete the account".
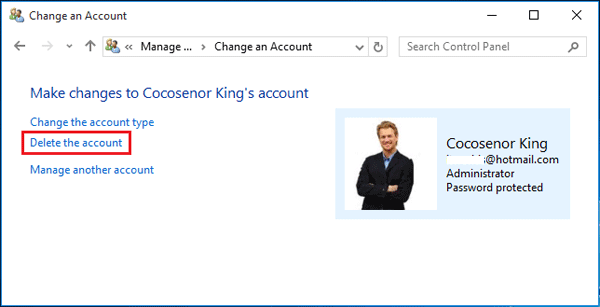
4. If want to erase the data of this user account, click on "Delete Files".
If want to keep the data of this user account, click on "Keep Files".
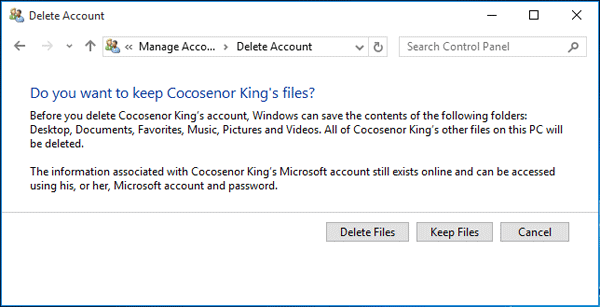
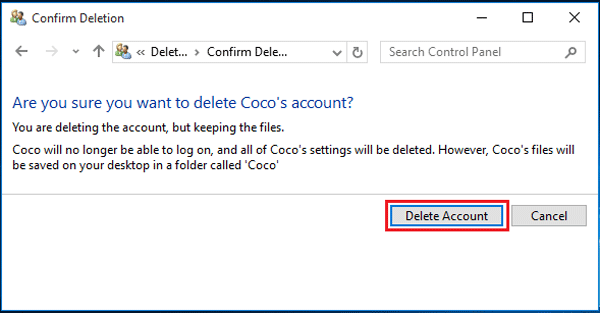
5. Click on "Delete Account", and then this account will be removed soon.
Way 3: Use "netplwiz"
1. Type in "run" on search box, and then click on Run on the result to open it.
2. Type in "netplwiz" on Run box, click on OK.
3. Select the user account you wanting to remove, and then click on "Remove" button.
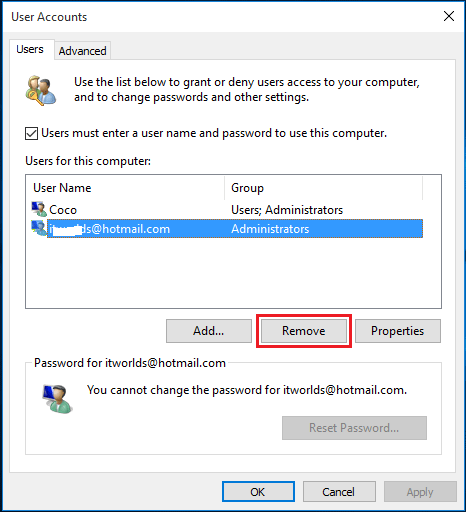
4. Click on Yes, and then this account will be removed from your Windows 10 PC soon.
Way 4: Use Command Prompt
1. Type in "command prompt" on search box, right-click on the search result of Command Prompt, select "Run as administrator" to run Command Prompt as Administrator in Windows 10.
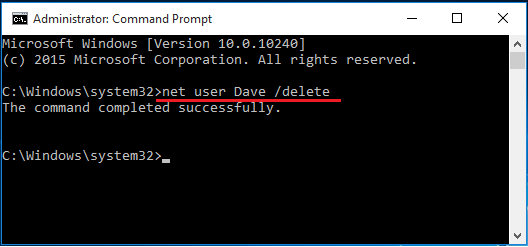
2. Remove the user account with the following command:
net user username /delete
Tips: Replace "username" with the user account name that you want to remove from Windows 10.
Related Articles
- 5 ways to remove administrator account from windows 10
- Windows 10 login without password – bypass it with 9 tips
- Two ways to unlock Dell Inspiron laptop without the password
- Locked out of my Acer laptop forgot password
- How to reset Dell Inspiron laptop Administrator password without disk
- How to unlock a HP laptop without the password when you forgot it

