How to Access UEFI BIOS in Windows 10

When you upgraded your computer to Windows 10, you may need to access the BIOS for a number of reasons like managing memory settings, resetting the BIOS password, etc. Now, you might wonder how to access UEFI BIOS in Windows 10? I will show you how to do that in this article.
- Guide Steps
- Way 1: Change PC settings to access UEFI BIOS in Windows 10
- Way 2: By Shift and Restart to access UEFI BIOS in Windows 10
Way 1: Change PC settings to access UEFI BIOS in Windows 10
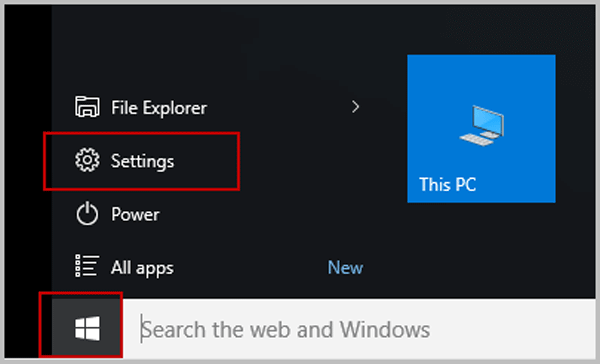
Step 1: Click on the Start button or press Win key on your keyboard, then click the Settings.
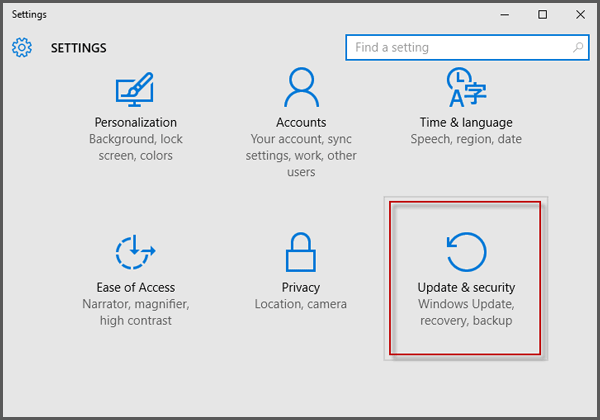
Step 2: Select Update & security on Settings panel.
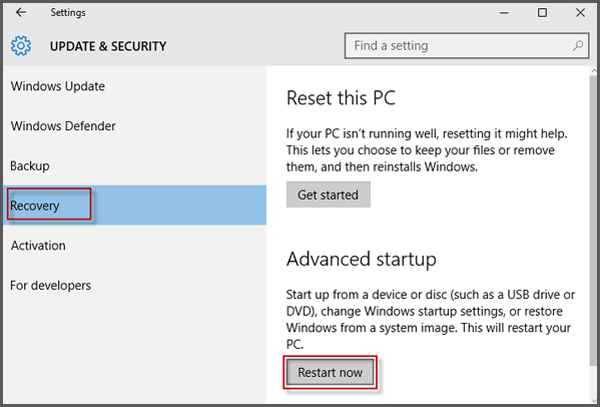
Step 3: Click Recovery. Under Advanced startup, click Restart now.
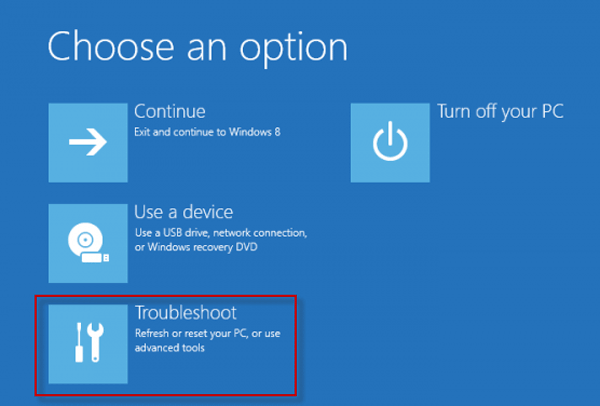
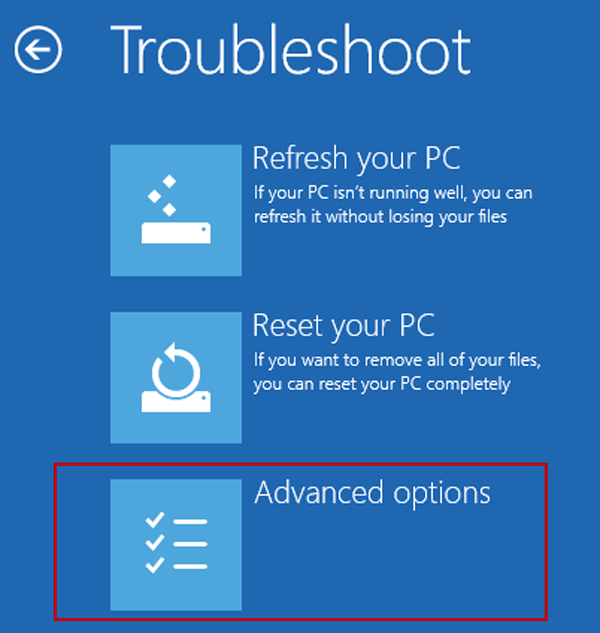
Step 4: The system will restart and show the Windows 10 boot menu. Choose Troubleshoot.
Step 5: Next, click Advanced options.
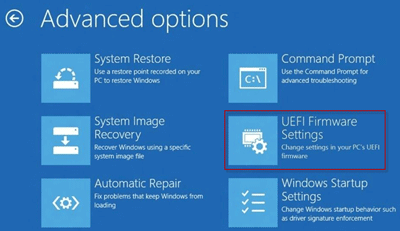
Step 6: Select UEFI Firmware Settings option. Click Restart to restart the system and enter UEFI BIOS.
Way 2: By Shift and Restart to access UEFI BIOS in Windows 10
Step 1: Click on the Start button or press win key, and click Power. Next, click Restart while pressing and holding Shift key.

Tips: If you are locked out of Windows 10 logon screen and forgot password, you also can click Power icon, and click Restart while holding Shift key. Then Windows 10 will immediately restart and display the blue screen. Select Troubleshoot > Advanced options > UEFI Firmware Settings, and then click Restart to reboot the system and enter UEFI BIOS.
Conclusion:
I hope you found this guide useful. When you successfully access to UEFI BIOS in Windows 10, don't hesitate to share with your friends.

