How to Extend Hard Drive Space without Formatting
A few days ago, one of my friends asked me for help, because her PC slowed down when working. She told that it would take her a long time to open a folder, take a long time to open a file, take a long time to log on some websites. In a word, the PC working slowed down which made her annoyed and seriously affected her work. She asked me if there have any solutions for solving this problem. She hoped to see the PC working normally soon!
After I examined my friend's PC, I answered to her "of course there has solution for your PC problem. I find your PC is running out of space on Local Disk (C:), which obviously has slowed down the computer working. You need to extend the Local Disk (C:)space of your PC."
Finally, I extended disk c space by shrinking the other disk space on her PC. Since there had enough space on other disks. That is the way I settled my friend's PC problem of low disk space result in slow working.
As we know, c disk usually means a computer's system drive. System drive with Low capacity would probably affect your pc working. That is why many friends want to increase c drive space in Windows.
Believe that many friends have ever faced a situation that while you were installing a program on your PC, the screen prompted up a warning that your Local Disk (C:) space was not enough, and you were asked to free space by deleting some files or cleaning up disk from local disk before you can continue. Surely, to free up space by deleting or cleaning some unnecessary files is a simple and fast way.
However, what can we do if more software needed to be installed and more space was requested on the computer disk? There may have different answer for this question, but today I would like to introduce an easy method to all friends who might come across low disk space situation. This method is base on that your PC has enough volume(space) on the local drives. Then you can free up space for the local drive disk which is in low space by shrinking other local drive disk which is in large enough space. The most important is that we no need to format disk c drive, so that we will not loss any important data and system documents.
For example, I want to increase 60 GB capacity to my PC disk (C:) because my disk (C:) space is too low. Happen that my disk (D:) has enough space to offer to disk (C:).Therefor, I extend volume for disk (C:) by shrinking disk (D:) volume. Please see steps below which will show you how to add space to c drive in Windows 8.1 without formatting disk c.
Steps to extend local disk c space on windows 8.1 without formatting c disk
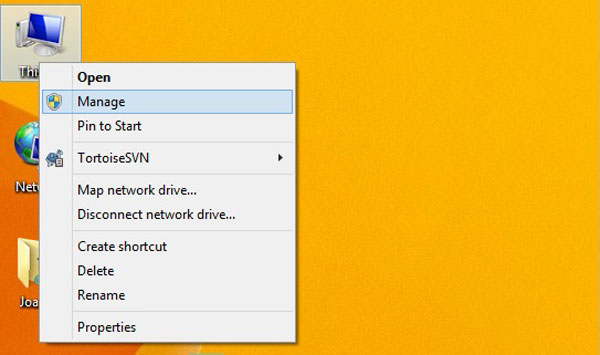
1. Right click This PC icon on your desktop, select Manage and click on it to enter computer disk management.
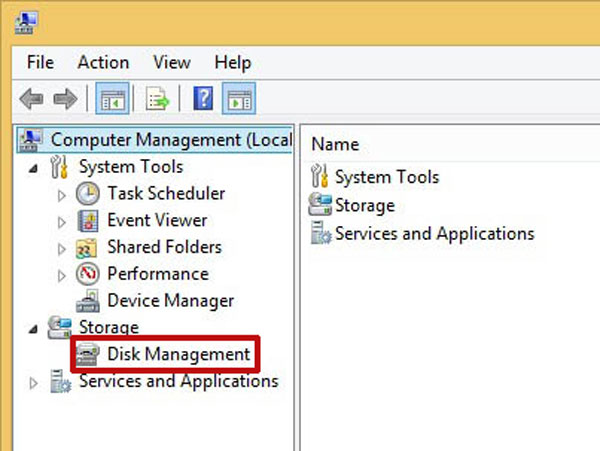
2. On the Computer Management window, find and click Disk Management below Storage.
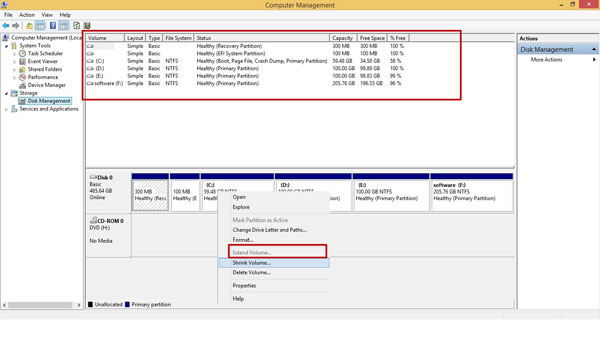
We can see PC local disk status such as capacity, free space and free percent etc. Move your mouse pointer over disk (C:), right click, you will see the Extend Volume is displayed as grey area. In this case, you are not able to extend space for disk (C:).
3. Format disk (D:)
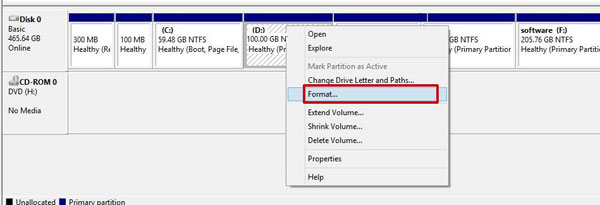
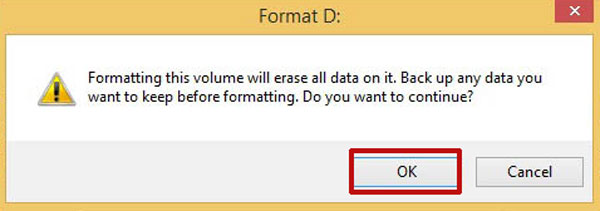
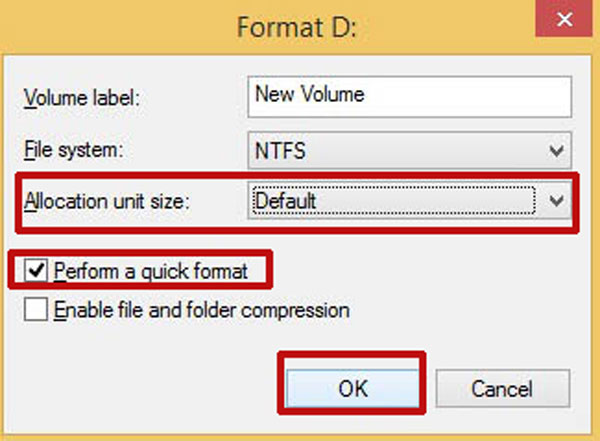
Move your mouse pointer over disk (D:), right click, select Format… and click on it. When a small popup comes up, click on OK, when another small popup comes up, we usually select Default as Allocation unit size, tick the box next to Perform a quick format, then click on OK. You will see disk (D:) become "New Volume (D:)".

4. Shrink New Volume (D:)
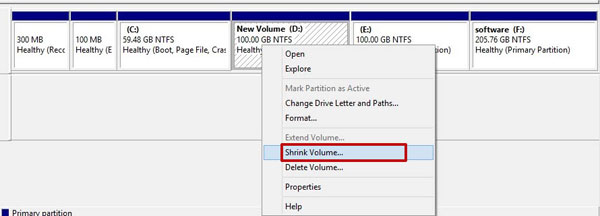
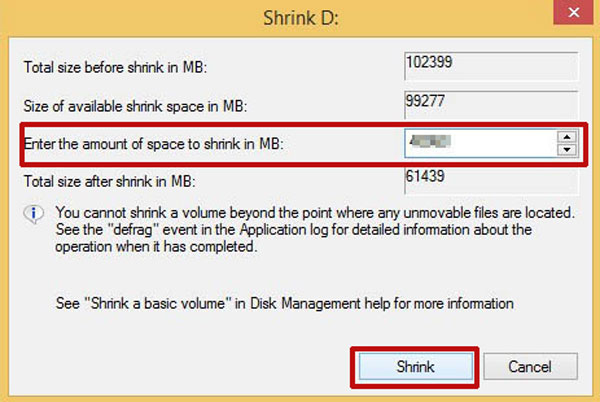
Move your mouse pointer over New Volume (D:), right click, select Shrink Volume…. when a small popup comes up, please type in the amount of space you want to shrink. Usually we select all size of available shrink space. Now on my PC Total size before shrink in MB is 102399(1024MB=1GB), Size of available shrink space in MB is 99277, Enter the amount of space to shrink in MB, I type 99277 in the blank. Then click on Shrink. After doing the shrink steps, the New Volume (D:) still has 3.05 GB remained. And the Unallocated Space is 96.95GB on the right of disk (D:). In this case we are still not able to extend space for C disk. Because the Unallocated Space must be on the right of disk (C:) and next to disk (C:). We need to delete the New Volume (D:) 3.5 GB.

5. Delete Volume
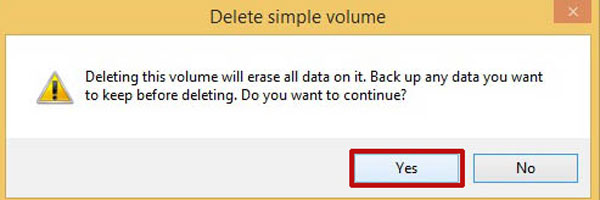
Move your mouse pointer over New Volume (D:), right click, select Delete Volume…. When a small popup comes up, click Yes. We can see the Unallocated Space comes up to 100.00GB, and it is on the right next to disk (C:). Now we can extend space for disk (C:).


6. Extend Volume for disk (C:)
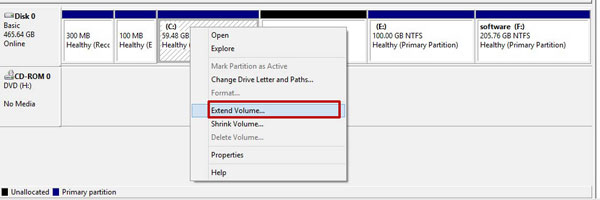
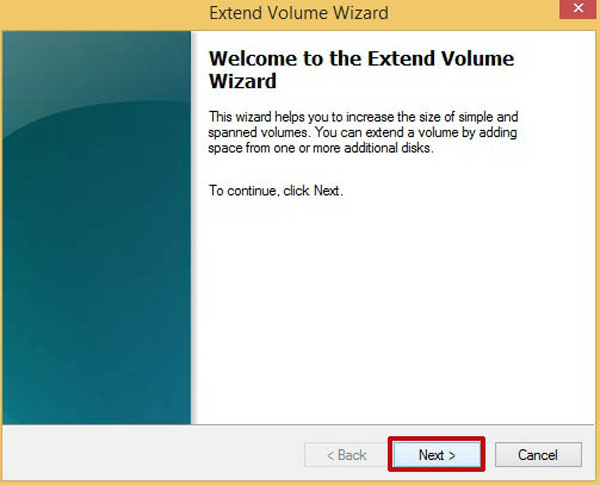
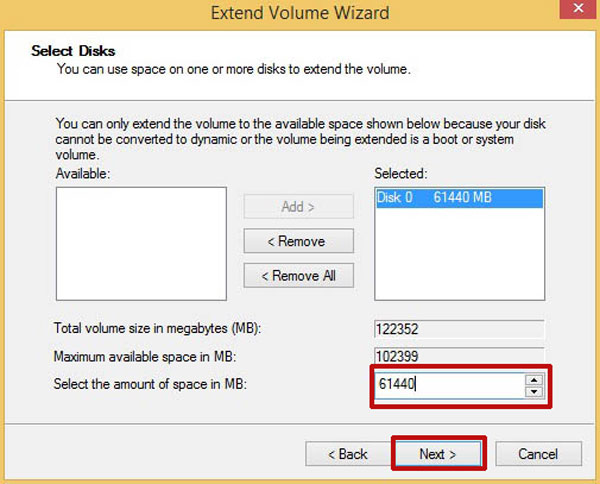
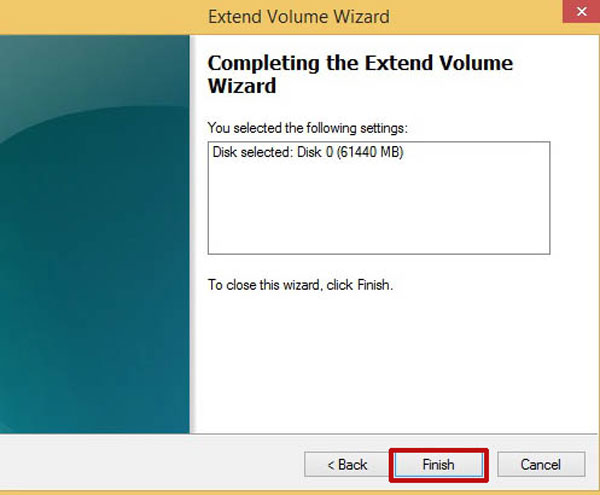
Move your mouse pointer over disk (C:), right click, select Extend Volume…. When the Extend Volume Wizard comes up, click Next to continue. In the blank of Select the amount of space in MB, you need to put in your own space amount that you want to extend to disk (C:). For example, I want to extend 60GB (61440MB) to my disk (C:), so I put in 61440 in the blank. Then click Next. And click Finish. As we can see the disk (C:) has increased to 119.48GB, and the Unlocated Space has reduced to 40.00GB. If you decide not to allocate the remained 40.00GB to disk (C:), you had better build a new simple volume so that you can use all space freely.

7. Build a Simple Volume
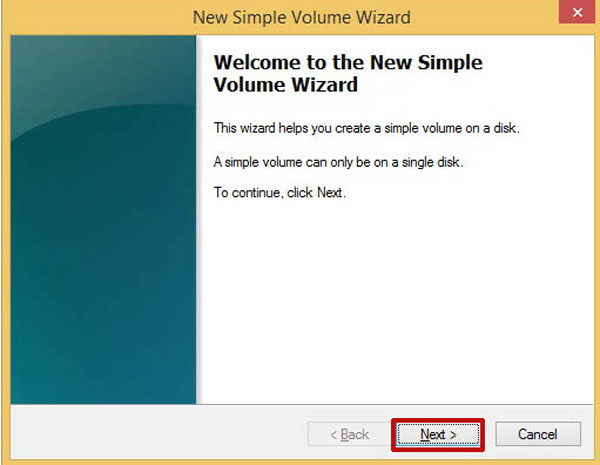
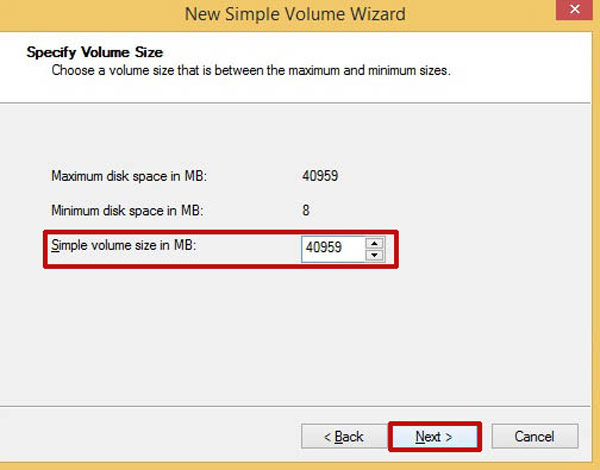
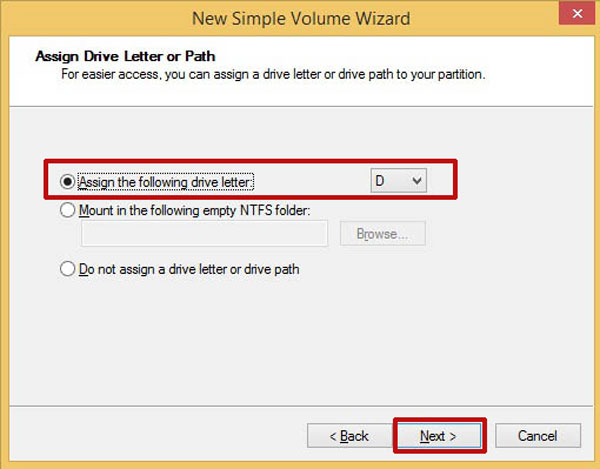
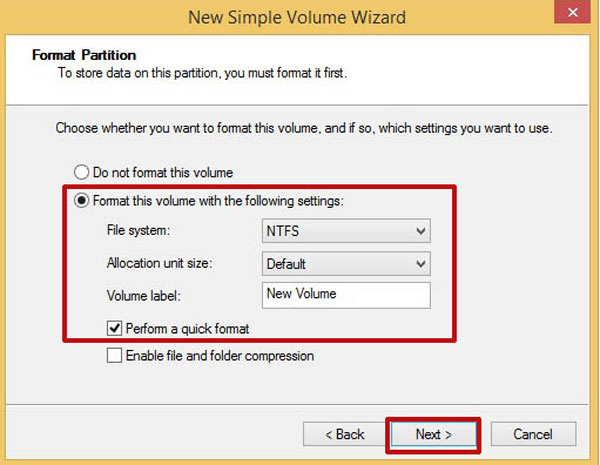
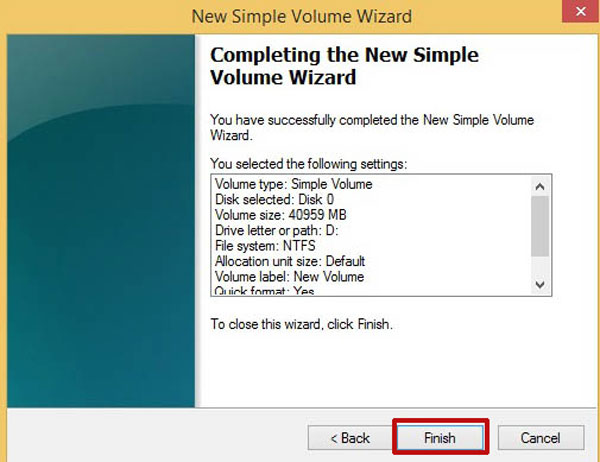
Move your mouse pointer over "40.00GB Unallocated", right click, select New Simple Volume and click on it. Then follow the steps of New Simple Volume Wizard to finish the operation. As we can see a New Volume (D:) with 40.00 is built.


Tips: If you want to extend volume form disk (E:) to disk (C:), you have to format disk (E:) and disk (D:), then delete these two disks to make an Unallocated Space on the right next to disk (C:). The details can refer to the above steps.
Thanks for your reading.

