How to Create an Apple ID For Your Child
Suppose that you have already set up a family group for family sharing, to participate in Family Sharing, all family members must have their own Apple ID. Apple also regulated that children under 13 can't create an Apple ID on their own. But a parent or legal guardian can provide verified parental consent for a child to have their own Apple ID, then create it on the child’s behalf. Now you can follow below steps to create an Apple ID for your child.
Tip: If you do not have a family group, you can set up a family sharing, or join a family sharing first.
Sidenote: Before you begin, you need to make sure you're using valid payment method, which includes credit card, debit car, Alipay, or UnionPay. To comply with child online privacy protection laws, you use the CVV, verification code sent via SMS, or security code from your payment method as part of providing your parental consent.
1. On iPhone, iPad, or iPod touch
-
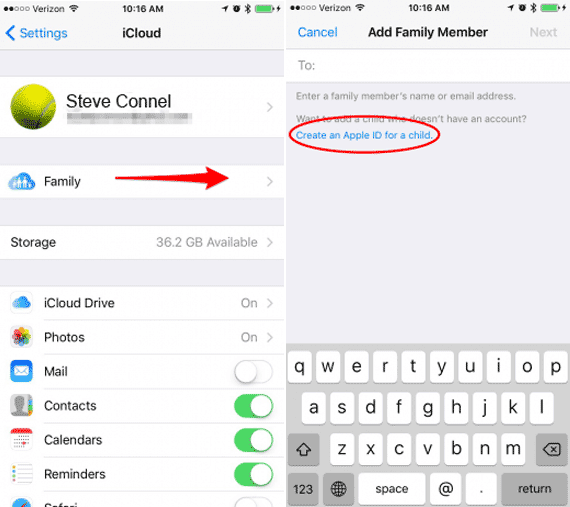
Go to Settings > [your name] > Family Sharing > Add Family Member, and tap Create an Apple ID for a child. If you're using iOS 10.2 or earlier, go to Settings > iCloud > Family.
-
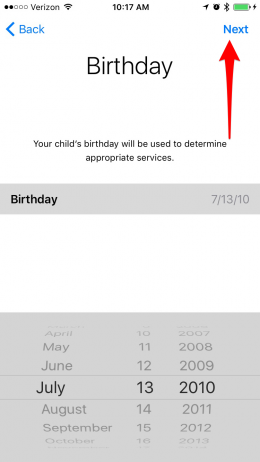
Enter your child's birthday and tap Next. Be sure to enter the correct date.
-
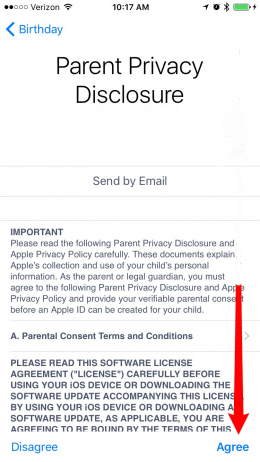
Review the Parent Privacy Disclosure and tap Agree.
- Enter the requested information for your payment method and tap Next.
-
Enter your child's name, tap Next, then create their Apple ID (username@icloud.com) and tap Next.
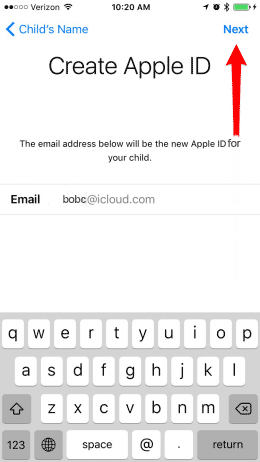
-
Set a password for the Apple ID
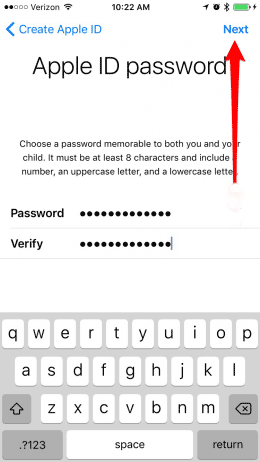
-
Turn on Ask To Buy

- Follow the onscreen instructions to make other settings, choose security questions, and set up your child's account. Choose passwords and security questions that you can both remember.
2. On Mac
-
Go to Apple menu > System Preferences > iCloud > Manage Family and click the plus icon(+).
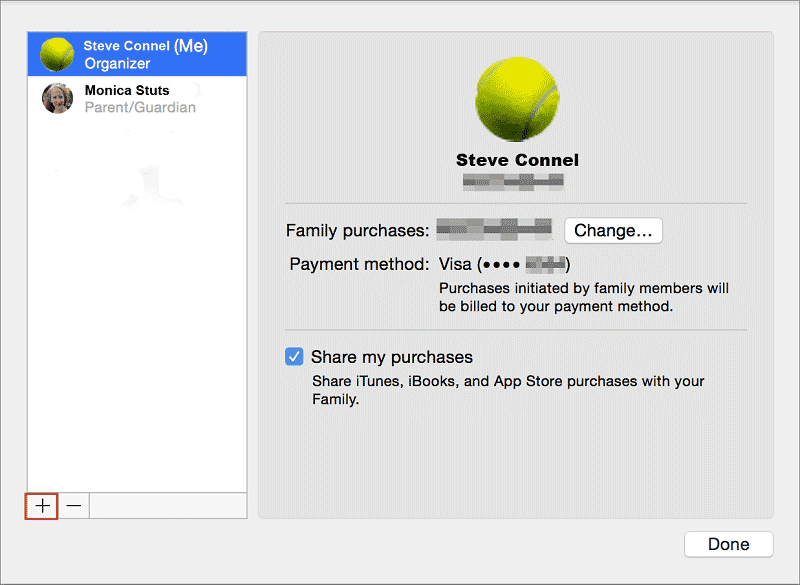
- Select Create an Apple ID for a child who doesn't have an account and click Continue.
- Enter your child's birthday. Be sure to enter the correct date.
- Enter your child's Apple ID (username@icloud.com), first and last name, and password, then click Continue.
- Enter the requested information for your payment method and click Agree.
- Follow the onscreen instructions to set a password, choose security questions, and set up your child's account. Choose passwords and security questions that you can both remember. You'll get an email confirmation after you create the Apple ID.
3. If your child has a Game Center account
If your child already under 13 has a Game Center account, but not an Apple ID, you don't need to create a new account for them. Just search for their nickname instead, follow these steps.
3.1 On your iPhone, iPad, or iPod touch with iOS 10.3 or later:
- Go to Settings > [your name] > Family Sharing > Add Family Member.
- Enter the child’s Game Center nickname.
- Follow the onscreen instructions.
3.2 On your Mac with macOS 10.12.4 or later:
- Choose Apple menu > System Preferences, then click iCloud.
- Click Manage Family.
- Click plus icon(+), then enter the child's Game Center nickname.
- Follow the onscreen instructions.
The child gets a message to enter their Game Center password. After they enter their password, the child is part of your Family Sharing group.

