
Easy Guide to Create a New Apple ID Without Phone Number
Generally, you are required to provide a phone number for Apple ID registration. Then every time signing in with Apple ID, it can help keep the account safe by entering a code via SMS. But maybe someone doesn’t have a phone number or thinks it’s insecure to link the number with Apple ID. Now there are some ways of creating an Apple ID without a phone number.
- Contents:
- Part 1: How to Create an Apple Account Using Only an Email Address
- Part 2: How to Register a New Apple ID via Your Friend’s Number
- Part 3: How to Get a Virtual Phone Number for Apple ID Creation
- Bonus Tips: How to Unlock Apple ID if You Forgot the Password
Part 1: How to Create an Apple Account Using Only an Email Address
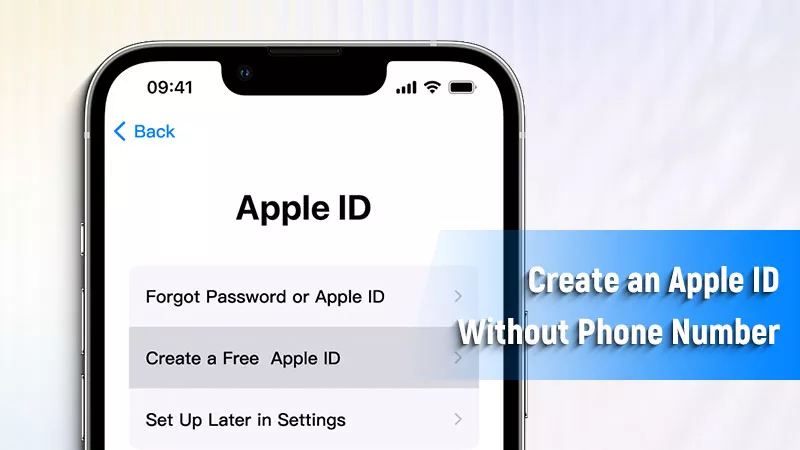
Apple users often create one Apple ID on their iPhone’s Settings. Just enter some basic information, like the email address and the phone number. During the setup process, someone can choose to skip entering a number. Here’s how:
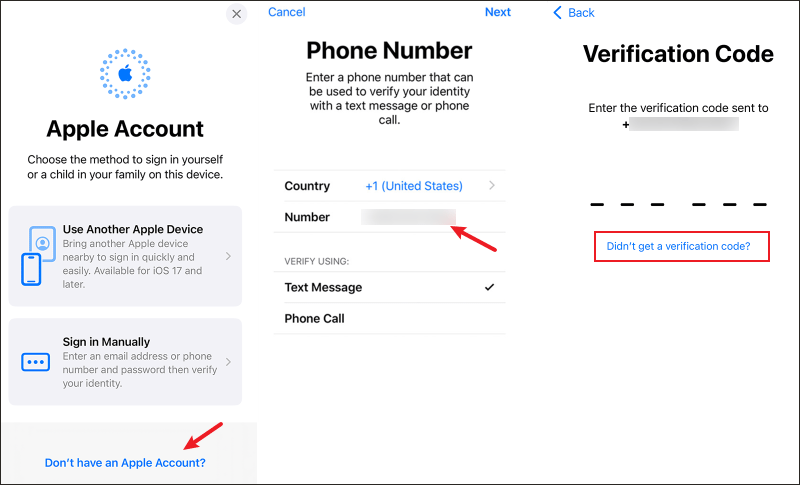
Step 1: Go to Settings > Click Sign in to your iPhone > Choose Don’t have an Apple ID > Tap on Agree and Continue. Enter your name and birthday in the box.
Step 2: Select Use email address to create Apple account. Type the email address and enter the Apple ID password.
Step 3: Provide a random phone number. Then tap on Continue. Choose Did not get a verification code > Verify later > Continue.
Note: If there is no “verify later” option, you must enter a valid phone number to create an Apple ID.
Step 4: After signing in, you can verify the email address and then use this Apple ID normally.
Part 2: How to Register a New Apple ID via Your Friend’s Number
If your family or friends have a phone number, you can temporarily use the number to create an Apple ID in Settings even though they have already registered one on their iPhone. What if you don’t have an iOS device? You can take the following steps to get an Apple ID.
Step 1: Visit icloud.com > Click Sign In > Choose Create Apple ID.
Step 2: Enter your name, country/region, birthday and email address. After that, set a password and enter your friend’s phone number.
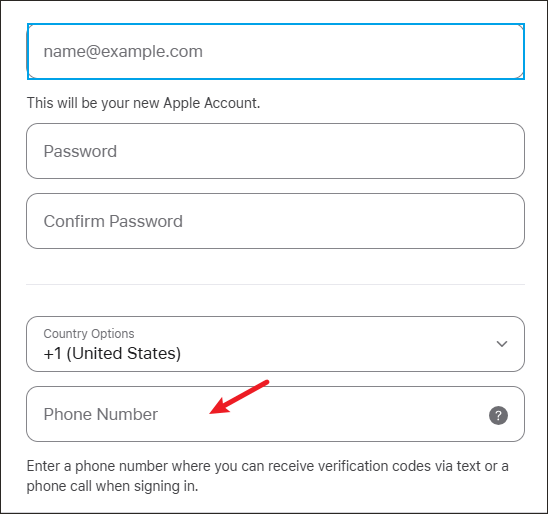
Step 3: Tap on Continue and type the verification code sent to his iPhone. Then the Apple ID is created successfully.
Notes: When you want to sign into any Apple services, get an Apple ID verification code on any trusted iOS devices or from your friend’s phone number. If you don’t need it later, there is an option to change the primary phone number.
Part 3: How to Get a Virtual Phone Number for Apple ID Creation
In case sending SMS frequently will interrupt your friends, you can purchase a virtual phone number on the Internet. Then type the number to set up an Apple ID.
Step 1: Search for an app that can generate a virtual phone number. Choose the country and the desired number. Then pay for it or get a free one.
Step 2: When creating a new Apple ID, enter the virtual number in the required field. After that, get a code to complete the setup.
Bonus Tips: How to Unlock Apple ID if You Forgot the Password
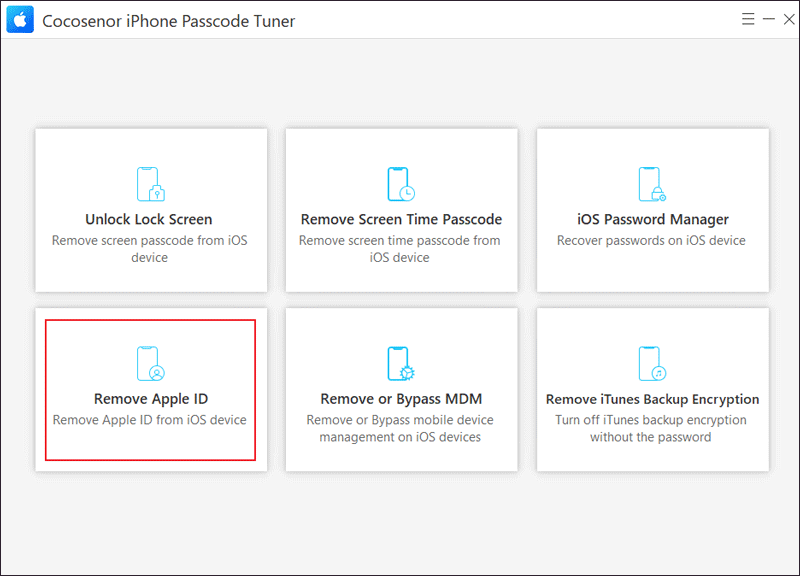
After linking a phone number to the Apple account, you can’t access the Apple ID once you forget the password. So, it is advised to download a powerful unlocking program: Cocosenor iPhone Passcode Tuner.
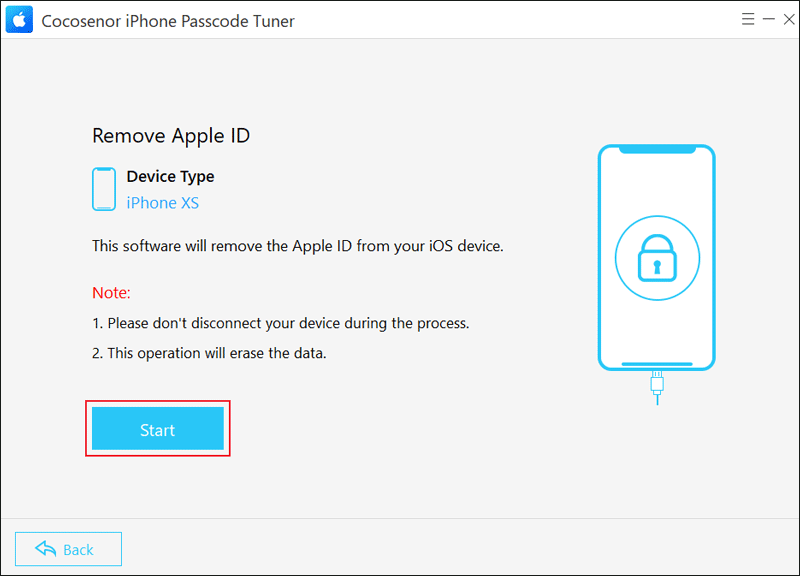
Step 1: Download and install the software on a computer. Then launch the app and choose Remove Apple ID.
Step 2: Connect the iPhone to the PC using a USB cable. After that, click the Start button.
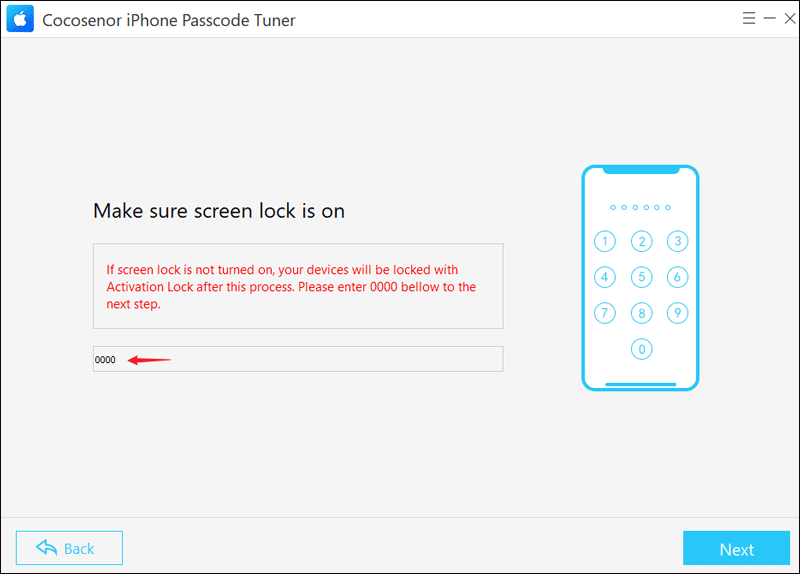
Step 3: If Find My is enabled, take the following steps. Make sure the screen lock is on. Then enter 0000 in the box and tap on Next.
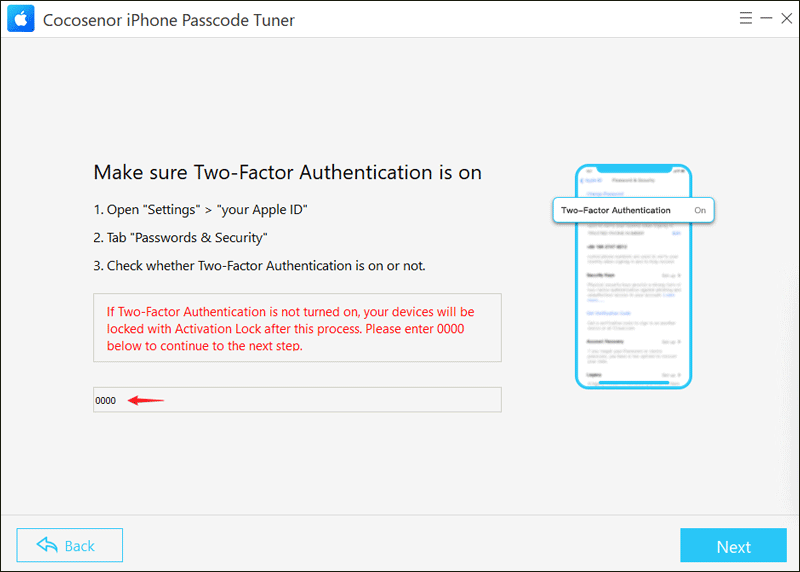
Step 4: Ensure you have enabled Two-Factor Authentication. After that, type 0000 and click on Next.
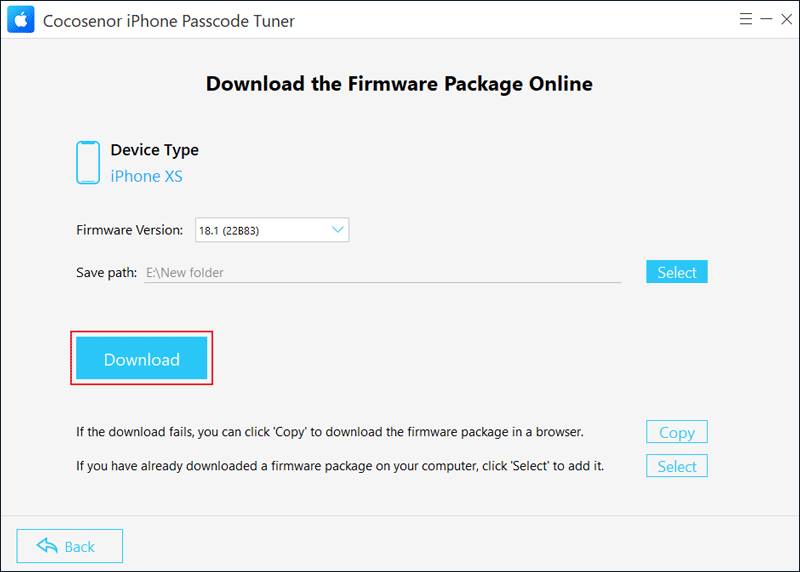
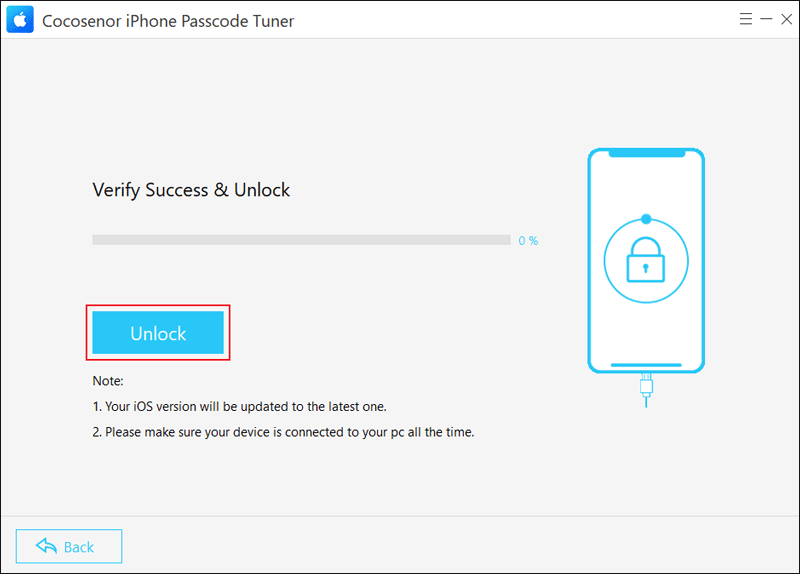
Step 5: Hit the Download button to get the firmware package.
Step 6: After downloading, click Unlock. And connect to the device all the time.
Step 7: When “Removed Apple ID Successfully” appears on the screen, continue to tap on Next and follow the onscreen instructions to remove the Apple ID with the screen passcode.