
5 Ways to Give Administrator Rights to a User Account on Windows 10
Administrator rights on Windows 10 provide a user with the ability to completely control a computer, install new software, and modify settings that affect other users. Generally, every new account created on the device is a regular user account by default. In order to gain more privileges, you should ask the other person to designate you as an administrator. It can be done in several ways after logging in to the computer with an admin account.
- How to Give Administrator Rights to a User Account
- Way 1. Change User Account Type via System Settings
- Way 2. Add Administrator Privileges through Control Panel
- Way 3. Upgrade the Standard User Account Using Netplwiz
- Way 4. Grant Administrator Rights via Command Prompt
- Way 5. Change Admin Settings Opening Windows PowerShell
Way 1. Change User Account Type via System Settings
Administrator user and Standard user are mainly two user account types on Windows. To have full permission, you can change the account type from Standard to Administrator in Settings.
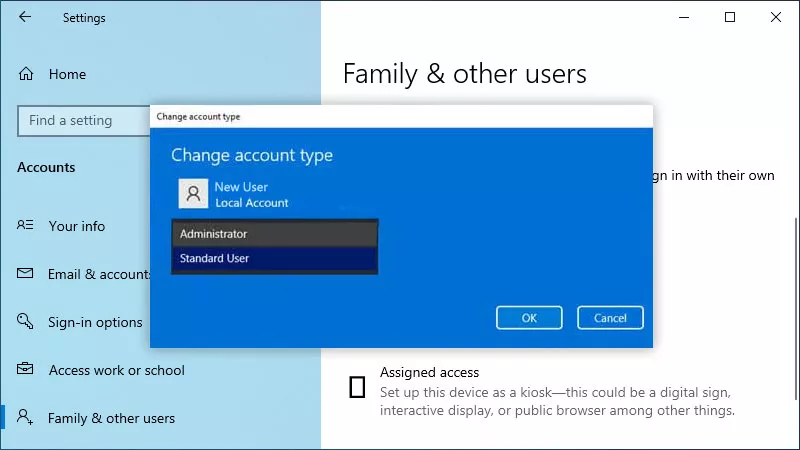
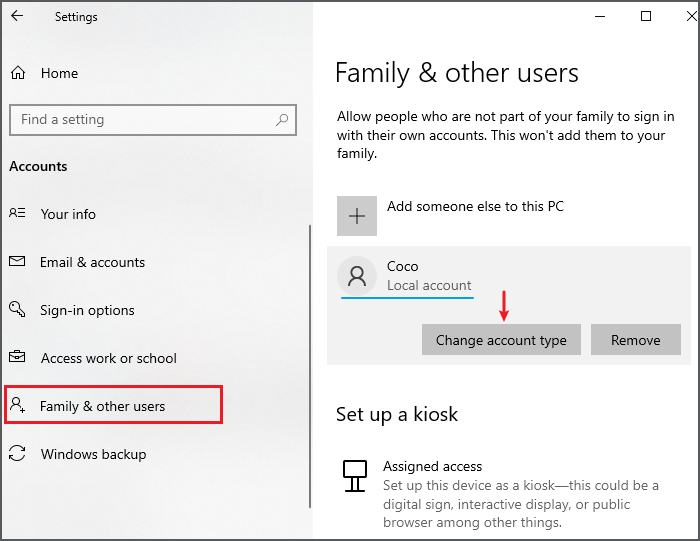
Step 1: Now tap on the Start menu > Go to Settings > Click Accounts > Choose Family & other users. Under the “Your family” or “Other users” section, find the account and click it > Hit the Change account type button.
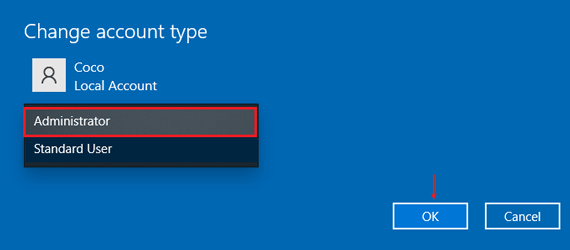
Step 2: Select Administrator > Click OK. And then you can restart the computer and log into your account when the admin logs out.
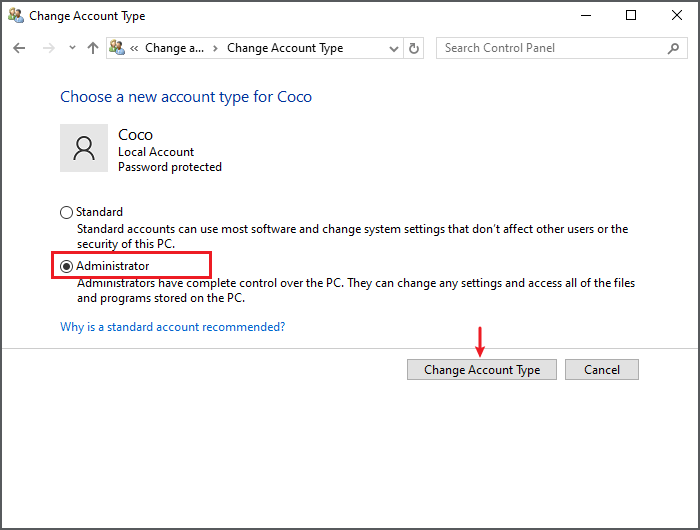
Way 2. Add Administrator Privileges through Control Panel
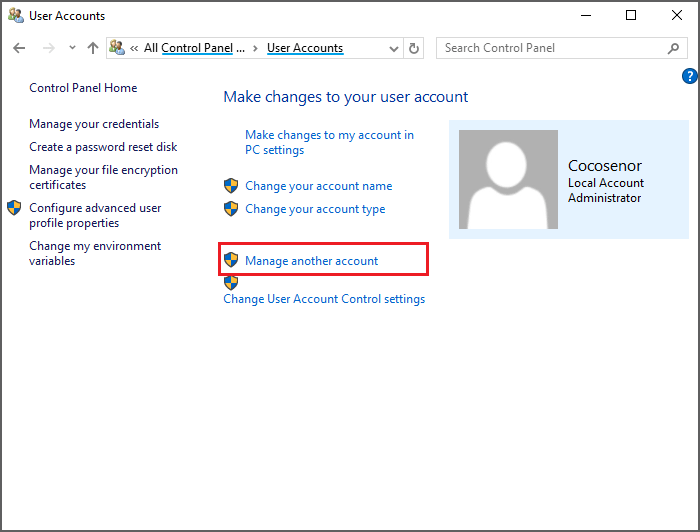
If you know the admin password, it’s also fairly easy to change the user account to an administrator. Type Control Panel in the Search bar and launch it > Click User Accounts > Tap Manage another account.
Then enter the admin user’s password > Select a user account to change > Click Change the account type > Choose Administrator > Hit Change Account Type to save the change.
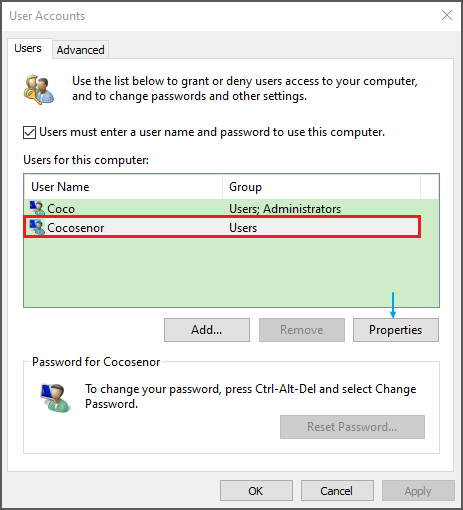
Way 3. Upgrade the Standard User Account Using Netplwiz
You know the standard user account has many restrictions and no full access. Another way is to run the netplwiz command. Just type netplwiz in the Windows Search and open it > Select a user account > Click Properties > Head to Group Membership tab > Choose Administrator > Click OK.
Way 4. Grant Administrator Rights via Command Prompt
The Command Prompt provides a quick way to change user privileges, especially useful for advanced users who prefer command-line interfaces or need to make bulk changes. With it, you can even change another user’s password besides the type.
Type CMD in the Search bar > Right-click Command Prompt and choose Run as administrator. In the command line, type net localgroup Administrators “username” /add and press the Enter key. Replace “username” with the exact username.

Way 5. Change Admin Settings Opening Windows PowerShell
After ensuring the user is safe, who has an account on a shared computer, you can launch PowerShell to turn the user account into an administrator.
Press Windows + X together > Choose Windows PowerShell (Admin) > Type Add-LocalGroupMember -Group “Administrators” -Member “username” > Press Enter.