8 Useful Tricks to Speed up Internet on Windows 10

It is supposed to be relaxing and enjoyable to browse the web and watch online videos on the computer. However, with a slow internet, you will have to put up with spinning progress bar and blank pages that are repeatedly refreshed. The sluggish internet is hardly free of complaints. Fortunately, there are ways to increase internet speed, allowing you to have a faster upload speed. Here we have outlined eight ways for optimizing internet speed and you can solve slow internet issues by applying these methods.
- Contents
- Method 1: Change limit reservable bandwidth
- Method 2: Close data hogging apps
- Method 3: Turn off background apps
- Method 4: Change DNS server
- Method 5:Flush DNS resolver cache
- Method 6: Disable metered connection
- Method 7: Clear out temporary files
- Method 8: Increase IRPStackSize in Registry Editor
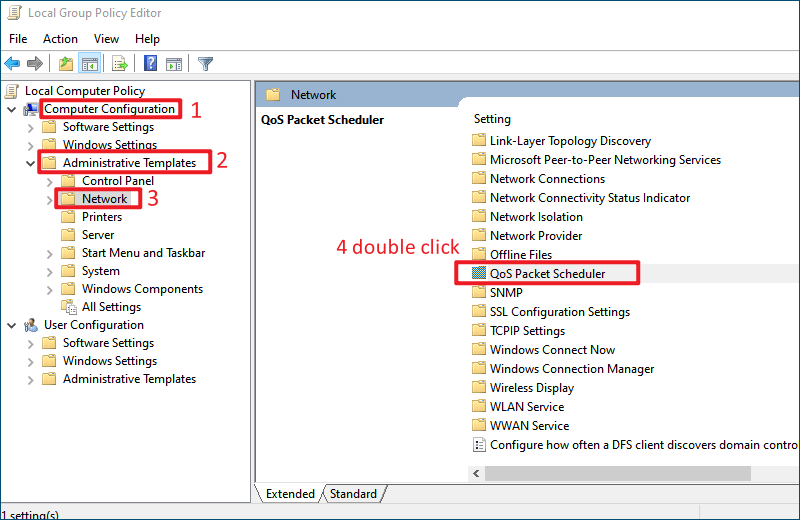
Method 1: Change limit reservable bandwidth
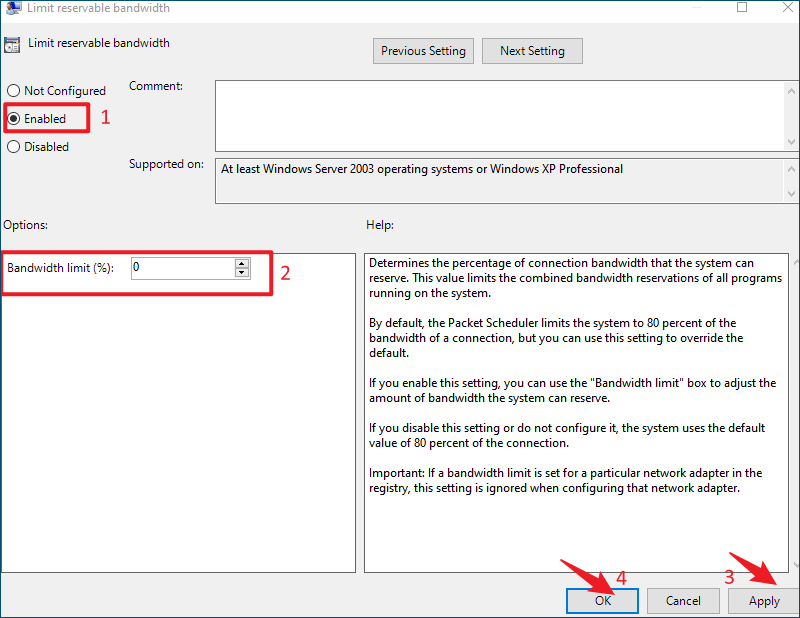
Normally, Windows reserves 20% bandwidth for automatic Delivery Optimization updates, which are background downloads. Therefore, you actually take the remaining 80% of the internet speed. But the bandwidth now is allowed to be adjust and you can remove this limit to run your computer at full internet speed.
Step 1: Press Windows+R to open Run dialog, type gpedit.msc in the open box and click OK to open Local Group Policy Editor.
Step 2: Select Computer Configuration > Administrative Templates > Network.
Step 3: On the right pane, scroll down to locate QoS Packet Scheduler and double click on it.
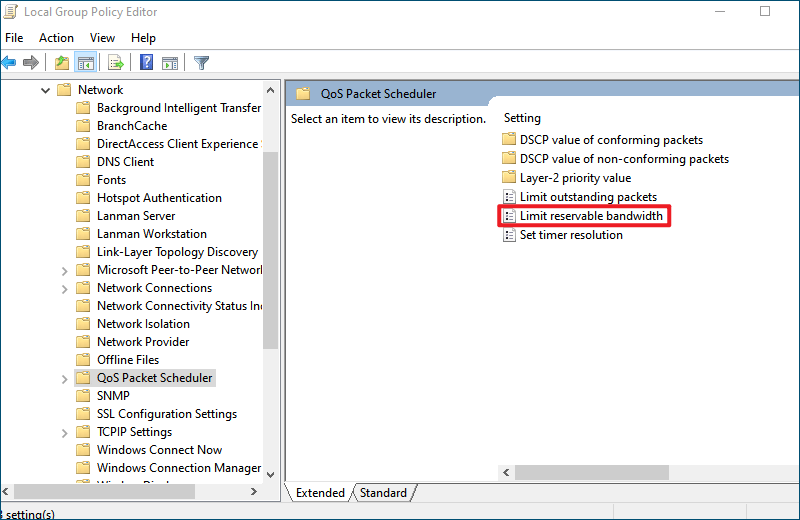
Step 4: Then double-click Limit reservable bandwidth policy to view its properties.
Step 5: Choose Enabled option and set the Bandwidth limit(%) to 0. Then click Apply and OK to make the changes effective.
Method 2: Close data hogging apps
If you want to improve the uploading and downloading speed when you have some downloading tasks, you can check which apps use too much bandwidth and close those data hogging programs.
Step 1: Press Windows+I to open Settings and select Network & Internet. Then select Data Usage under the connected network.
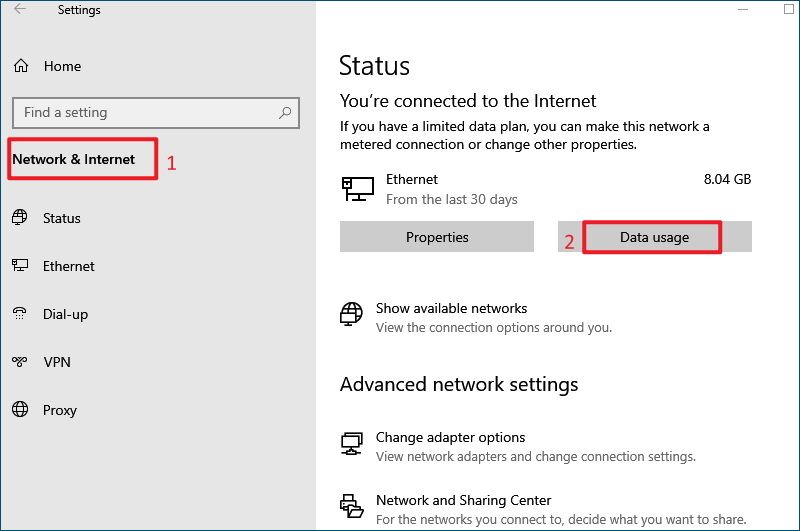
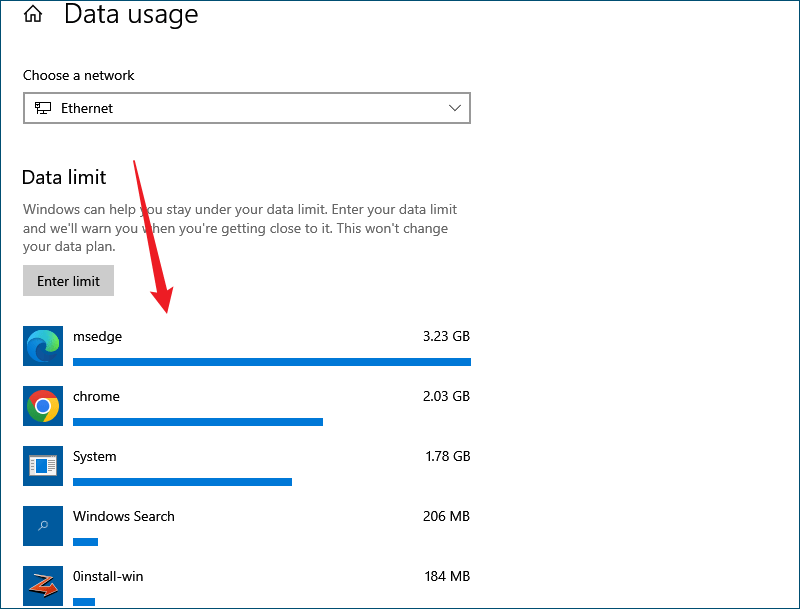
Step 2: You will be presented with a list of usage statistics on how much bandwidth each application uses, choose the one you want to close.
Method 3: Turn off background apps
Too many background apps can dramatically slow down your internet speed as they will share your internet bandwidth. Turning off those background apps will give you a faster internet connection.
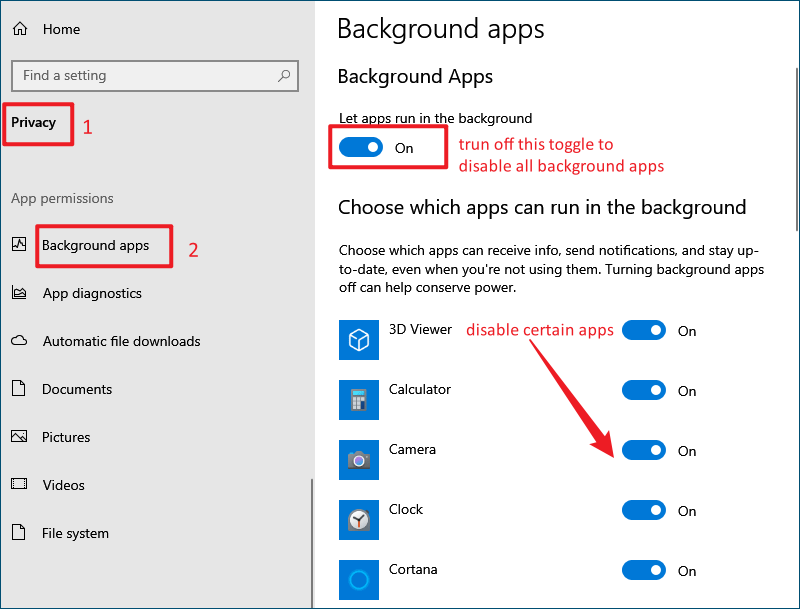
Step 1: Open settings and select Privacy > Background apps.
Step 2: On the right pane, you can choose switch the toggle off under Let apps run in the background to disable all background apps. Alternatively, you can choose which apps can run in the background as per your preference.
Method 4: Change DNS server
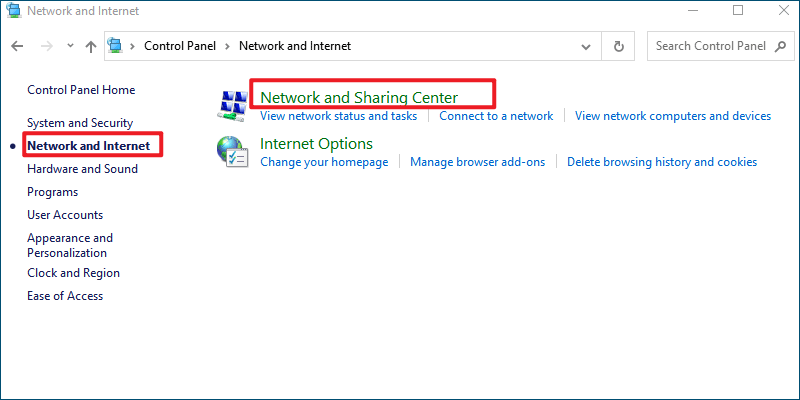
Step 1: Search control panel in the search box and open it.
Step 2: Select Network & Internet > Network and Sharing Center.
Step 3: Under View your active networks section, click your connected network, Ethernet or WiFi.
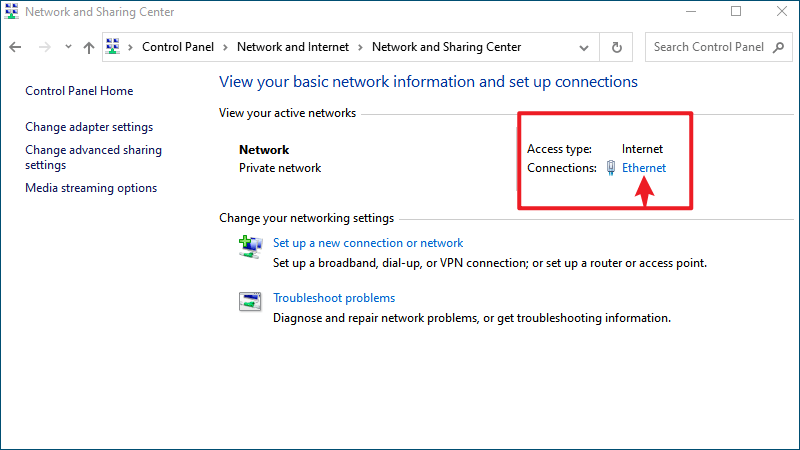
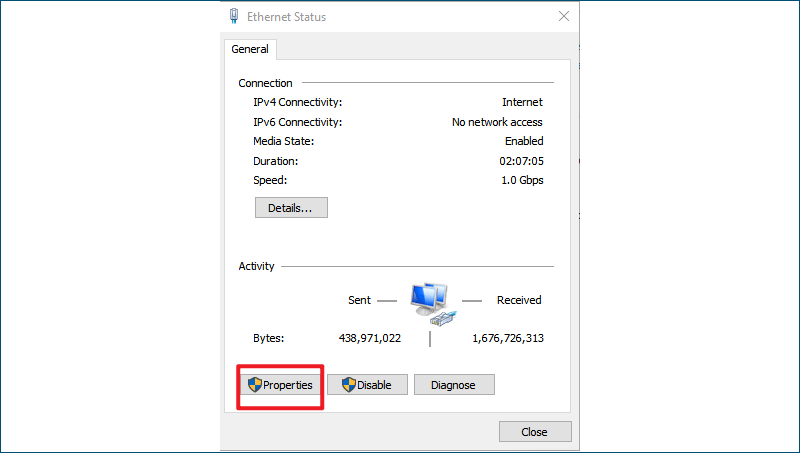
Step 4: In the follow-up window, click on Properties.
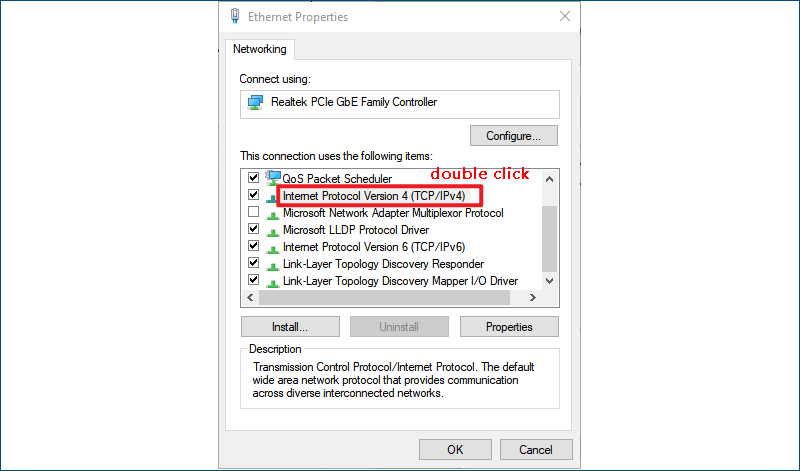
Step 5: Double click Internet Protocol Version 4 (TCP/IPv4).
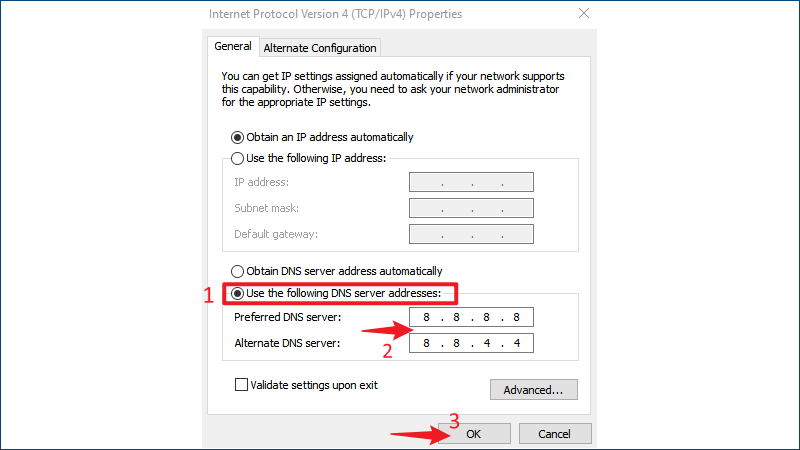
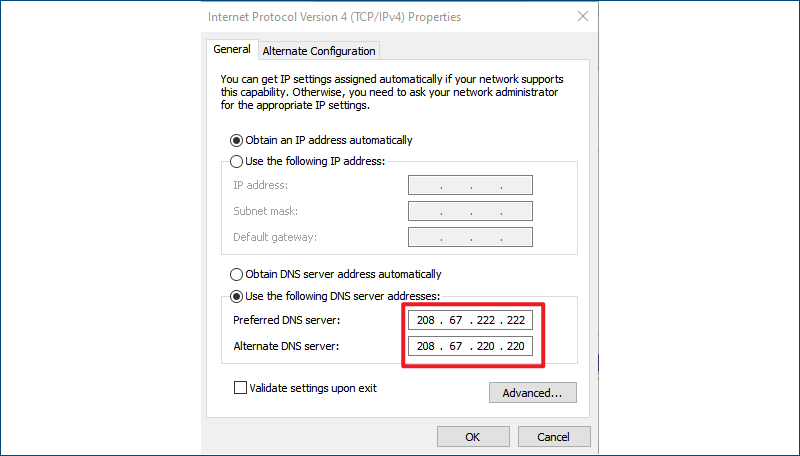
Step 6: Select Use the following DNS server addresses item. If you want to use Google DNS, enter the Preferred DNS server and Alternate DNS server as following:
- ● Preferred DNS server: 8.8.8.8
- ● Alternate DNS Server: 8.8.4.4
If you want to use OpenDNS, type the following in the box:
- ● Preferred DNS server: 208.67.222.222
- ● Alternate DNS server: 208.67.220.220
Step 7: Once you finished, tap on OK to save changes and restart your PC.
Method 5:Flush DNS resolver cache
Computer's operating system would keep a record of recent websites and other internet domains that we visited or tried to visit. DNS cache is the storage of recent DNS queries. In other words, a DNS cache amounts to a temporary database that can provide a quick reference when your computer is trying to figure out how to load a website. Clearing the DNS cache will remove all invalid records, allowing the computer to repopulate the address the next time it accesses new websites. Though this operation may slow down the internet for a while, you will gain a faster internet connection afterwards.
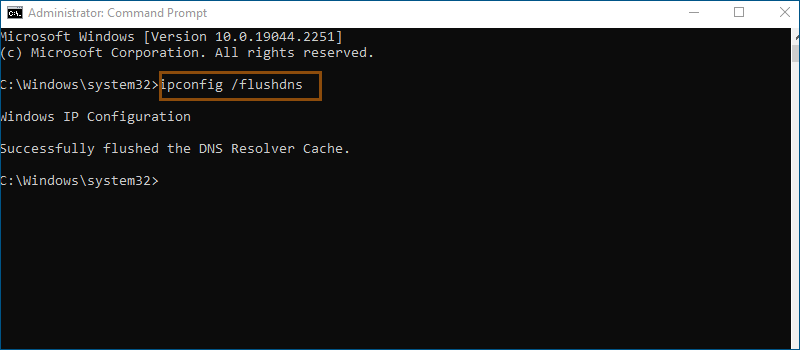
Step 1: Search cmd in the search box and select Run as administrator from the searching results.
Step 2: Type ipconfig /flushdns in the Command Prompt and hit Enter to launch the command. You will see "Successfully flushed the DNS Resolver Cache" once finished.
Method 6: Disable metered connection
A metered connection is an internet connection with data limitations. If your Wi-Fi or Ethernet was set to metered, some apps might not work at maximum efficiency to help reduce your data usage. The below steps will show you how to disable metered connection:
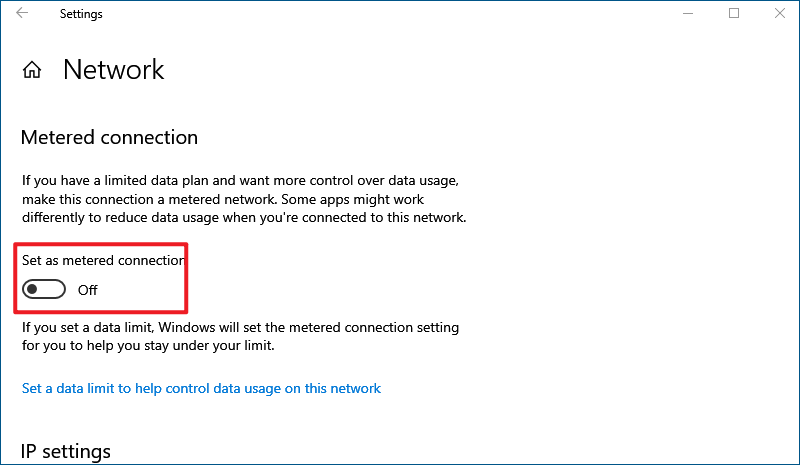
Step 1: Open Settings and select Network & Internet > Status.
Step 2: Select properties under your connected internet.

Step 3: Scroll down to locate the Metered connection section and turn off the toggle under Set as metered connection.
Method 7: Clear out temporary files
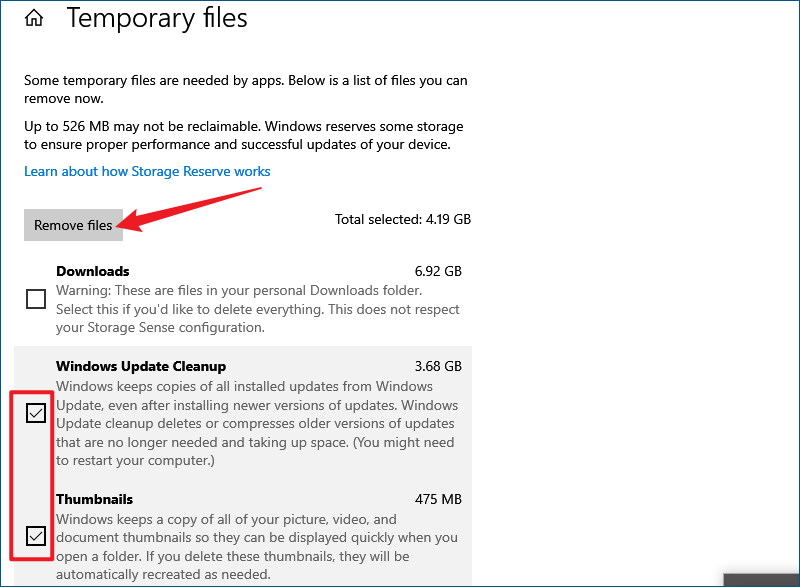
Step 1: Open Windows Settings and select System > Storage > Temporary files.
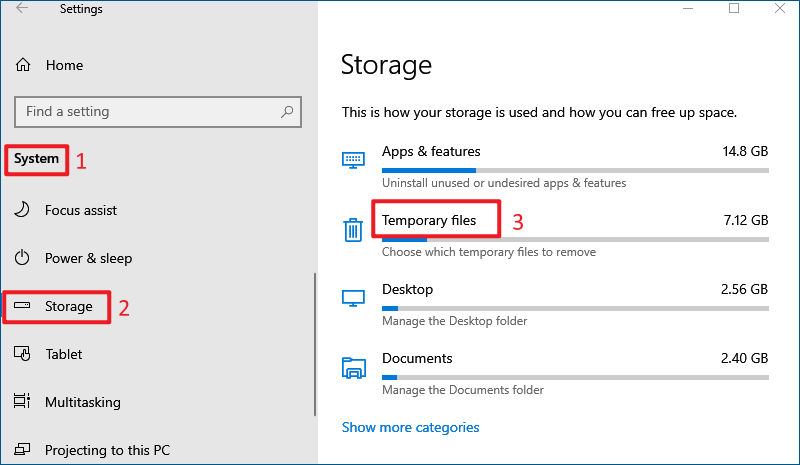
Step 2: You shall see a list of temporary files that can be removed and some files are already selected. Select all the files you want to delete by ticking their checkbox and click on Remove files.
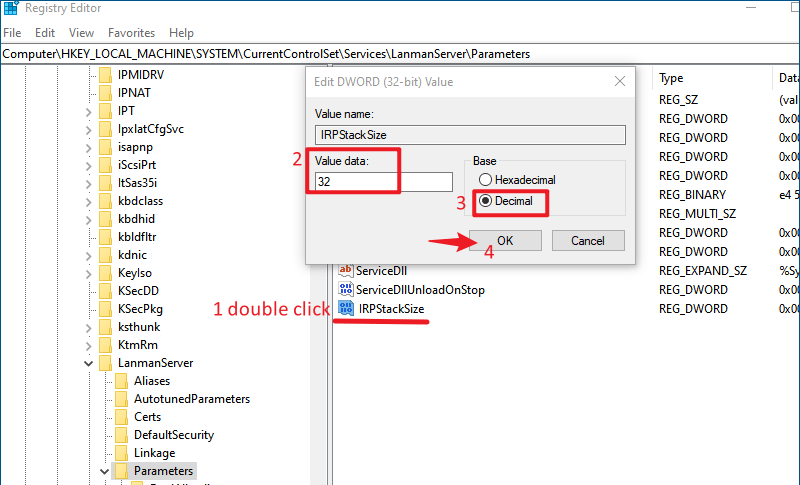
Method 8: Increase IRPStackSize in Registry Editor
I/O Request Packet Stack Size on your computer signifies how many 36-byte receive buffers your computer can use simultaneously. A larger number of buffers will allow your computer to handle more data simultaneously, which will improve your network performance. It has a maximum value of 50, however, it defaults to 15 in Windows. If the value is adjusted to 33-38, the stability of Windows system will be negatively affected. Therefore, we can adjust this value to 32.
Step 1: Press Windows+R to open Run dialog, type regedit in the open box and click OK to open Registry Editor.
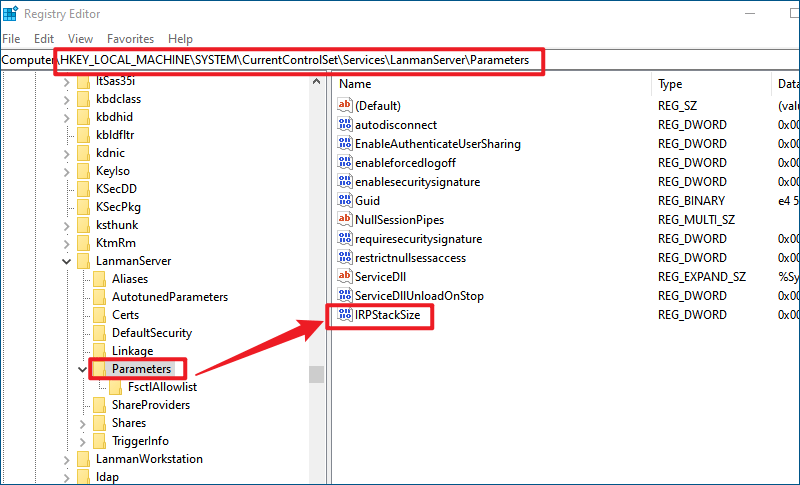
Step 2: Navigate to the following directory by entering it to the address bar:
HKEY_LOCAL_MACHINE\SYSTEM\CurrentControlSet\Services\LanmanServer\Parameters
Step 3: Right-click on the Parameters folder and select New > DWORD(32-bit). Then name the freshly created value as IRPStackSize.
Step 4: Double-click IRPStackSize, set the value data as 32 and change the Base to Decimal. Then click OK to save changes.