Fix There Was a Problem Resetting Your PC Windows 10
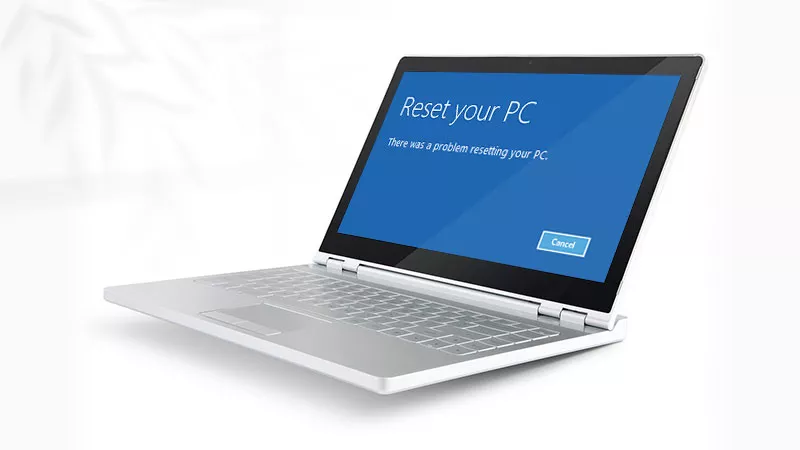
Is there an error called “There Was a Problem Resetting Your PC” interrupting the computer’s reset? If so, you can have a simple restart and launch Settings to reset it again. Maybe the files or the image used for Windows Recovery are damaged, leading to a failed Windows 10 reset. Hence, if you still can’t reset your PC after backing up, now take the following methods to resolve it.
- Contents:
- Method 1. Perform a SFC Scan
- Method 2. Run the DISM Scan
- Method 3. Use a Restore Point
- Method 4. Repair WinRE Image
- Method 5. Run Startup Repair
- Recover Data after a Factory Reset
Method 1. Perform a SFC Scan
It is a quick way to fix the error by using the system file checker (SFC) scan, which can replace the corrupted files. After scanning, you can try to reset and reinstall the system again.
Step 1: Type CMD in the Search bar. Next, right-click Command Prompt and choose Run as administrator.
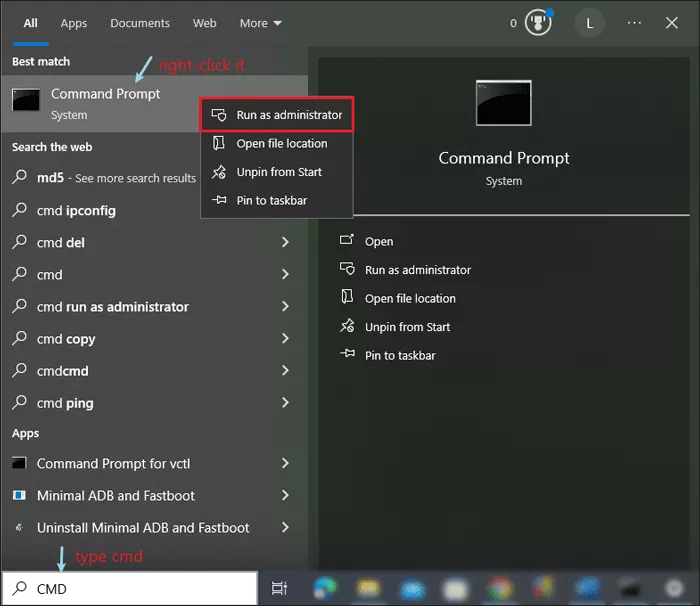
Step 2: After opening it, enter sfc /scannow and hit the Enter key.

Note: The scanning process will take some time, so wait patiently until it is completed.
Method 2. Run the DISM Scan
If you can’t use a SFC scan or it doesn’t work, there is another scan you can run. Deployment Image Servicing and Management (DISM.exe) scan is a good option to check the files on Windows. It can service and prepare Windows images.
Step 1: Type CMD in the Search bar. After that, find and right-click Command Prompt and select Run as administrator.
Step 2: In the command line, enter DISM /Online /Cleanup-Image /RestoreHealth and press Enter.

Note: Don’t interrupt the process. And after scanning successfully, you can check whether the computer can be reset well.
Method 3. Use a Restore Point
Every time you install a new app, driver, or Windows update, the restore point can be created. Thus, you can restore your computer to a point before the bug occurs.
Step 1: Type System Restore in the search bar, select Create a restore point.
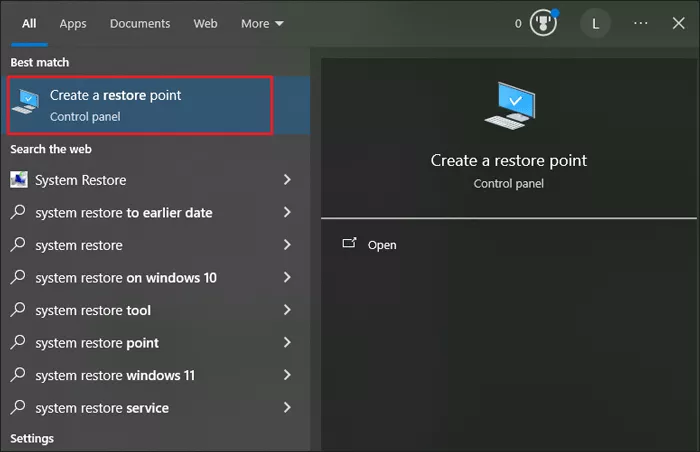
Step 2: Under the System Protection tab, choose OS (C:) (System) drive and then click the System Restore button.

Step 3: After opening the System Restore window, hit the Next button.
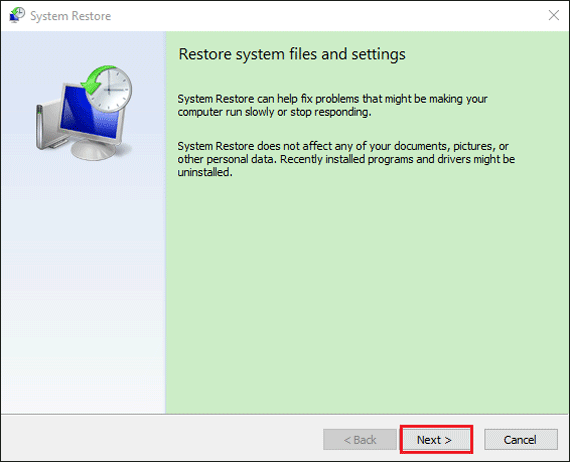
Step 4: Select a restore point if available and tap on Next. Follow the on-screen steps to proceed.
Method 4. Repair WinRE Image
Windows Recovery Environment (WinRE) is a recovery environment that can troubleshoot an unbootable computer. So, repairing it can fix this error when the environment malfunctions. You just need to restart it and regain the image by disabling reagentc temporarily.
Step 1: In the Search bar, type CMD and open Command Prompt (Admin).
Step 2: Enter reagentc /disable and press Enter.

Step 3: Turn off the Windows computer and reboot it. Open Command Prompt again and type this command reagentc /enable and click Enter.

Method 5. Run Startup Repair
Sometimes, it becomes necessary to repair the system outside of the window. If this way is of no use, you can try to boot your computer from a USB drive.
Step 1: Open the Start menu and click the Power icon. After that, press and hold Shift. Then choose Restart.
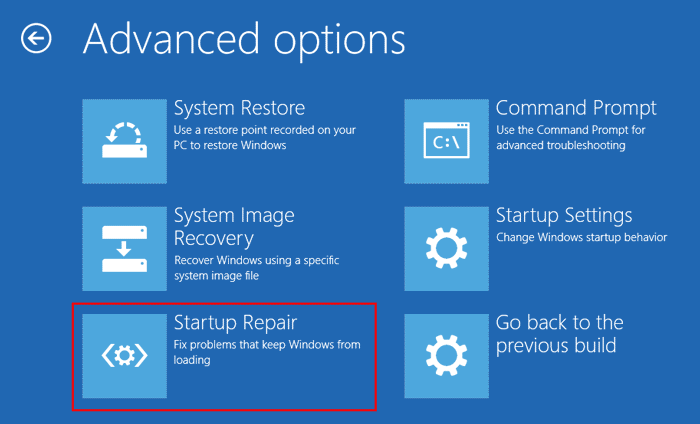
Step 2: Click on Troubleshoot > Advanced options > Startup Repair.
Recover Data after a Factory Reset
Because of deleting, resetting, formatting, crashed systems or virus attacks, some of the data may be lost and the files cannot be open after solving this problem. Therefore, you can use a powerful program to recover them, like Cocosenor DataTuner.
Step 1: Download and install the software. Then launch it on your computer.
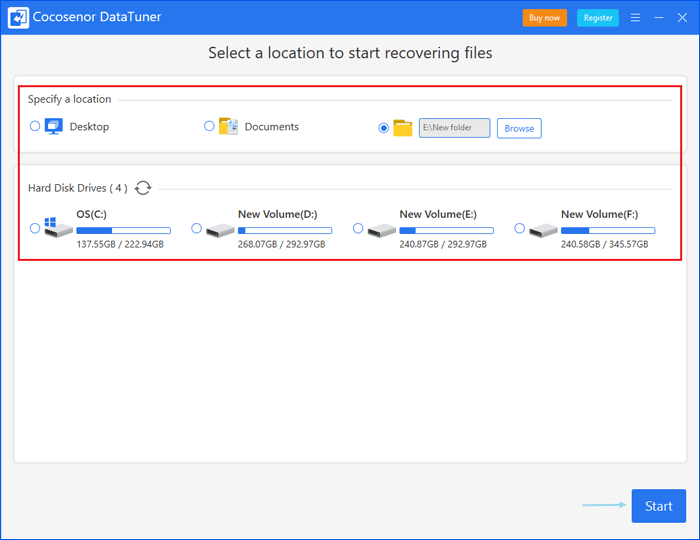
Step 2: Choose an exact location or a disk drive where the lost files were saved before and click the Start button.
Step 3: After a quick scan and a deep scan, you can tick the folders that you’d like to recover on the left side. Then click on the Recover button.
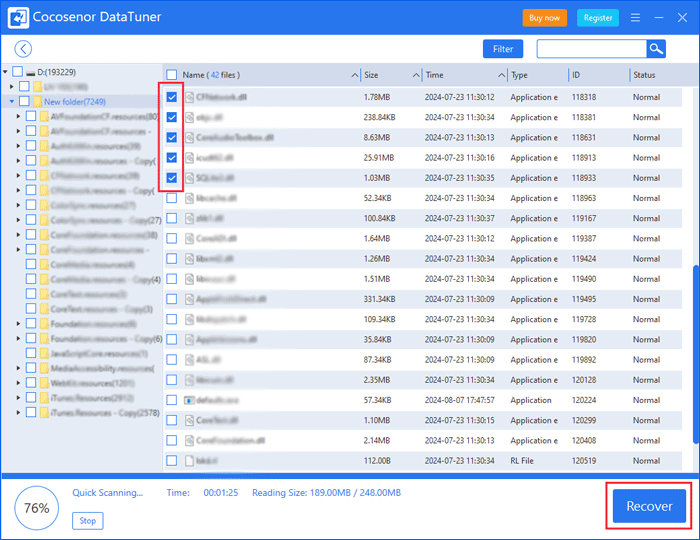
Note: If you find the file you need when scanning, you can click the Stop button in the bottom left corner.
Step 4: Select a location differ from the previous one to store the missing files.

