How to Recover Lost Files After Windows System Restore

Windows system restore is a useful tool which helps roll back the system to a previous good status when there's a system crash or installation failure etc. But you might be caught in a situation where you are unable to find some important files after performing a system restore. What's worse, the files haven't been backed up or particular files get lost even if you made a backup. Is there a way to recover lost files after restoring computer? Of course, all you need is a reliable data recovery tool. This article will present a step-by-step guide on how to get back deleted files after systerm restore.
- Contents
- 1. Does system restore delete personal files?
- 2. How to get back files after system restore?
- 3. What can you do to prevent file lost?
Does system restore delete personal files?
In principle, system restore will remove some files but it won't affect your personal data and files like photos, notes and music etc. This utility keeps monitoring system activity and creates a restore point if particular activities occur. All of the system files and registry settings can be reverted to an earlier state. Though programs installed after the restore points were created will be removed when performing a system restore, your documents, mails, videos and photos you've created through the programs won't be deleted. However, if the operating system goes back to a state when a software haven't been installed, the files related to this software won't be registered and the system will fail to open the files without file associations. That's why you cannot find and access some files after system restore.
How to get back files after system restore?
As we mentioned above, system restore may make some of your files useless and unable to access. To bring the lost files back without causing damage, you need a powerful data recovery tool--Cocosensor DataTuner.
Cocosenor DataTuner supports data recovery on Windows 11/10 and all earlier versions. It is specialized in recovering deleted and lost files, with which you can retrieve your files from hard drives or memory cards on the computer after system restore. Give a free try to recover all sorts of missing files on your own:
Step 1: Download and install Cocosenor DataTuner on your Windows computer. Then start it after the installation finished.
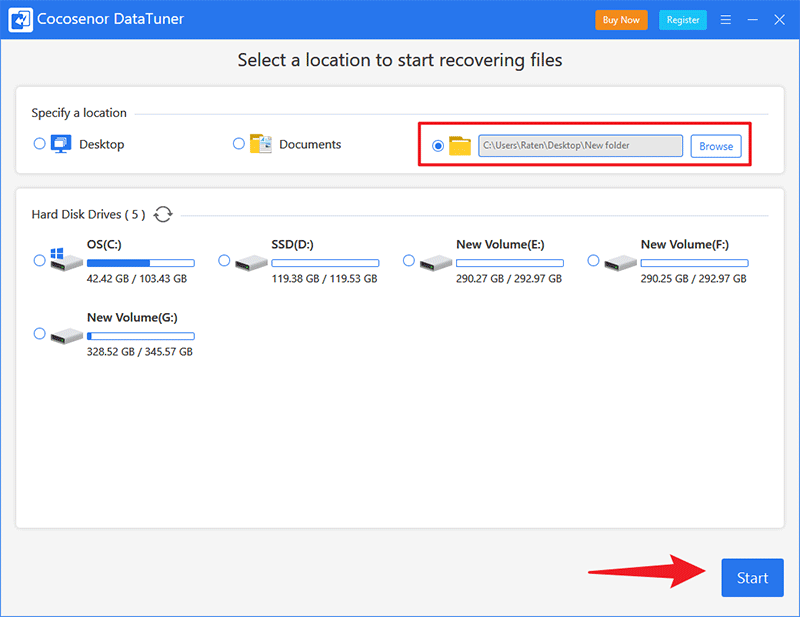
Step 2: Choose a specific location or hard disk drive to scan and click Start.
If you are clear about the location or full path of the lost file, select the specific location. If you are not sure where the missing files are located, try to work out the drive partition in which they are kept.
Step 3: A quick scan will start and once finished, tick the checkbox of a specific folder to perform a deep scan.
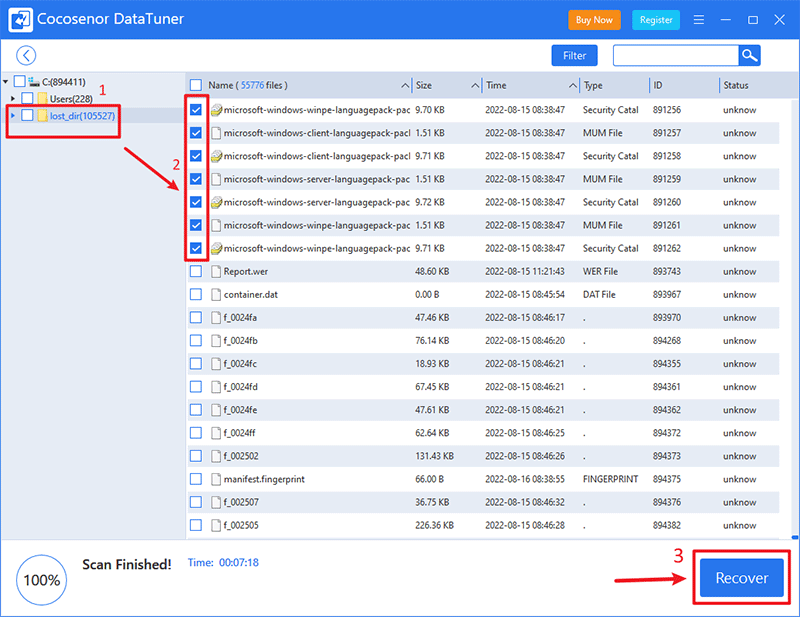
Step 4: Check the lost files and start recovering.
Tick the box of files you want to recover and click on Recover.
Tip: All the files under the selected folder are displayed on the screen, if you cannot locate the missing files, take advantages of the Fliter function. Set Fliter Settings based on your needs and click Apply. It's also all right to stop deep scan as long as you find all the missing files.

Step 5: Select a location different from the original one to save the restored files.
Step 6: Choose whether to open the recovery folder as per your needs.
What can you do to prevent file lost?
The safest way to prevent files from missing is to make a full backup. You can use the built-in backup feature to set up an automatic backup for your system files following these steps:
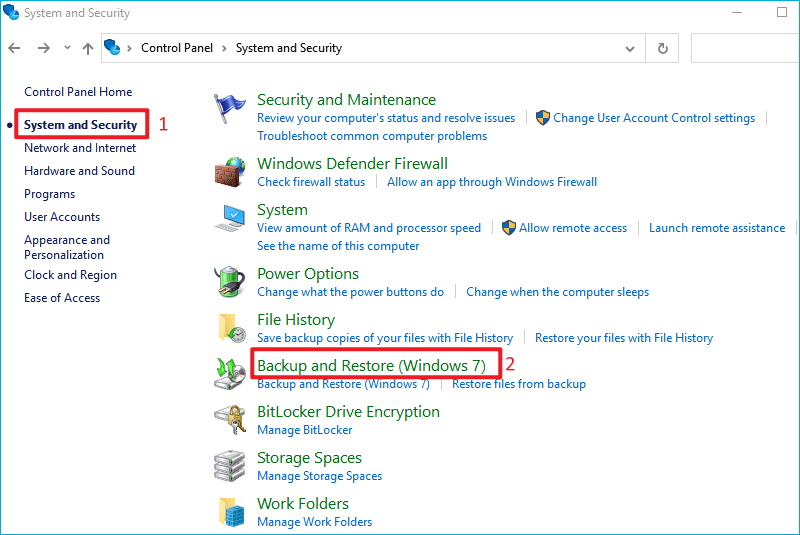
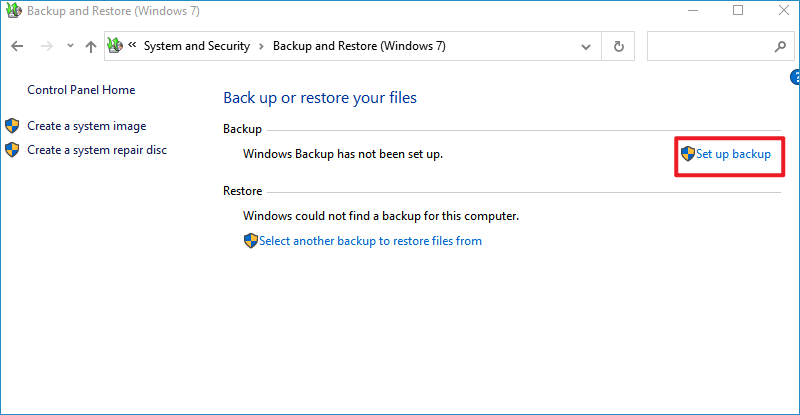
Step 1: Search control panel in the search bar and open it.
Step 2: Select System and Security > Backup and Restore(Windows 7).
Step 3: Click Set up backup under the Backup section.
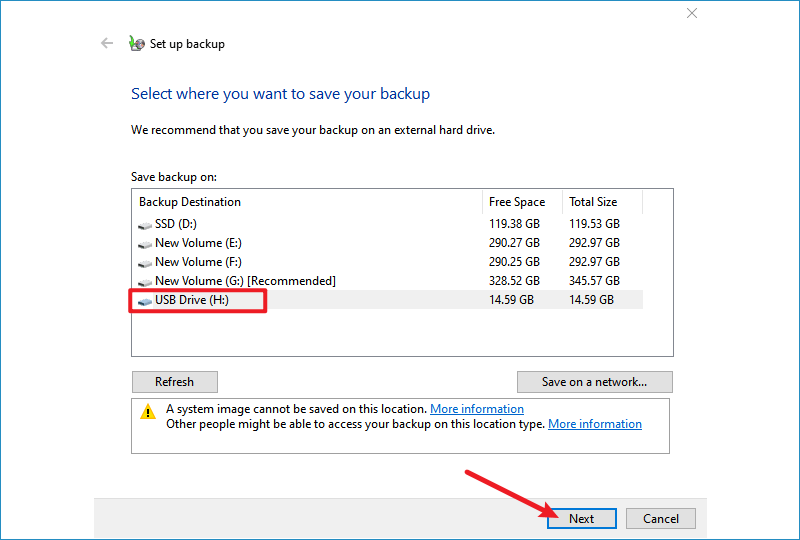
Step 4: It's recommended to save the backup on an external drive. Choose the drive and click Next.
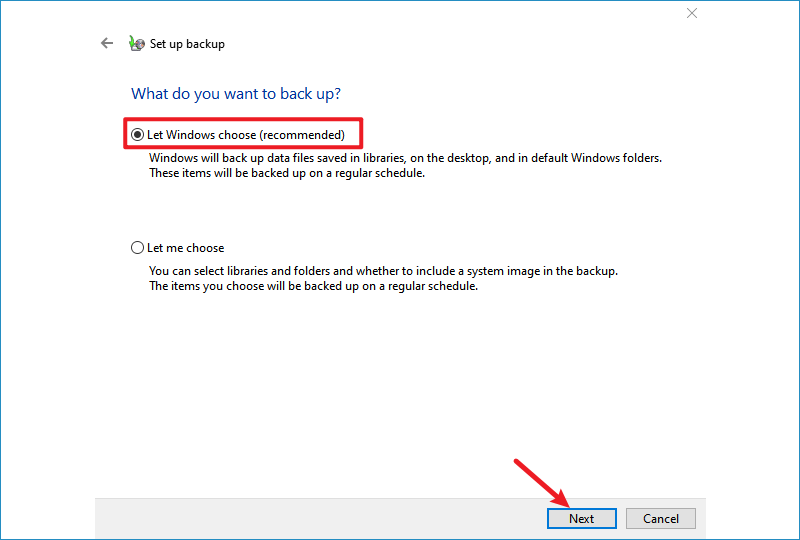
Step 5: Select Let Windows choose to backup all the system data and click Next.
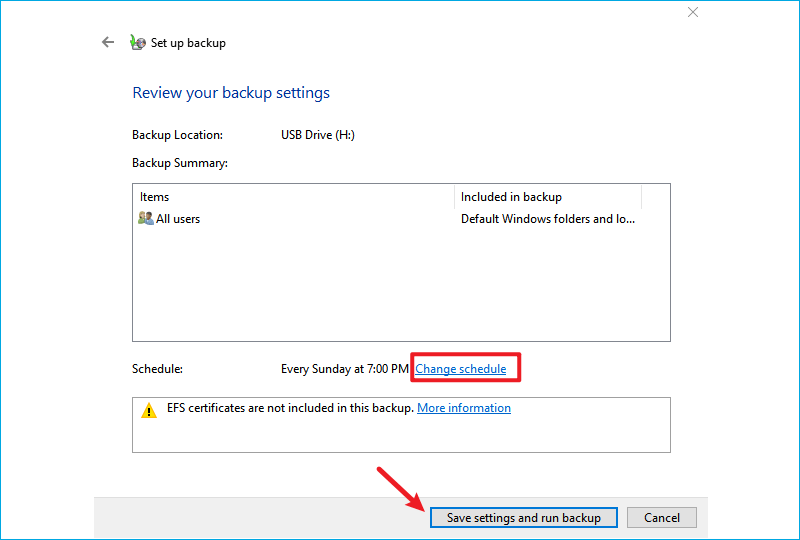
Step 6: Click Change schedule to set up a regular backup time if you want and click on Save setting and run backup.