How to Fix the “Compatible TPM Cannot be Found” Error

The Trusted Platform Module (TPM) is an important security component in computer systems, particularly with Windows 10, which uses TPM for features like BitLocker encryption and Windows Hello. However, some users encounter the “Compatible TPM cannot be found” error in their PCs. Now read this article and get the device to normal.
- Contents:
- Fix 1: Enable TPM in Motherboard’s BIOS
- Fix 2: Update BIOS or UEFI Firmware
- Fix 3: Reinstall or Update the TPM Driver
- Fix 4: Clear All Keys from TPM
Fix 1: Enable TPM in Motherboard’s BIOS
When there is “Compatible TPM cannot be found,” you may have a TPM that is disabled. Follow the instructions to enable TPM.
Step 1: Restart your computer and enter the BIOS/UEFI. During startup, look for the message when the vendor logo appears, which will tell you the BIOS key. You can press F2/F10/Del/Esc depending on the manufacturer.

Step 2: Under the Security or Advanced tab, find the TPM, PTT (Intel Platform Trust Technology), or fTPM (AMD Firmware TPM) option and enable it if not activated.
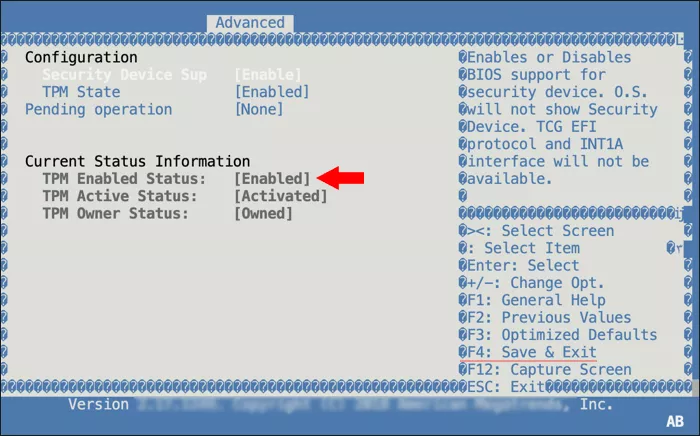
Step 3: Save the changes and exit the BIOS. Then after typing tpm.msc in the Run box and opening TPM management, check if the status is “The TPM is ready to use.”
Fix 2: Update BIOS or UEFI Firmware
An outdated BIOS or UEFI firmware may not properly support TPM functionality, especially on older systems. So, you can update your system’s BIOS to the latest version.
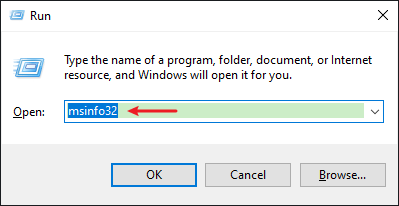
Step 1: Press Win + R keys together. Then type msinfo32 in the Run box and click the OK button.
Step 2: Look for the BaseBoard Manufacturer and BaseBoard Product fields. From here, check your motherboard model.
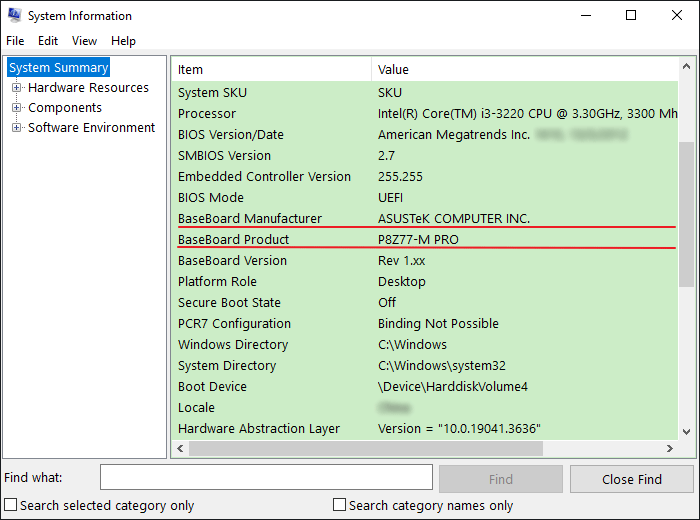
Step 3: Visit the manufacturer’s website and navigate to the Support or Downloads section. Download the latest BIOS/UEFI update for your motherboard model. Carefully read the manufacturer’s instructions on how to perform the update.
Step 4: After updating the BIOS, restart your system and enter the BIOS/UEFI setup again to confirm that TPM is enabled (as described in Fix 1).
Fix 3: Reinstall or Update the TPM Driver
Sometimes, the TPM error can occur due to corrupted drivers. To fix it, reinstall or update the TPM driver through Device Manager.
Step 1: Press Win + X and select Device Manager.
Step 2: Select the Security Devices section and right-click Trusted Platform Module.
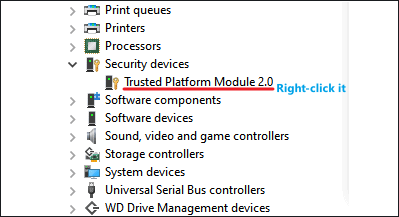
Step 3: Choose Uninstall Device and confirm the action. After uninstalling, click on Action in the top menu and select Scan for hardware changes. This will prompt Windows to reinstall the TPM driver automatically.
Fix 4: Clear All Keys from TPM
If none of the above-mentioned solutions work, you may need to clear the TPM keys. Clearing TPM resets it to its default state. So, ensure that you have backed up any important data before clearing.
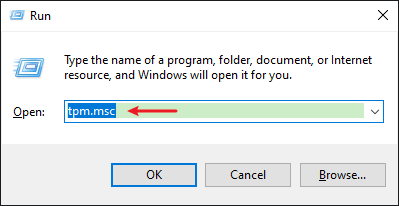
Step 1: Press Win + R keys and type in tpm.msc in the dialogue box. Then press Enter.
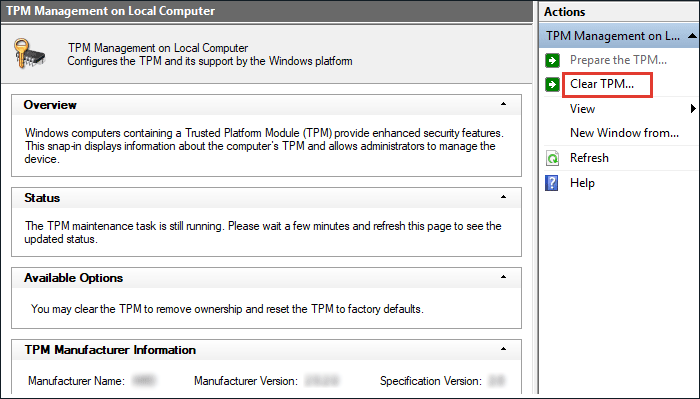
Step 2: In the Trusted Platform Module (TPM) Management window, click on Clear TPM in the right pane. You will be prompted to restart your computer to complete the process.
Step 3: After restarting, follow any on-screen prompts to clear the TPM keys.

