How to Stop Windows 10 Download and Install Updates Automatically
Since I upgrade my Windows 7 PC to Windows 10, I found that the free space of my C disk becoming less day by day. I checked for the update history, I found that there are updates every day on my PC.
How to stop the automatic updates on Windows 10? So that my system would not turn slower and the free space of my disk would not become less.
- Here are the methods:
- 1. Change Windows 10 Update Settings to schedule restart time
- 2. Use Show or Hide Update Tool Downloaded from Microsoft
- 3. Change Computer Configuration
- 4. Stop Windows Update Services
1. Change Windows 10 Update Settings to schedule restart time
On Windows 10, the Windows updates are automatic and mandatory by default, but we can change the update settings to schedule restart time, so that it would not restart when we are working.
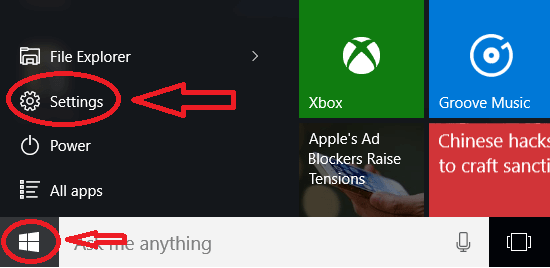
Step 1: Click on Windows icon left on your desktop and select "Settings".
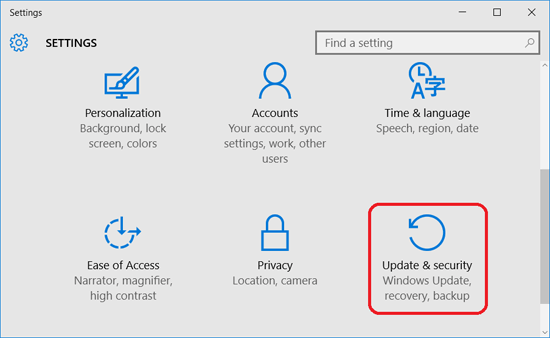
Step 2: Select "Update & security" on Settings screen.
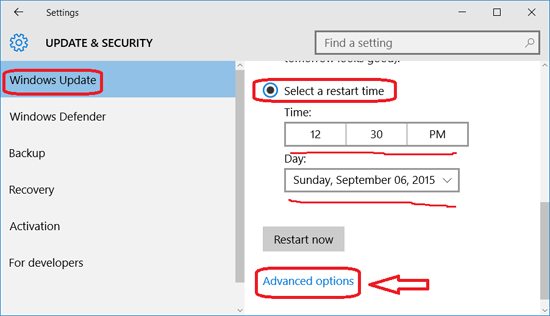
Step 3: On Windows Update options, you can select a restart time, and then click on "Advanced options".
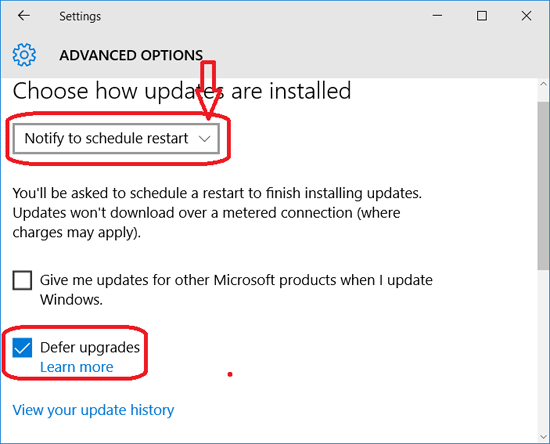
Step 4: Select "Notify to schedule restart" on the drop-down list, and select "Defer upgrades" check box.
And then the next time when it restarts to install the updates, you will get the notification.
Tips:
When you defer upgrades, new Windows features won't be downloaded or installed for several months, so it will prevent you from getting the latest Windows features as soon as they are available.
2. Use Show or Hide Update Tool Downloaded from Microsoft
Some Windows 10 editions let you defer and schedule upgrades, but Windows 10 home edition is updated automatically and mandatory.
Here you can use Microsoft Show or Hide Update tool to stop the unnecessary updates.
Step 1: Download Show or Hide Updates troubleshooter from Microsoft official site.
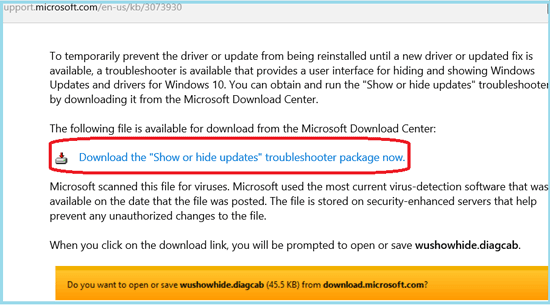
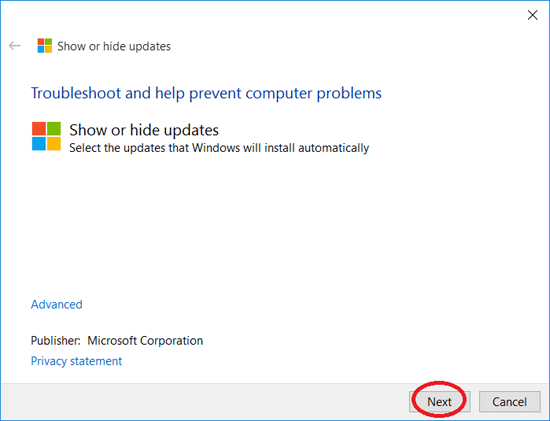
Step 2: Double-click on the tool just downloaded to open it, and then click on "Next". And then the troubleshooter will detect problems, please wait patiently.
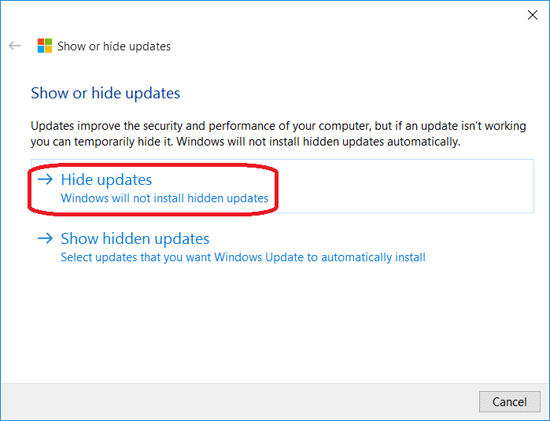
Step 3: "Hide Updates" option: To set updates Windows will not install.
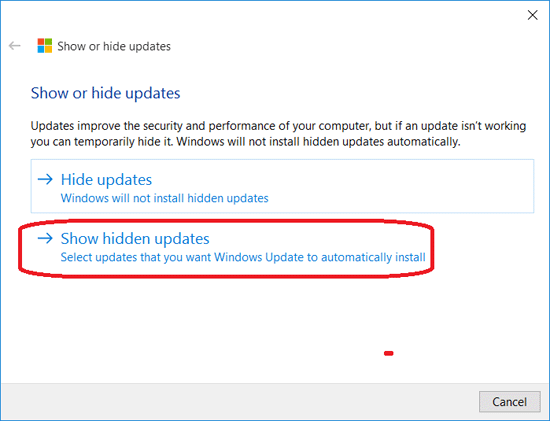
"Show Hidden Updates" option: To set updates Windows will update automatically.
Click on "Hide updates" to go on.
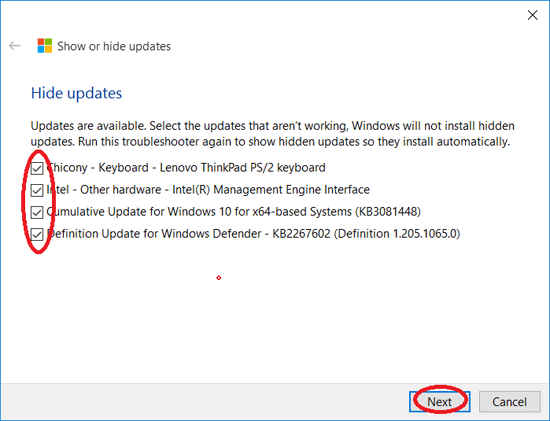
Step 4: Select the updates that are not working, and click on "Next", and then Windows will not install the hidden updates.
Step 5: If want to install the hidden updates, open the "Show or hide updates" troubleshooter again, and click on "Show Hidden Updates".
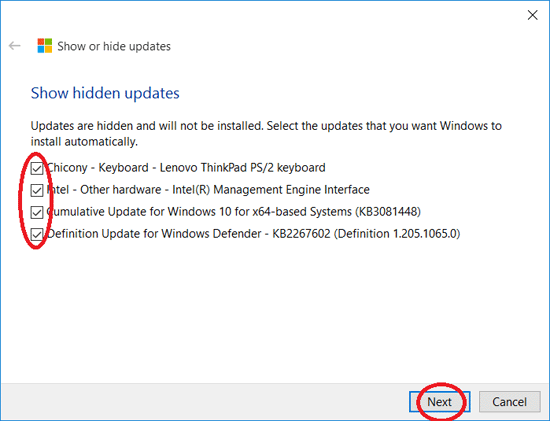
Step 6: Select the updates that you want Windows to install automatically, and click on "Next".
3. Change Computer Configuration
For Windows 10 Pro, Enterprise, and Education edition may also be able to change the computer configuration to let us to select when to download and install Windows 10 updates.
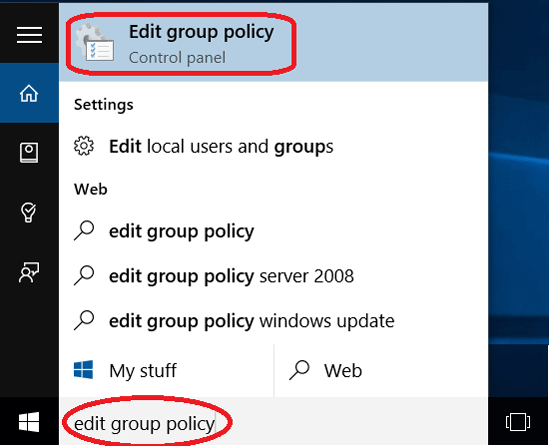
Step 1: On Cortana search box type in: edit group policy. And then click on "Edit Group Policy".
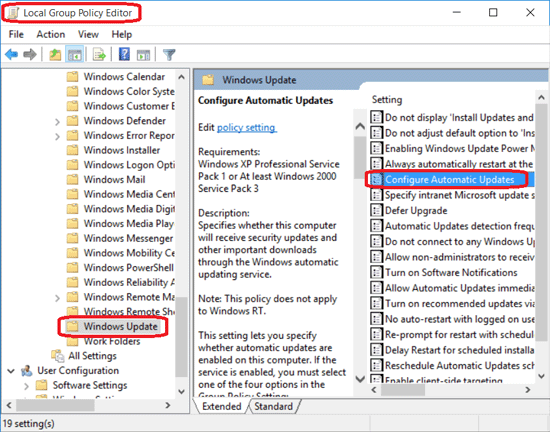
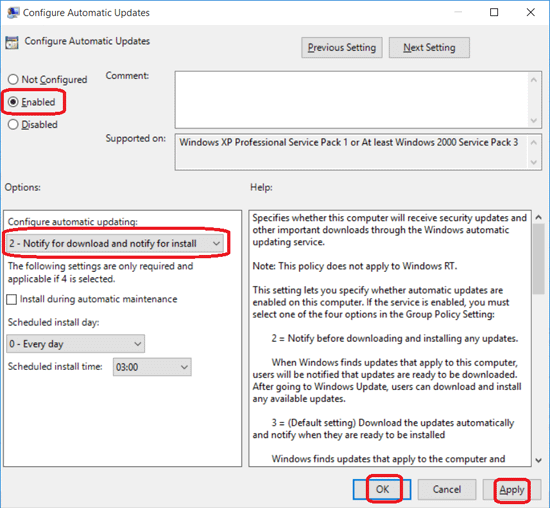
Step 2: Find Windows update by this way: Computer Configuration >> Administrator Templates >> Windows Components >> double-click "Windows Update" >> find "Configure Automatic Updates" >> double-click on "Configure Automatic Updates".
Step 3: On the Configure Automatic Updates window, select "Enable", and select the "2-Notify for download and notify for install" below the Options. Click on "Apply", and then "Ok" to save the change.
4. Stop Windows Update Services
For Windows 10 Home edition, you can choose to turn off Windows update service, which may be a little rude but simple.
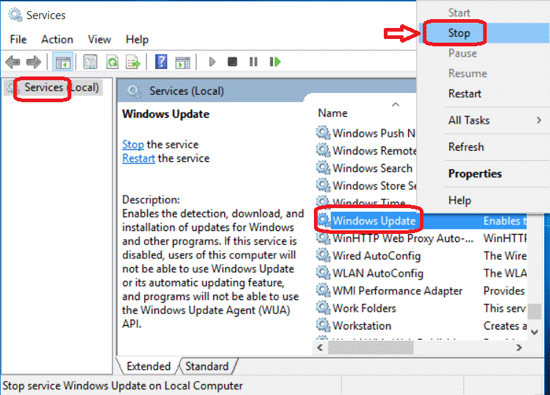
Step 1: On Cortana search box type in: services. And then click on "Services" to open it.
Step 2: Find "Windows Update" on the Services, right-click on it, and select "Stop" to disable Windows 10 Update service.
Tips:
If Windows Update service is disabled, users of this computer will not be able to use Windows Update.

