9 Easy Ways to Fix Keyboard Not Working on iPad
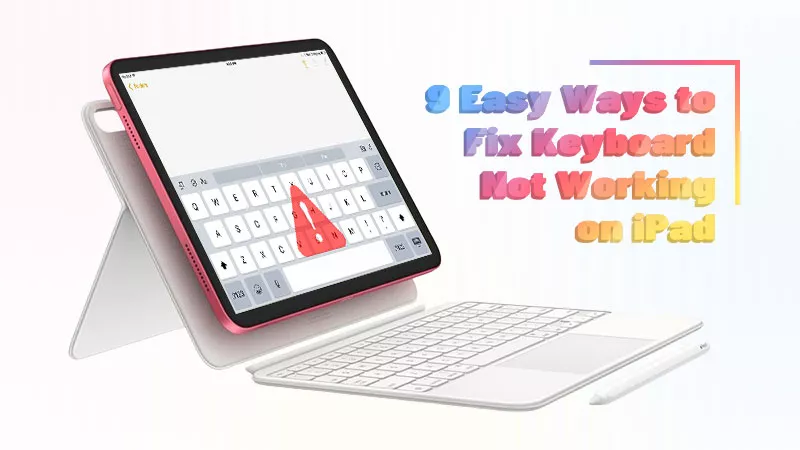
"My iPad Pro keyboard suddenly stopped working. Accessory not supported. pls help." From discussions.apple.com.
When you are typing on the keyboard or using the trackpad to input, the keyboard has no response, so you feel very frustrated about it. How can you solve these issues with the keyboard? Actually, whether it's your external keyboard or onscreen keyboard, the solutions are here. Now let’s take a look.
- How to Fix Keyboard Not Working on iPad:
- Part 1: Troubleshoot External Keyboard Not Working with iPad
- Way 1: Make Sure Your iPad Model is Compatible
- Way 2: Check the Smart Connector
- Way 3: Reset All Settings on iPad and Reconnect It
- Part 2: Fix Onscreen Keyboard Not Showing Up on iPad
- Way 1: Update Your iPadOS
- Way 2: Remove the Third-Party Keyboard
- Way 3: Restart the iPad
- Way 4: Reset the iPad
- Way 5: Contact Apple Support
- Part 3: Use a Recovery Program to Repair Keyboard Issues
Part 1: Troubleshoot External Keyboard Not Working with iPad
You won’t complain again with these useful fixes. After trying these methods, you can probably find the problem is not serious, just a small one.
Way 1: Make Sure Your iPad Model is Compatible
You don't rush to purchase a new physical keyboard because your iPad may not be compatible with this one. You should check the device model in advance.
For Smart Keyboard, your iPad model is one of these: iPad (7th, 8th, or 9th generation), iPad Air (3rd generation), iPad Pro 9.7-inch, iPad Pro 10.5-inch, iPad Pro 12.9-inch (1st or 2nd generation).
For Magic Keyboard or Smart Keyboard Folio, it works with these: iPad Air (4th or 5th generation), iPad Pro 11-inch (1st, 2nd, or 3rd generation), iPad Pro 12.9-inch (3rd, 4th, or 5th generation).
For Magic Keyboard Folio for iPad (10th generation), you must have an iPad (10th generation).
Way 2: Check the Smart Connector
If you are using a Smart Keyboard, check the Smart Connector. You can clean it with a microfiber cloth if the port has been blocked by dust. Then view if it's correctly attached to your iPad, if not, remove and reattach the keyboard.

Way 3: Reset All Settings on iPad and Reconnect It
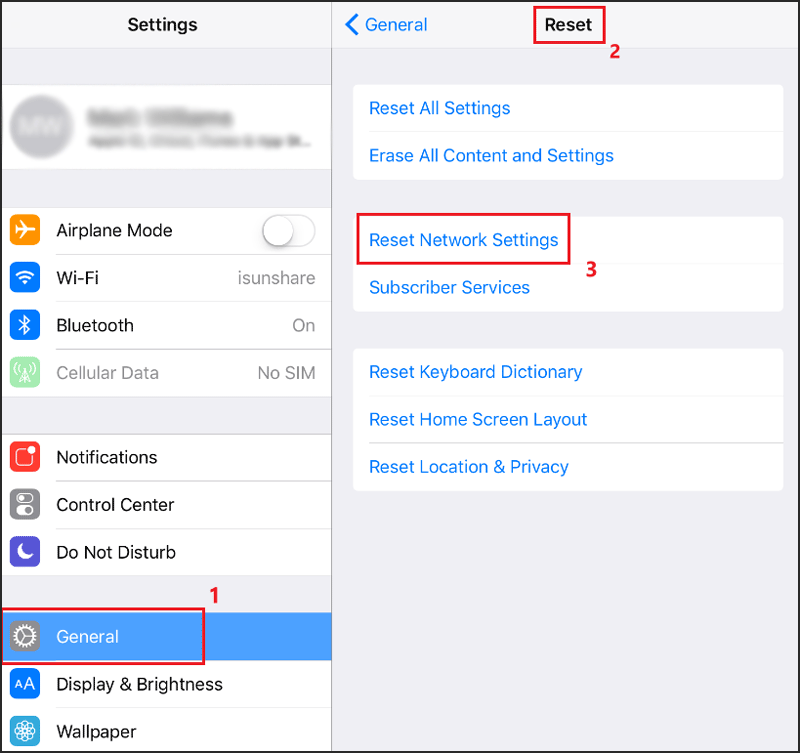
The poor network may cause connectivity issues sometimes, so go to Settings > General > Reset > Reset Network Settings. Confirm to reset it and then check if the keyboard works.
Part 2: Fix Onscreen Keyboard Not Showing Up on iPad
When you are on the go, the onscreen keyboard is stuck or frozen, even doesn't appear on the screen, which makes you feel anxious. What can you do? There are some tips below.
Way 1: Update Your iPadOS
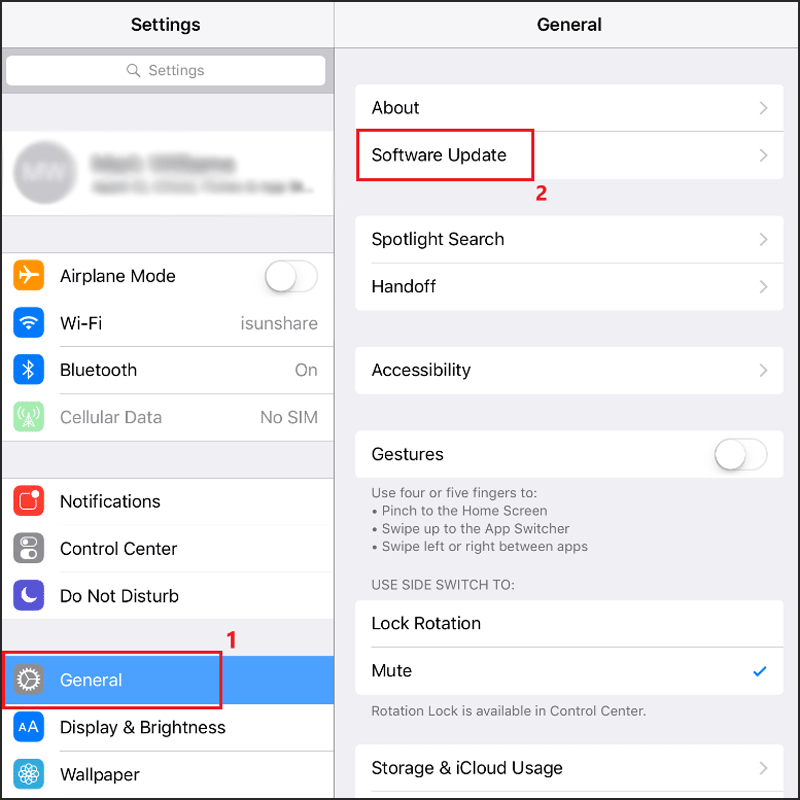
It’s a good decision to update your iPad to the latest version. Go to Settings and tap the notification about Software Update. Alternatively, go to Settings > General > Software Update. Then see if the operation can fix the bug.
Way 2: Remove the Third-Party Keyboard
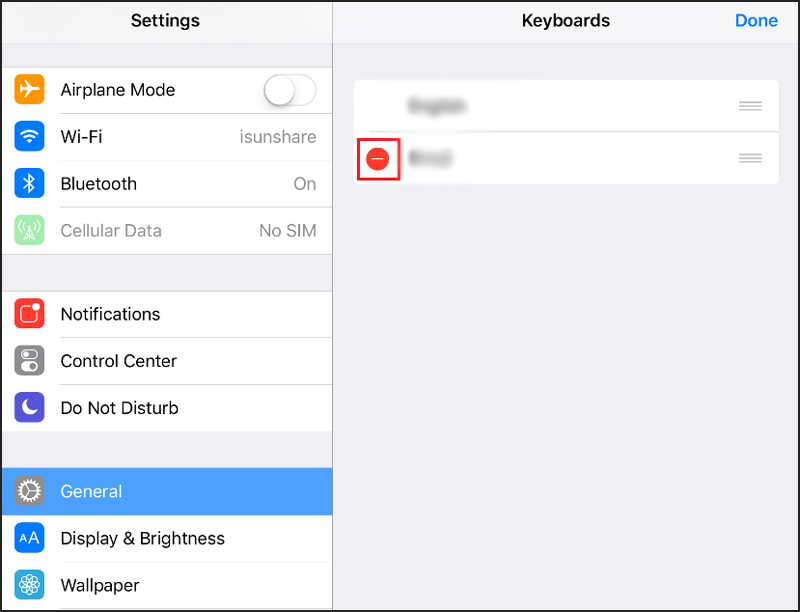
If you install a third-party keyboard, such as Gboard or SwiftKey, you can delete it or reinstall the keyboard app to fix the glitches, or find Settings > General > Keyboard > Keyboards > tap Edit > click the red remove icon > Delete.
Way 3: Restart the iPad
To get the problem resolved soon, restart your iPad with/without Home button. It can repair the temporary software bug and reload your iPad, including the keyboard.
Just hold down the Top button until the power slider appears on the screen (without Home button, press the volume button at the same time). Drag the slider to power off. And wait for your iPad to shut down completely. Then turn it on.

Way 4: Reset the iPad
The other option is to reset your iPad if all of the ways above are of no use. Most matters can be solved by restoring your iPad to its factory settings.
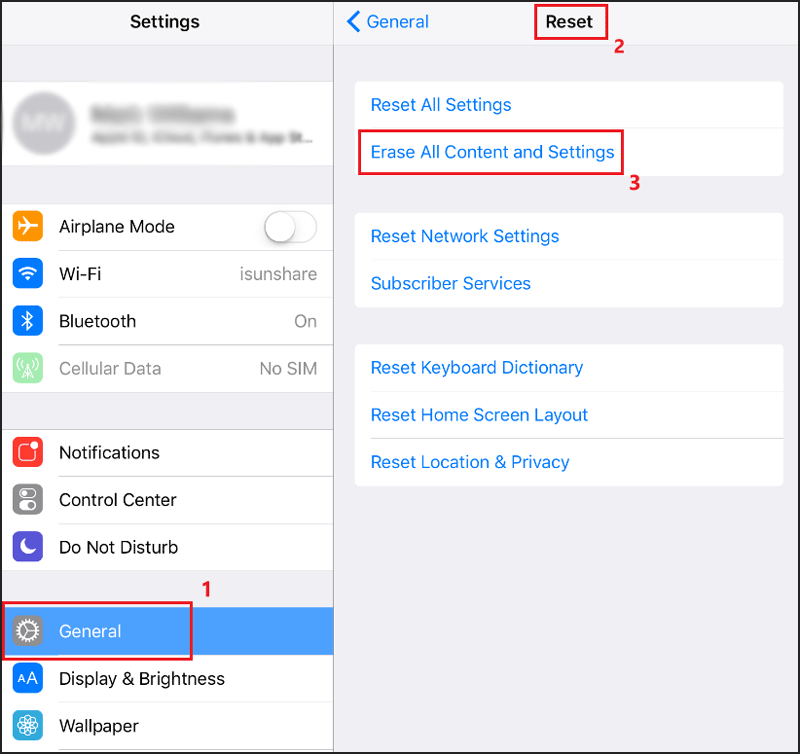
First, you should back up your important pictures, videos, etc. Then navigate to Settings > General > Reset > Erase All Content and Settings.
Way 5: Contact Apple Support
Maybe the keyboard has issues with hardware. So, you can take it to the Apple store or contact Apple Support to ask for assistance.
Part 3: Use a Recovery Program to Repair Keyboard Issues
Some tough and tricky system problems can be fixed with the help of some professional repair software, like Cocosenor iOS Repair Tuner. It helps address lots of iOS issues and errors successfully.
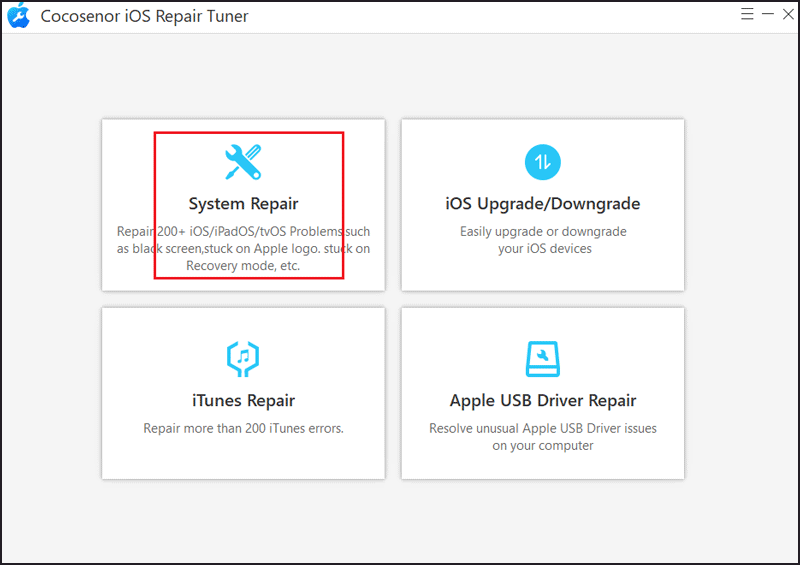
Step 1: Download the software on your PC. And make sure you have installed iTunes on your computer. Then run the program and select System Repair.
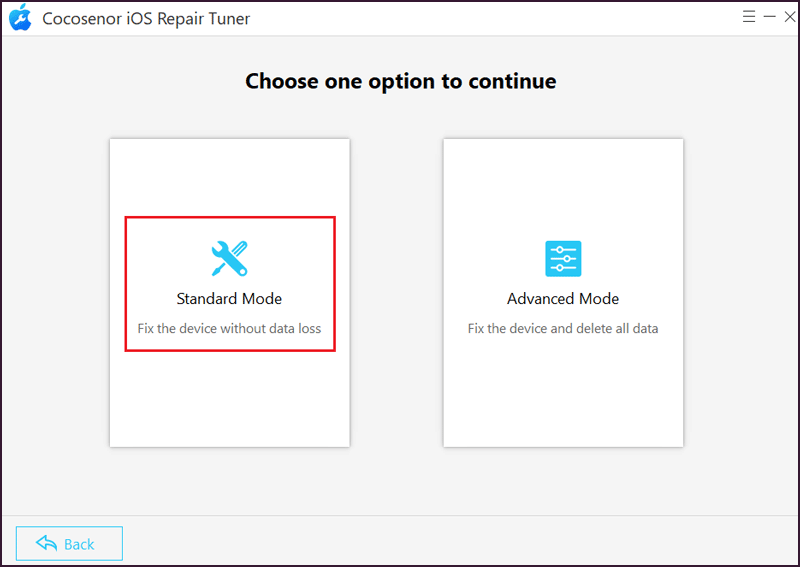
Step 2: Next, choose the first option Standard Mode.
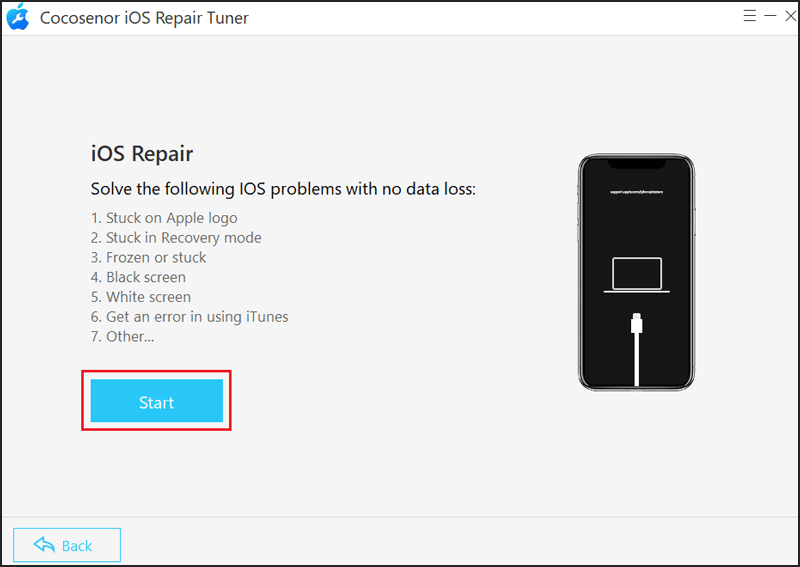
Step 3: Click the Start button.
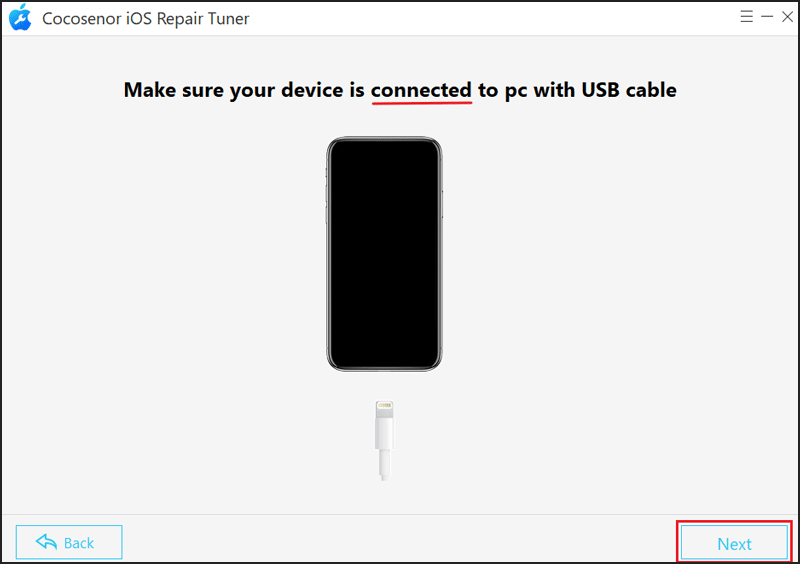
Step 4: Connect your iPad to the computer with a USB cable. Then tap the Next button.
Step 5: Select a path to store the firmware package. Then hit Download to get the package. It will load your iPad information automatically.
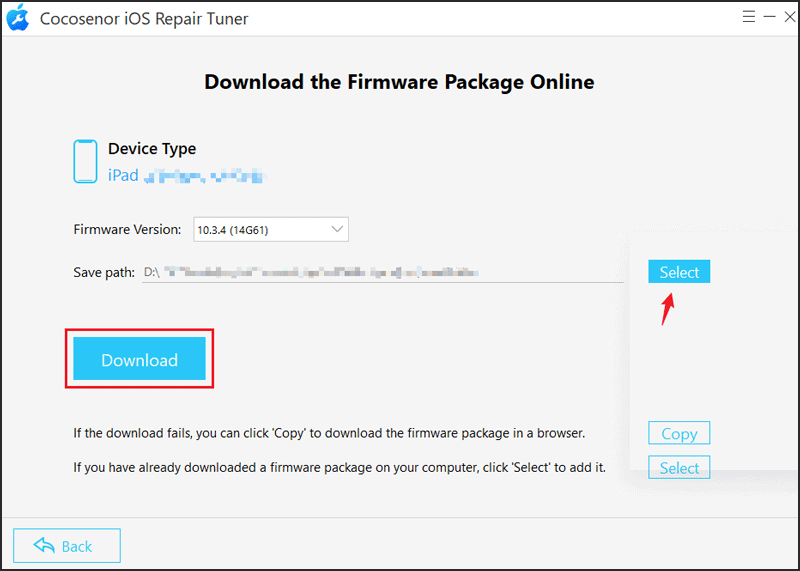
Please wait patiently for downloading. It will take some time.

Step 6: Click Repair to proceed with the process. Ensure you have connected the devices all the time.
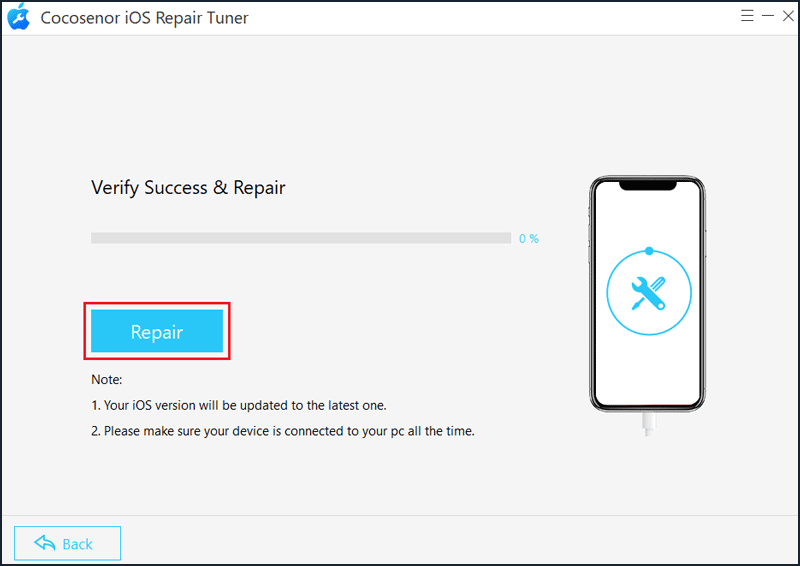
Step 7: After completing, it will prompt you that it has been repaired successfully, just click Done. And then you can reconnect the iPad keyboard and check it again.
Conclusion
If the keyboard doesn’t work properly, it really affects your everyday work. Thus, it’s worth taking a few minutes to learn how to fix this problem. Trying to find out the cause of the trouble, but perhaps all failed.
What’s the reason? The most likely one is about the software issue, and it’s troublesome to check by yourself. Therefore, it is highly recommended for you to download a powerful repair tool right away, launching it to tackle any problem if you don’t want to spend much time.

