Fixed—iPhone Screen Recording Not Working
“Hi, my iPhone screen recording makes no response when I press it? I cannot do the screen recording now. What can I do to save this screen recorder?
If you find the screen recording function is not working on your iPhone in the below situations: its icon turns into a white circle; the screen recording icon appears greyed out and screen recording failed to save, how can you solve this issue and get the screen record function back to normal? In this article, several solutions are listed for the iPhone screen recording not working issue.
- Solutions to iPhone Screen Recording not Working
- Why Is My Screen Recording Not Working?
- Solution 1: Check the Screen Recording Permissions and Restrictions
- Solution 2: Enable Screen Recording on Control Center
- Solution 3: Make Sure Microphone Audio is on during Screen Recording
- Solution 4: Get Enough Space for the Screen Recording
- Solution 5: Turn off Low Power Mode
- Solution 6: Reset All Settings on the iPhone
- Solution 7: Repair Issue with iOS Repair Tuner
- Tips: How to Export Screen Recording Videos from iPhone to PC
Why Is My Screen Recording Not Working?
Several reasons can make you unable to record the screen or unable to use the screen recording:
- 1. You are not restricted to use the screen recording or you are not allowed to record in the app.
- 2. Screen Recording icon is unavailable.
- 3. Insufficient storage space in the iPhone can lead to the failure of screen recording.
- 4. The Low Power Mode is on so that the screen recording is disabled.
- 5...
Solution 1: Check the Screen Recording Permissions and Restrictions
First of all, you need to make sure the app you’re going to record from has permission to use the screen recording. Just tap Settings> Privacy> Screen Recording. After that, you can check whether the app you’re trying to record from are allowed to use screen recorder or not.
Besides, you need to check whether there are restrictions on using the screen recorder. Tap Settings> Screen Time> Content & Privacy Restrictions. Then you can check whether screen recording is allowed in Content Restriction section.
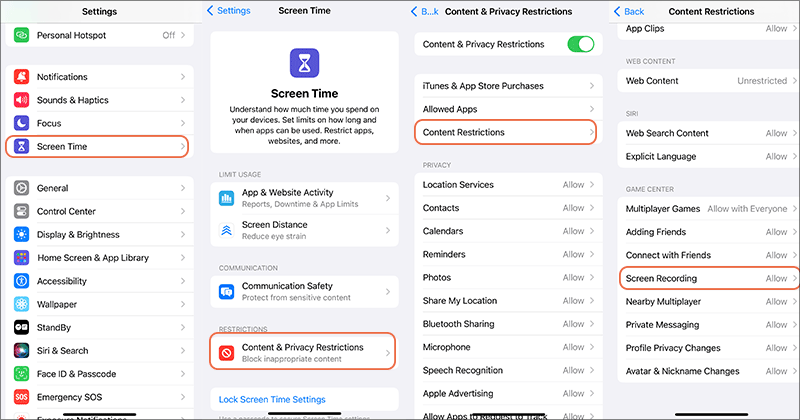
Moreover, if your iPhone is set up with MDM restriction, it might be unavailable to use the screen recording as the IT administrator has restricted this function on your iPhone.
Solution 2: Enable Screen Recording on Control Center
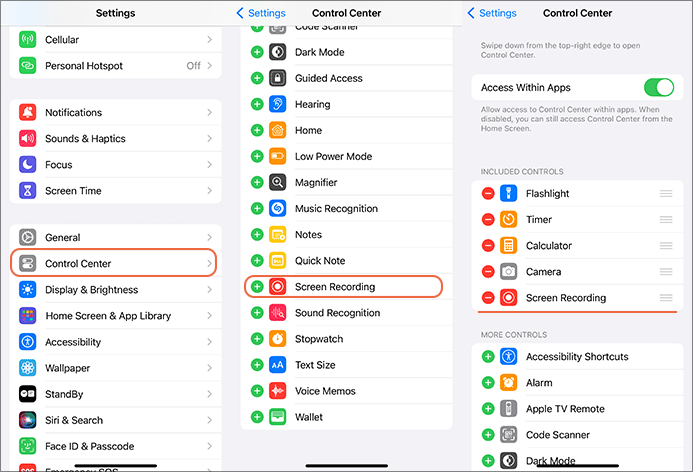
Before you are going to use the Screen Recording, you can enable Screen Recording on Control Center. Otherwise, you cannot find the screen-recording icon or the icon is greyed out & makes no response when you tap it from the upper-right corner of your iPhone screen.
How can you add screen recording to Control Center? You can add it by accessing Settings> Control Center> More Controls section. After that, tap the add icon next to Screen Recording to enable Screen Recording before using it.
Solution 3: Make Sure Microphone Audio is on during Screen Recording
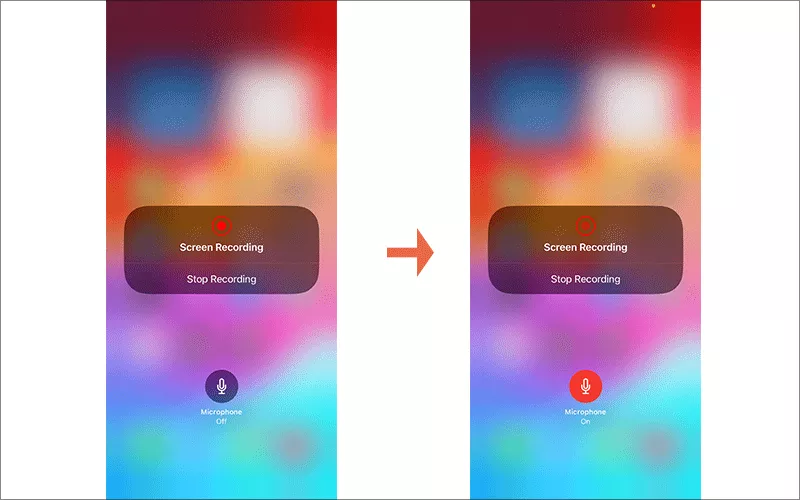
Some iPhone users think the screen recording is not working properly because it does not record audio. You can set this by long pressing the screen recording icon and then turn Microphone on.
Solution 4: Get Enough Space for the Screen Recording
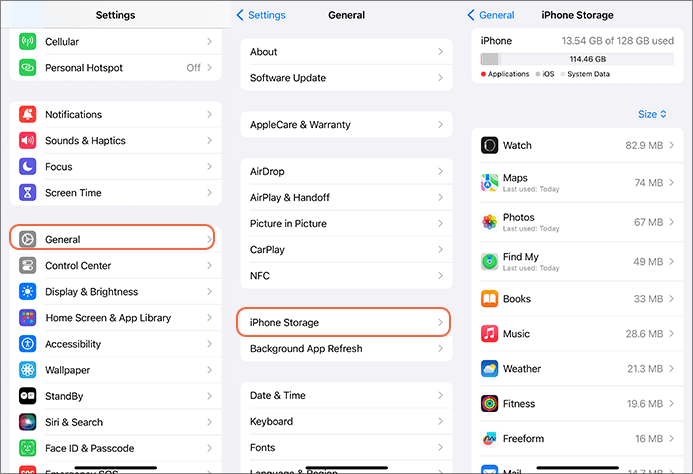
If there is not enough space on the iPhone, the screen recording feature might fail to work. Thus, you should free up space regularly by deleting the unnecessary files or uninstalling apps.
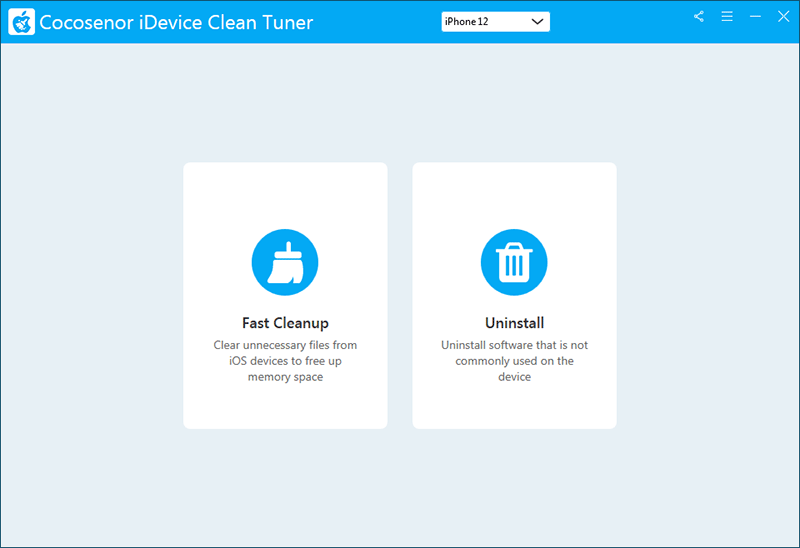
Or you can use Cocosenor iDevice Clean Tuner to clean up iPhone and win more available space.
Solution 5: Turn off Low Power Mode
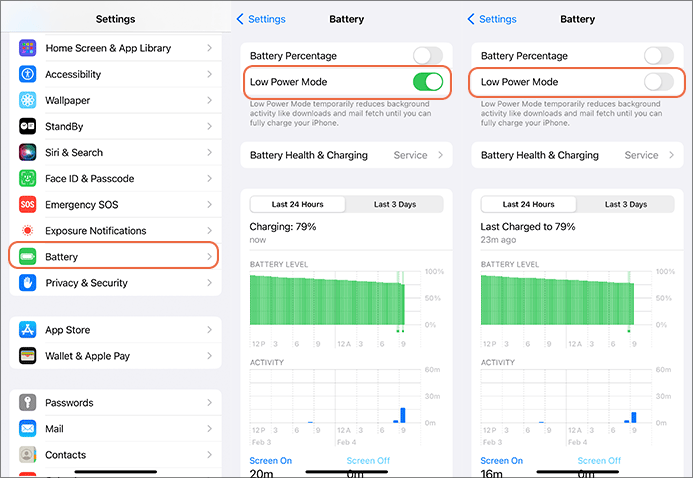
If your iPhone is in Low Power Mode, the screen recording function will be disabled automatically. So, if you want to fix iPhone screen recording function not working issue, you need to turn off the Low Power Mode: tap Settings> Battery> Lower Power Mode.
Solution 6: Reset All Settings on the iPhone
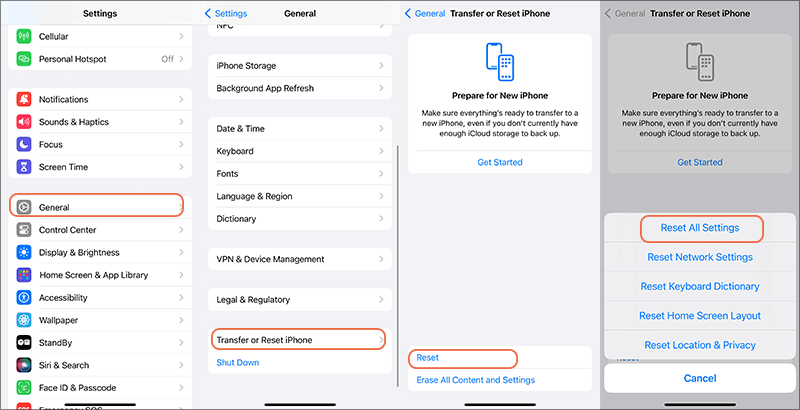
If all above can not fix the issue, you can try to reset all settings on your iPhone. This solution will not delete your data, but help your iPhone back to its original settings. Just access Settings> General> Transfer or Reset iPhone (or Reset in the older iOS versions)> Reset> Reset All Settings. After that, it will ask for your screen passcode if you set it.
Solution 7: Repair the Issue with iOS Repair Tuner
If iPhone screen recording issue is caused by the iOS system, you can easily fix it with Cocosenor iOS Repair Tuner. This software can help you repair the iPhone and update the iOS version without causing any data loss. After that, you can use the iPhone screen recorder normally.
Step 1: Download and install Cocosenor iOS Repair Tuner on your PC or Mac. Meanwhile, connect your iPhone to the computer via the USB cable.
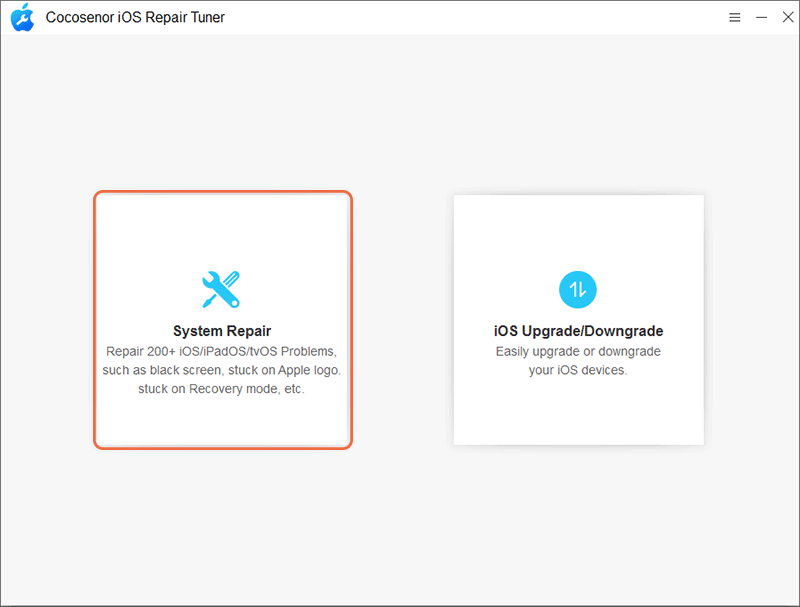
Step 2: Run the software and choose System Repair on the available options displayed on the home interface.
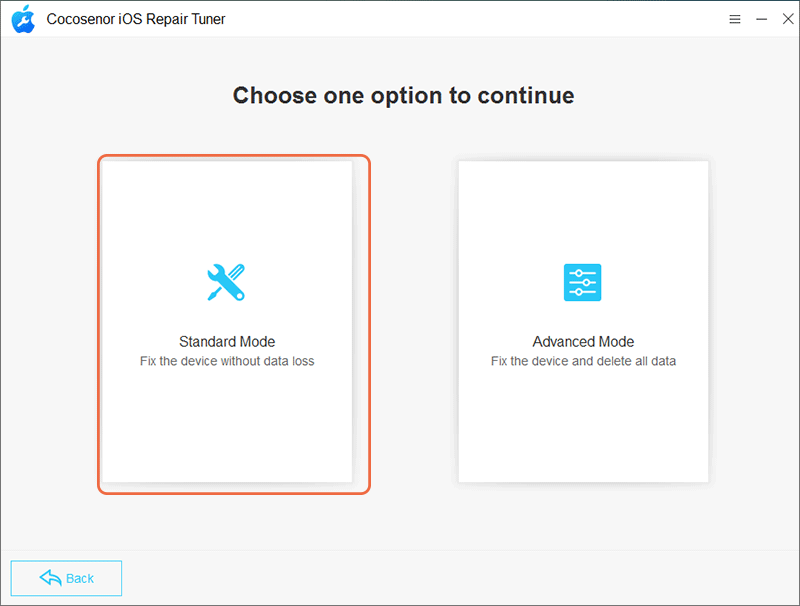
Step 3: Select the Standard Mode to repair the iPhone screen recording not working issue.
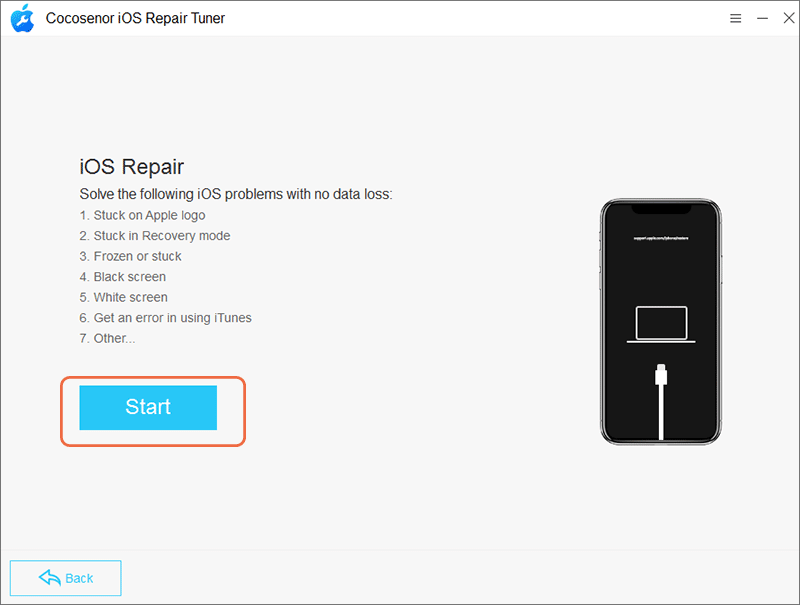
Step 4: Hit the Start button and the Next button in the next interface.
Step 5: Before starting the repair, you need to hit the Download button to get the original firmware software package for your iPhone.
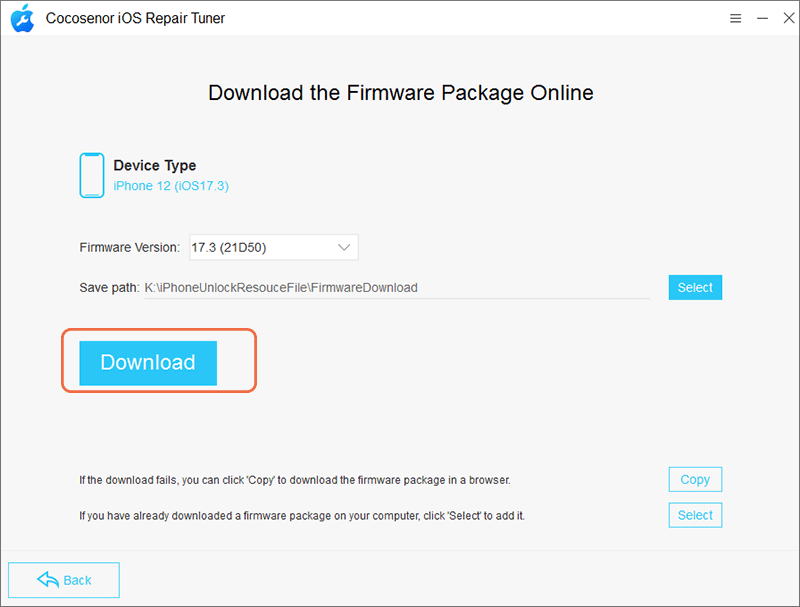
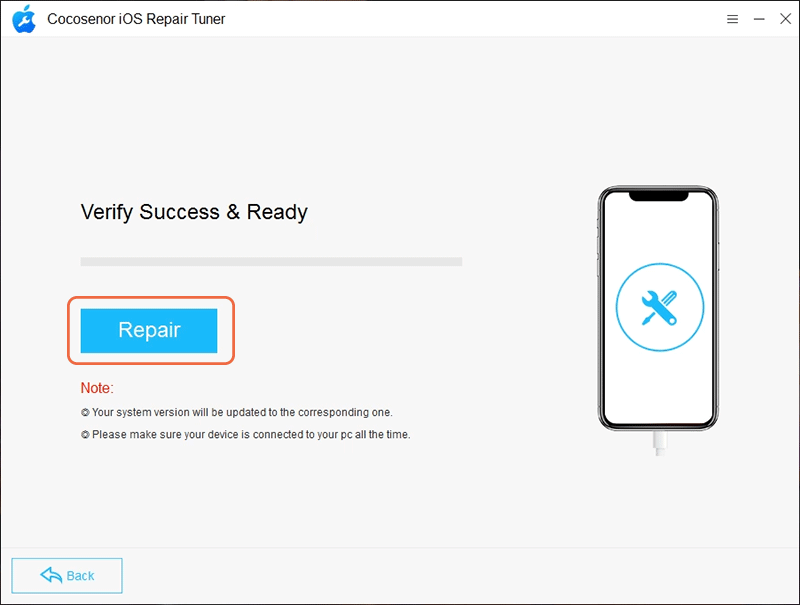
Step 6: Minutes later, hit the Repair button. After that, Cocosenor iOS Repair Tuner starts repairing your iPhone.
Tips: How to Export Screen Recording Videos from iPhone to PC
When you can record the screen operations smoothly, how can you deal with the screen recording videos when there is less space available on iPhone? You can export the screen recording videos from iPhone to PC so as to ensure the screen recordings features can work normally. Cocosenor iDevice Clean Tuner is the professional iOS storage cleaner that can help to release iPhone storage. With this software, you can easily export the screen recording videos to PC.
Step 1: Get this software installed on your PC and make the iPhone connected.
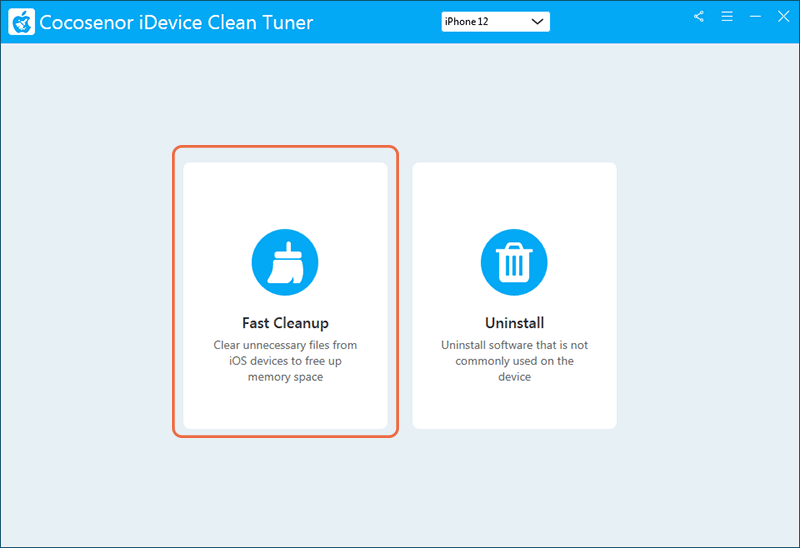
Step 2: Run the software and choose Fast Cleanup option from the home interface.
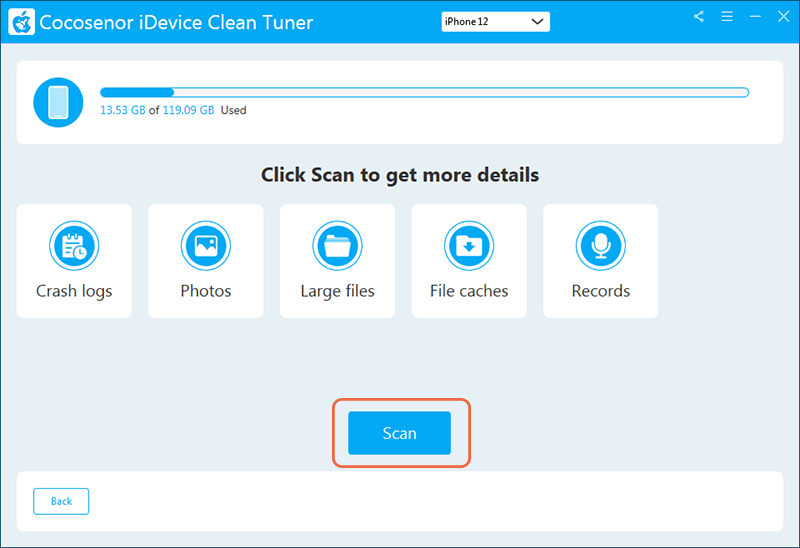
Step 3: Hit the Scan button to start the scanning process.
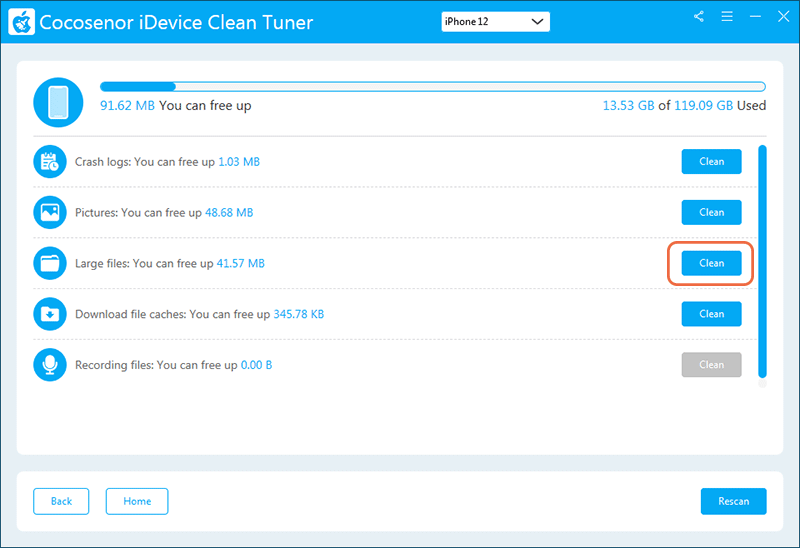
Step 4: Go to the Large files section and hit the Clean button.
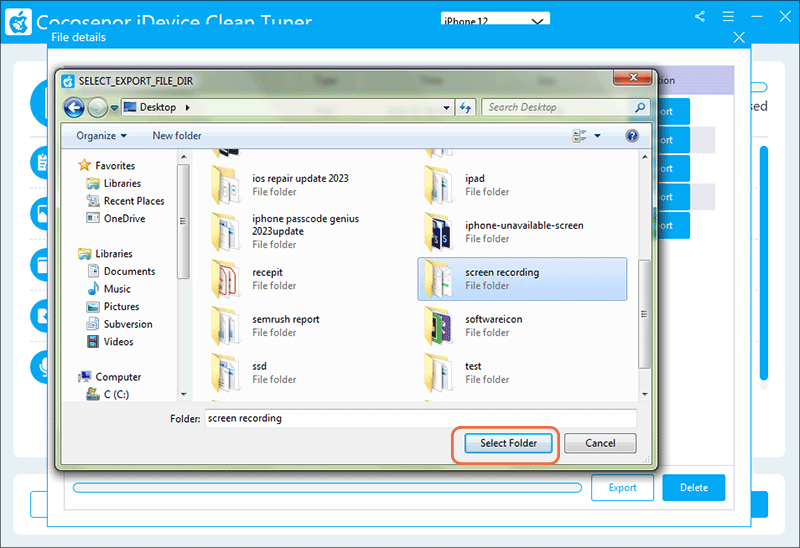
Step 5: Tick the screen recording videos and hit the Export button on the lower-right corner.
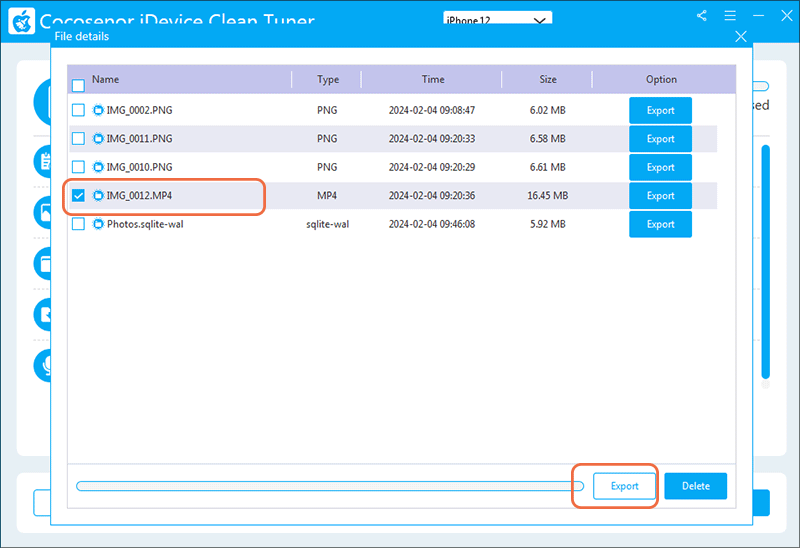
Step 6: Select a location to save the screen recording videos. Finally, you can hit the Export button to export them to your PC.
