What to Do If You Can’t Turn Off Find My iPhone
After opening Settings and accessing the Apple ID page, you find you can’t turn off Find My iPhone. What happened? Maybe there are some restrictions or the network is unstable, which prevents you making any changes to your accounts. So, you can follow the step-by-step instructions in this article to fix the Can’t turn off Find My iPhone issue.
- Contents:
- Way 1 -- Check Whether You Have a Stable Network
- Way 2 -- Turn Off the Stolen Device Protection Feature
- Way 3 -- Ensure Location Services Is Enabled in Settings
- Way 4 -- Disable Find My iPhone via the iCloud Website
- Way 5 -- Try to Reset All Settings on Your Apple Device
- Bonus Tip: How to Disable Find My iPhone by Removing Apple ID
Way 1 -- Check Whether You Have a Stable Network
First what you need to do is to ensure you have connected to Wi-Fi or a stable network. You can temporarily disconnect the cellular network or switch to a different network. After reconnecting, enter the correct Apple ID password and then disable Find My.
Way 2 -- Turn Off the Stolen Device Protection Feature
To protect your iOS device, maybe you forgot you have turned on Stolen Device Protection. When you have it enabled, the Find My feature can’t be allowed to turn off.
Step 1: Open Settings > Scroll down to find Face ID & Passcode > Enter your passcode.
Step 2: Click Stolen Device Protection. Next, turn it off using Face ID. Then click Start Security Delay > Done. The delay will last for an hour and you can see the remaining time on the screen.
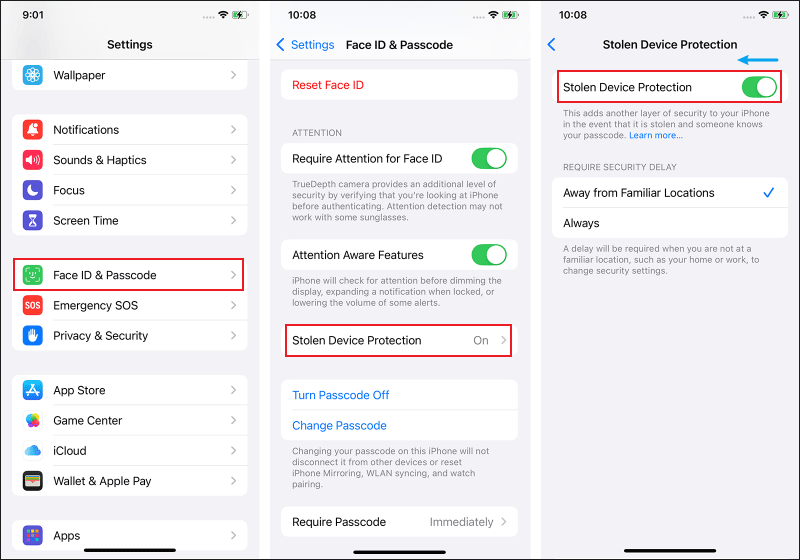
Step 3: After waiting for an hour, you can toggle off Stolen Device Protection again. Then it will be turned off. Now locate to Apple ID page and disable Find My iPhone.
Way 3 -- Ensure Location Services Is Enabled in Settings
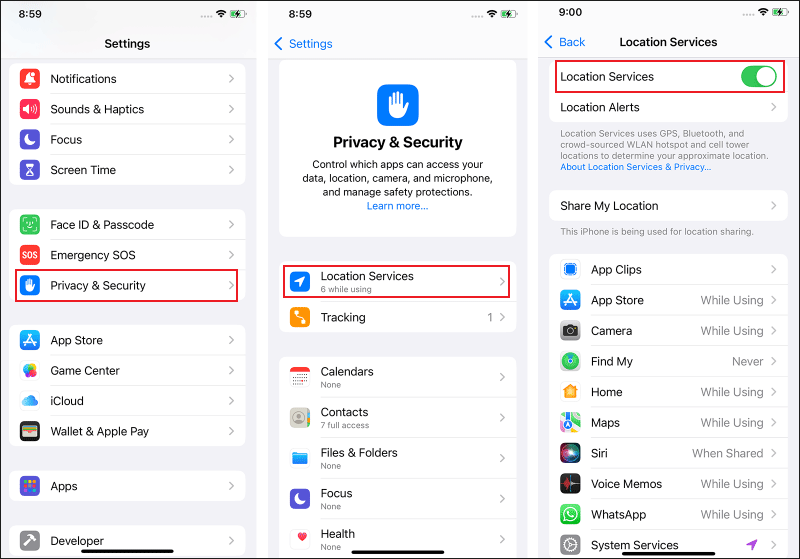
Find My iPhone uses the device’s Location Services to track its location, and if these settings are disabled, it might prevent you from turning off Find My iPhone.
Step 1: Go to Settings > Privacy & Security > Location Services.
Step 2: Confirm Location Services is enabled.
Way 4 -- Disable Find My iPhone via the iCloud Website
If you can’t turn off Find My on your iPhone, another way that gets it resolved is by visiting the iCloud website. If you buy a second-hand iPhone, you can also contact the previous owner, and then let him log into iCloud with his Apple ID to disable Find My.
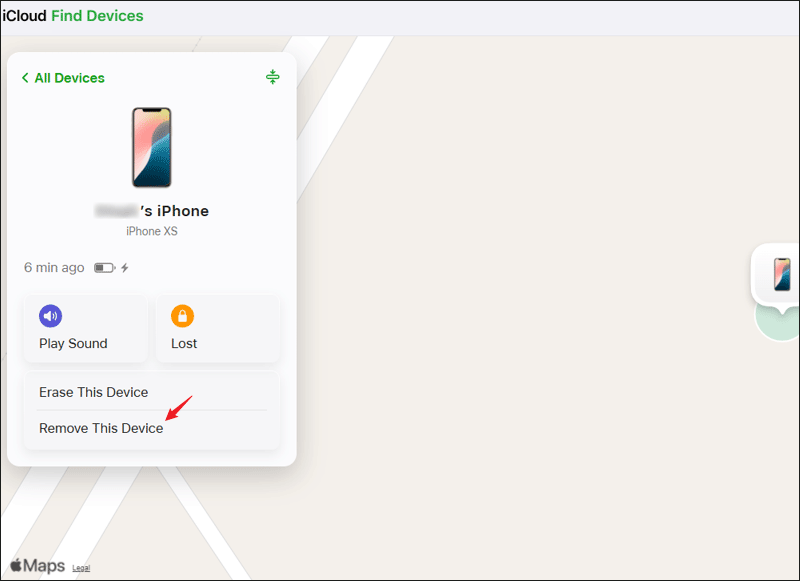
Step 1: Open a browser and go to iCloud.com. After that, sign in with your Apple ID. Then click Find My.
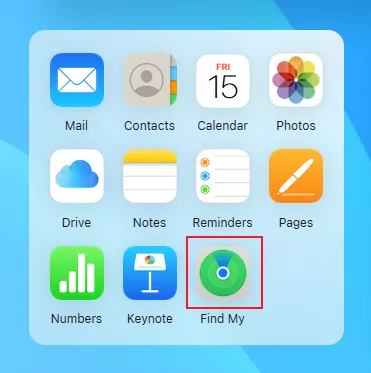
Step 2: Under All Devices menu, click the iPhone device and tap on Remove This Device. After this operation, your Apple ID will be signed out without any restrictions.
Way 5 -- Try to Reset All Settings on Your Apple Device
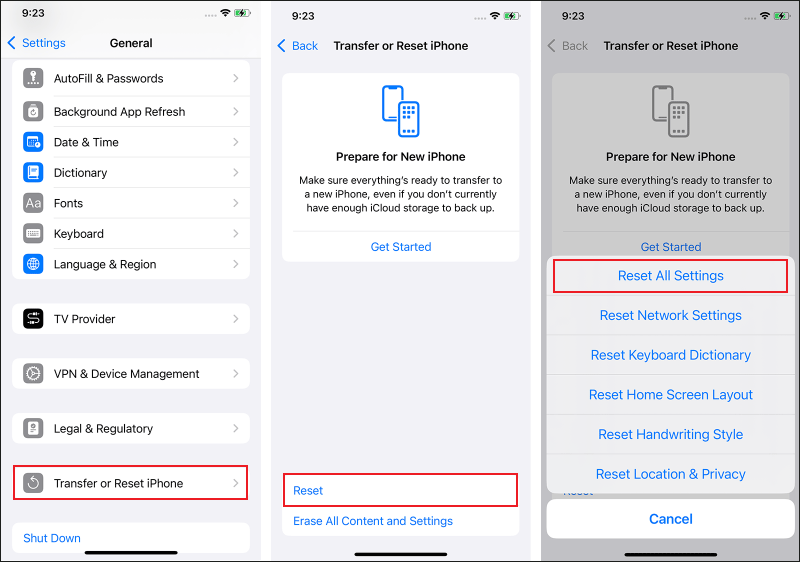
Once you have activated some function like Screen Time, it may cause Find My to be restricted. So if you are not sure which features lead to the problem, you can rest all settings. It won’t delete any data, just removing some settings, such as Wi-Fi and Bluetooth.
Just launch Settings > Choose General > Click Transfer or Reset iPhone > Tap on Reset > Select Reset All Settings > Confirm to reset.
Bonus Tip: How to Disable Find My iPhone by Removing Apple ID
If none of the above-mentioned methods work on the Apple device, try to directly remove Apple ID with/without password. Meanwhile, it can resolve Can’t turn off Find My iPhone.
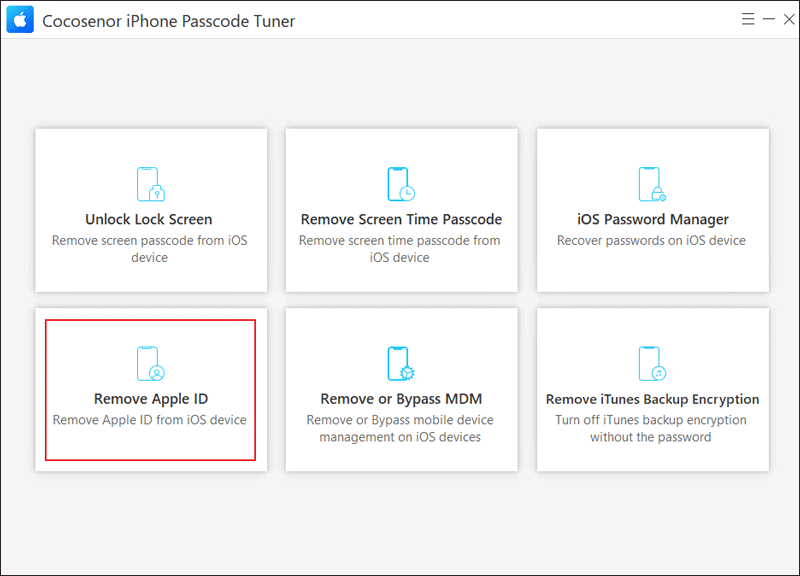
Step 1: Download and install Cocosenor iPhone Passcode Tuner on a PC. Then launch the program and choose Remove Apple ID.
Step 2: Connect your iPhone to the computer via a USB cable. Unlock the screen and tap on Trust This Computer.
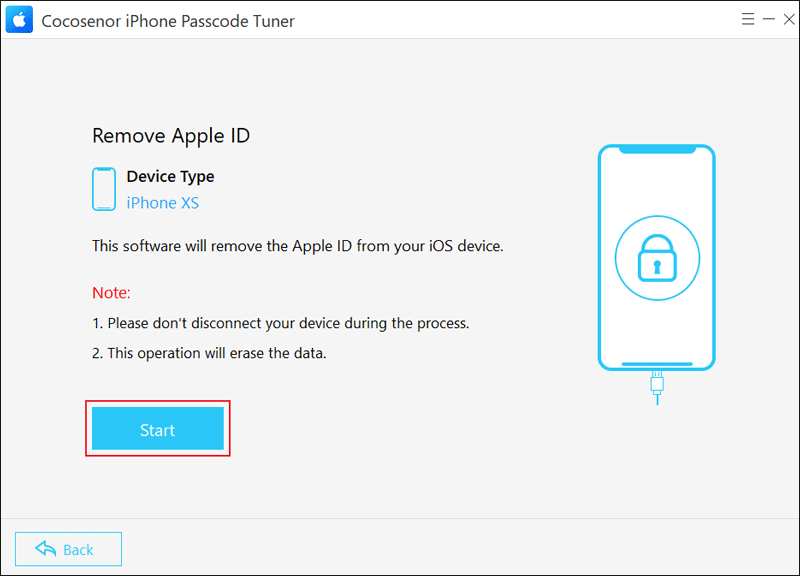
Step 3: Click the Start button. When Find My is turned on, use a screen lock and 2FA to delete Apple ID (support iOS 11.4 or later).
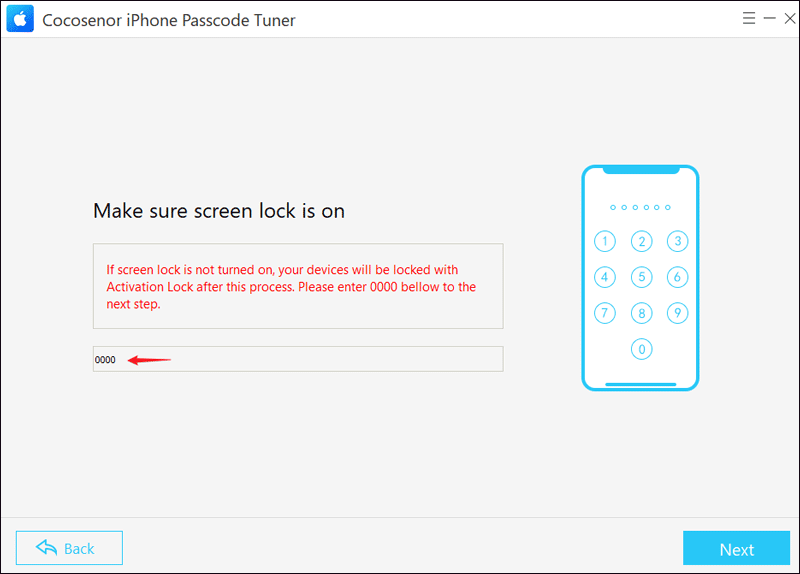
Step 4: Ensure you have set a screen lock, and then enter 0000. After that, hit Next to continue.
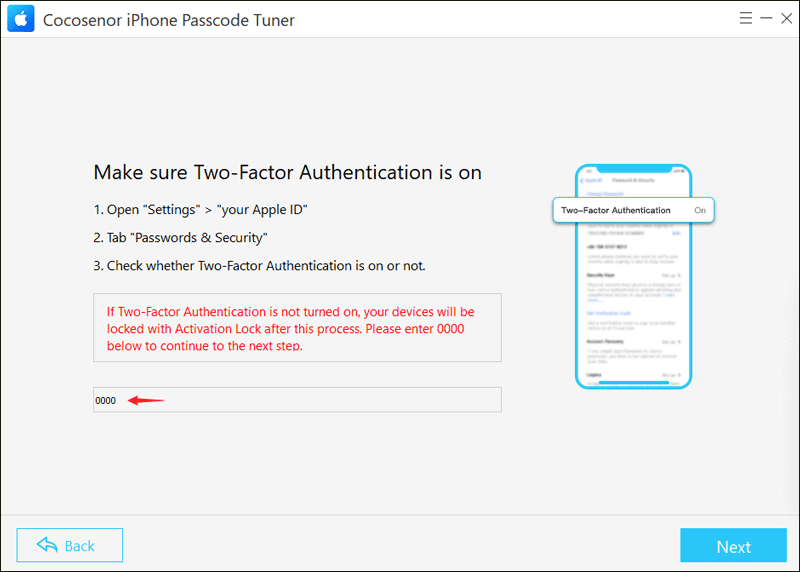
Step 5: Ensure you have enabled Two-Factor Authentication (check it by opening Settings > Apple ID > Sign-In & Security), and type 0000 in the blank box. Then click on Next.
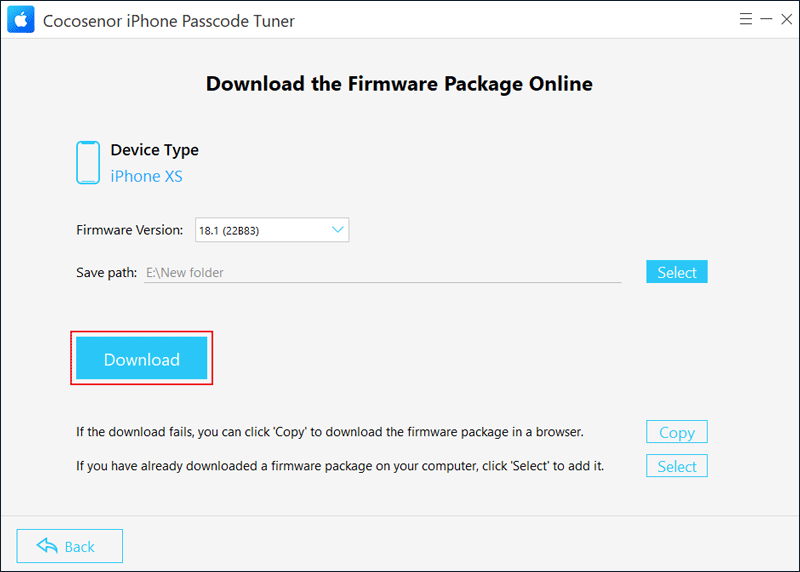
Step 6: Don’t disconnect your device during the process and tap on Next. Click Download to get the firmware package. After that, wait for the download to be completed and the package to be verified.
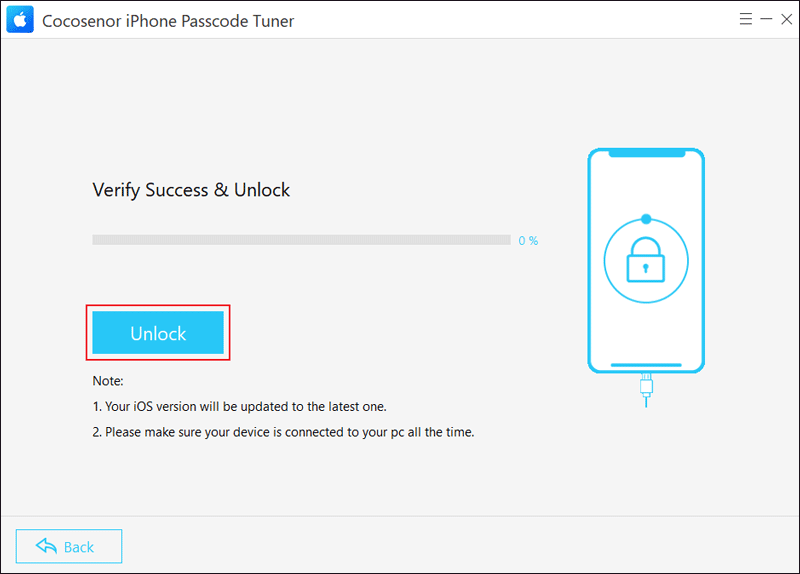
Step 7: Hit the Unlock button. When it is removed successfully after a while, you can set up the device as a new one.
Tips: If you still have an iCloud Activation Lock, unlock it by choosing Unlock with Passcode > tap on Use Device Passcode > Enter the screen passcode.

