How to Fix the iTunes Library.itl Cannot Be Read Error
When intending to open iTunes, you find it has no response. Meanwhile, you get the error message, “The file iTunes Library.itl cannot be read because it was created by a newer version of iTunes”, so what does that mean and how to fix the error?
- iTunes Library.itl Cannot Be Read:
- Part 1: What is iTunes Library itl File
- Part 2: Two Ways to Fix the iTunes Error
Part 1: What is iTunes Library.itl File
The file with the itl extension is an Apple iTunes database, including all the tracks of the music and videos you have, the playlists you created in the iTunes library, etc.
Once iTunes was upgraded to the latest version, the contents of the library file may be changed. So, if you choose to downgrade iTunes after discovering that you still like the old version, then the error message will pop up. But don’t worry, you can fix it soon and launch it again.
![]()
Part 2: Two Ways to Fix the iTunes Error
Is it not working properly after reinstalling the out-of-date iTunes? Actually, the iTunes library file created by the latest iTunes cannot be read by the old iTunes, but you can reuse it from the first solution.
Way 1. Rename the iTunes Library File
To access a readable iTunes Library file, you need to rename or delete the file. Alternatively, you can directly update iTunes or download it from Apple and from the Microsoft Store. Now let’s learn how to rename it.
Step 1: On the computer desktop, open File Explorer from the taskbar.
Step 2: Go to C:\Users\your username\Music\iTunes\. You can also type iTunes Library in the search bar to locate it.
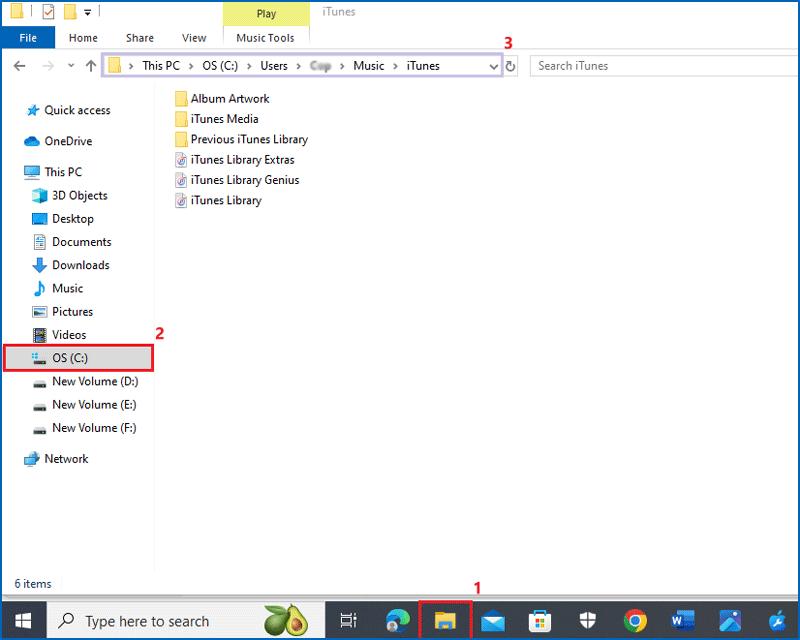
Step 3: Find the file iTunes Library and rename it to iTunes Library old.
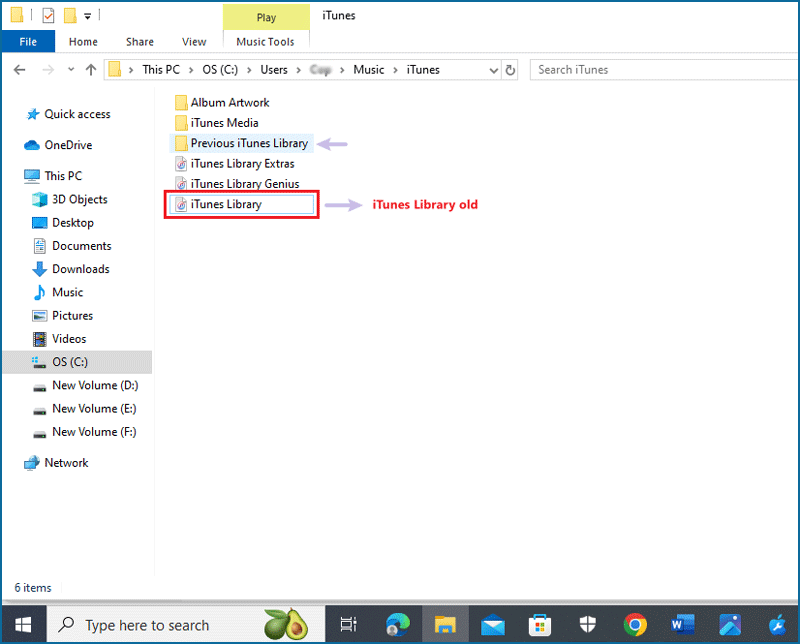
Step 4: Open the folder named Previous iTunes Libraries. Rename the most recent library file as iTunes Library, move or drag it to iTunes folder.
Step 5: Then try to launch iTunes and check if it can work well.
Way 2. Use Repair Software to Fix iTunes Issues
Apart from the method mentioned above, you can also download an iTunes repair tool to solve the problem, such as Cocosenor iOS Repair Tuner. It has no complex steps and can automatically scan the error. You can give it a try.
Step 1: Download and install the app on your computer. After that, run the iOS Repair Tuner and click the third one iTunes Repair.
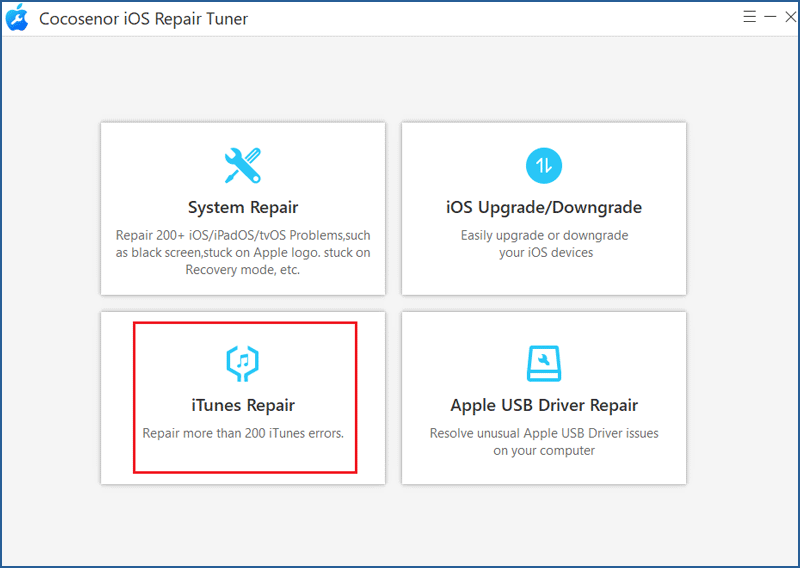
Step 2: Choose Repair iTunes Errors.
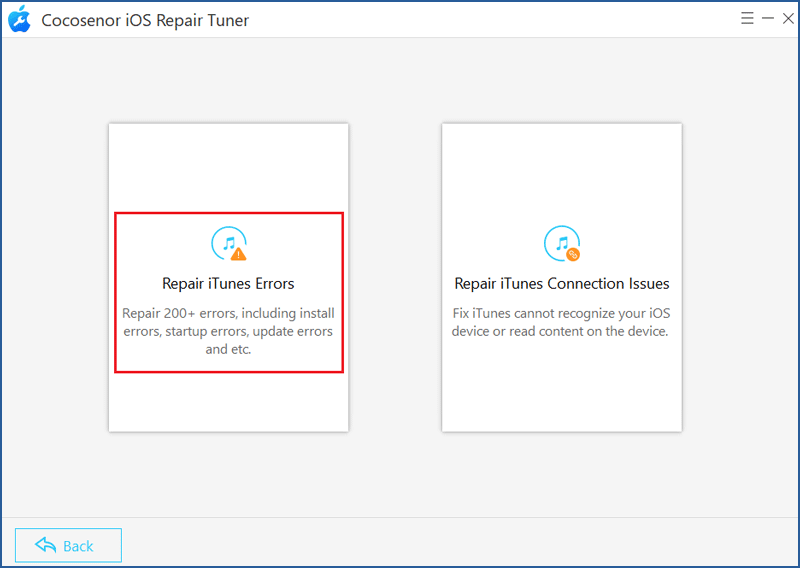
Step 3: After a few minutes, the error messages will be shown after scanning. Then you should hit the Repair button to continue.
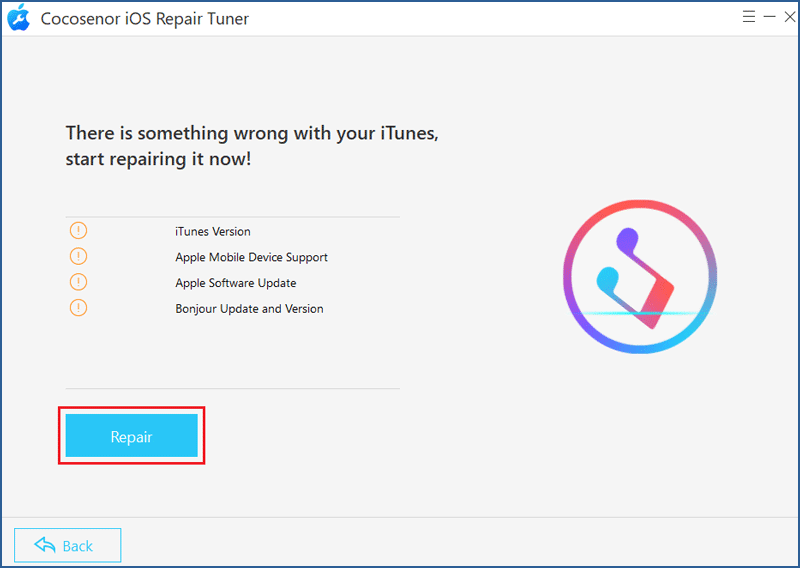
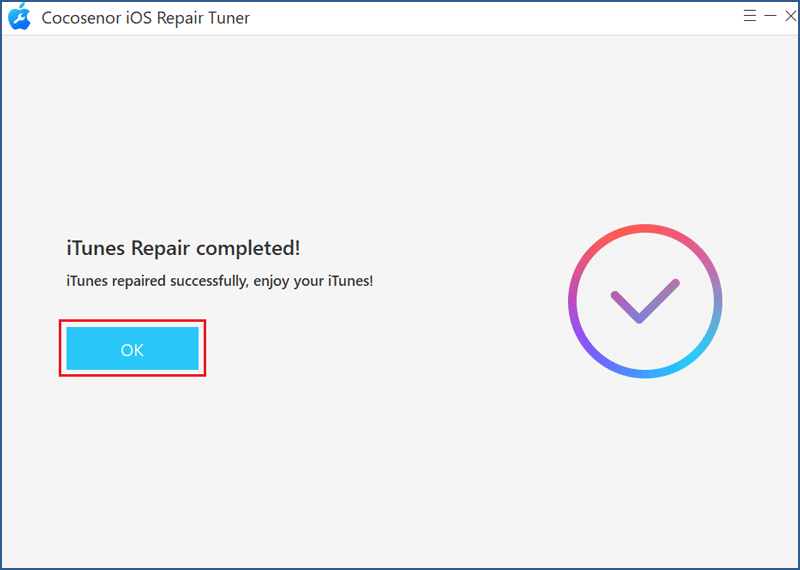
Step 4: When the error is repaired successfully, just click OK.
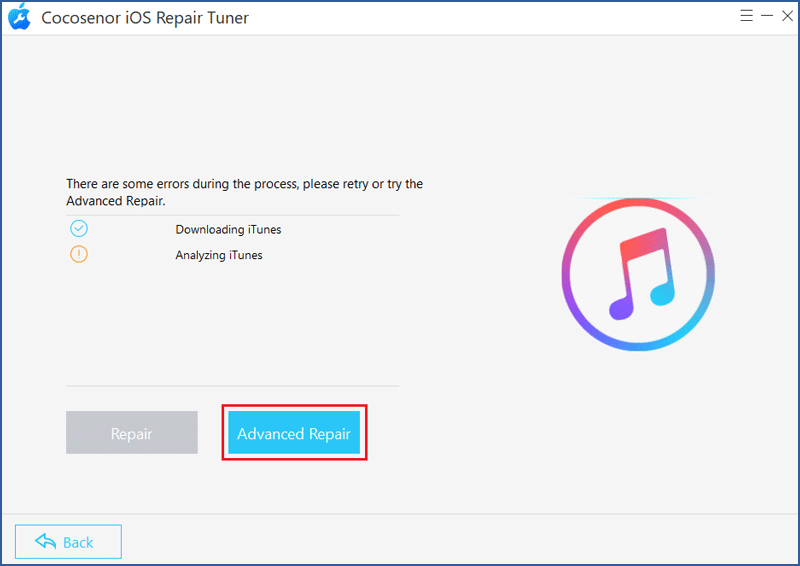
If iTunes still pops up the error message or there are some errors during the repair process, you can select the Advanced Repair option to fix it.
Conclusion
Whether you change the iTunes Library file name manually or use a repair program to automatically solve issues, Cocosenor iOS Repair Tuner is highly recommended for you to download as it can troubleshoot other iTunes read errors.
Related Articles
- How to Easily Fix iTunes Not Recognizing Your iPhone
- Fixed-- Encrypt Local Backup Greyed Out in iTunes
- [Fixed] iTunes Stuck on Waiting for iPhone during Restore
- Solved - iTunes could not restore because the Password was Incorrect
- How to restore iPhone from iCloud or iTunes backup for 7Plus, 7, SE, 6Plus, 6s

