Fixed -- Trusted Devices List Is Not Available on iPhone
When you first sign into another iOS device, such as a Mac, you’re required to enter a verification code and choose whether to trust this computer. Once you click Trust, all trusted devices will be displayed on your iPhone. But after you open Settings and locate to Apple ID page, you only find Trusted devices list is not available. So, why does the list disappear and how to get it back?
- Contents:
- Part 1: Why Is the Trusted Devices List Not Available
- Part 2: How to Fix Trusted Devices List Is Not Available (4 Ways)
- Part 3: How to Remove Apple ID with Grey Sign Out Option
Part 1: Why Is the Trusted Devices List Not Available
If the Apple ID devices list is unavailable, it could be due to several reasons, including Internet connectivity issues, Apple ID sync problems, or outdated software. Sometimes, temporary bugs or errors in the system might also cause this issue. First what you can do is to close the Settings app, and try to restart your device. If it’s still not resolved, maybe the following ways can help you.
Part 2: How to Fix Trusted Devices List Is Not Available (4 Ways)
Here’s how you can address the error of Trusted devices list is not available on your iPhone. Now follow the step-by-step instructions.
- Fix 1: Ensure You Have a Stable Network
- Fix 2: Log Out of the Apple ID and Log Back in
- Fix 3: Update the System to the Latest Version
- Fix 4: Reset All Settings on Your iPhone
Fix 1: Ensure You Have a Stable Network
A stable Wi-Fi or cellular connection is necessary for your iPhone to sync with Apple’s servers and display the trusted devices list. So, you can toggle the Wi-Fi off and on to refresh the connection and then ensure you’ve connected to the network.
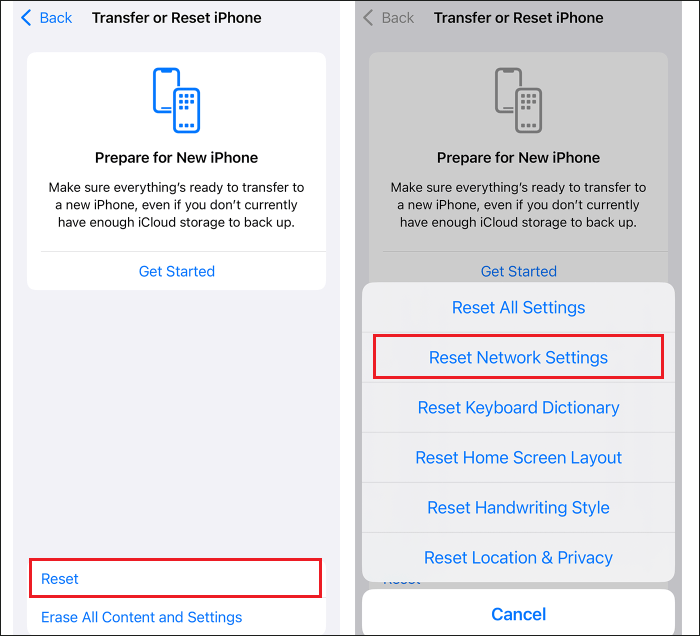
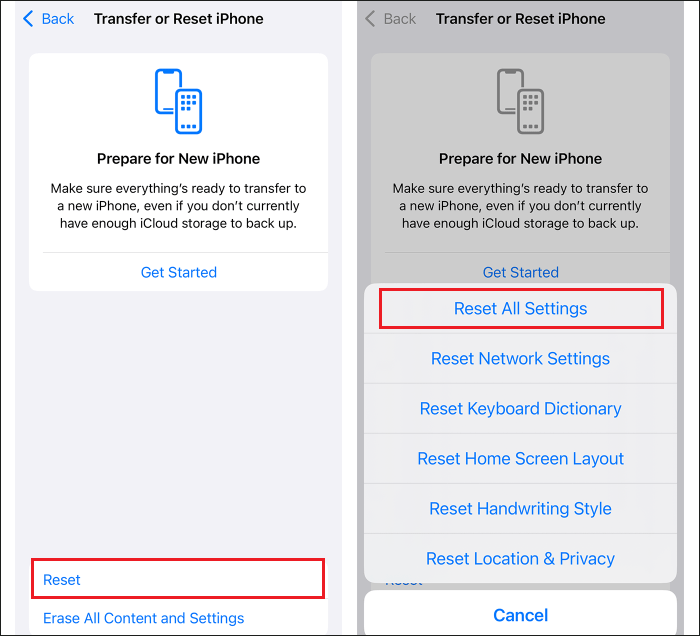
In addition, you can reset network settings by going to Settings > General > Transfer or Reset iPhone > Reset > Reset Network Settings.
Fix 2: Log Out of the Apple ID and Log Back in
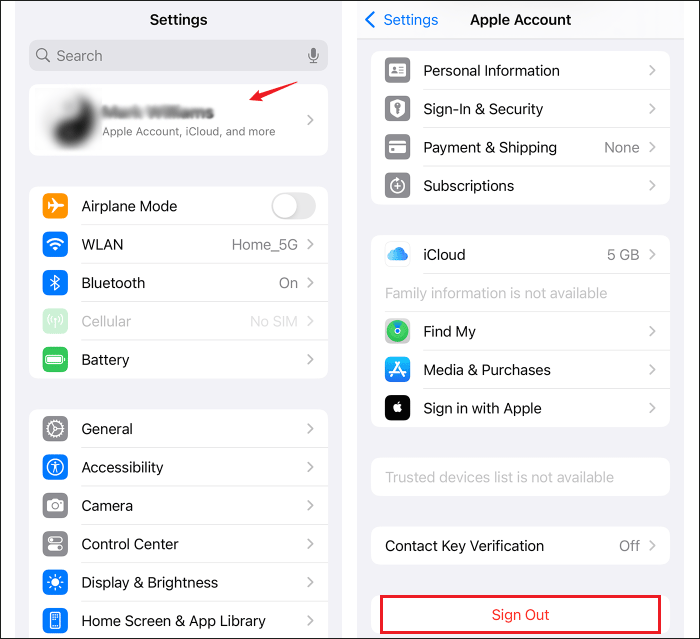
Sometimes, signing out and signing back into your Apple ID can fix iOS trusted devices list issues. Launch Settings > Tap on Apple ID Name > Scroll down and tap Sign Out. Enter your Apple ID password to sign out. Go back to Settings > Sign back in with your Apple ID. Then it will reload the list.
Fix 3: Update the System to the Latest Version
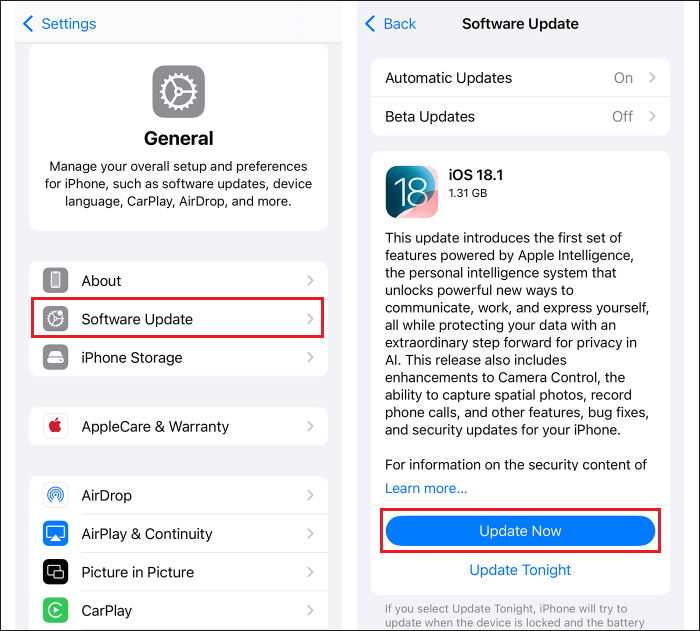
Ensure your iPhone is running the latest version of iOS, as software updates often fix bugs related to Apple services and Apple software. Head to Settings > General > Software Update. Then tap on the Update Now button if there are available updates.
Fix 4: Reset All Settings on Your iPhone
If none of the methods work after trying the previous steps, you can reset all settings on your iPhone. This won’t delete any data, but it will reset your settings (Wi-Fi, Bluetooth, and others) back to default.
Go to Settings > General > Transfer or Reset iPhone > Reset > Reset All Settings. Then enter your screen passcode and confirm to reset.
Part 3: How to Remove Apple ID with Grey Sign Out Option
Under the unavailable iOS trusted devices list, in most cases it may come with the grey Apple ID Sign Out option. Once you forget the password or buy a second-hand iPhone, it will be complex to sign out of the Apple ID account. Thus, you can use some unlocking tools to remove it, like Cocosenor iPhone Passcode Tuner.
Step 1: Download and install the program on your Windows or Mac computer.
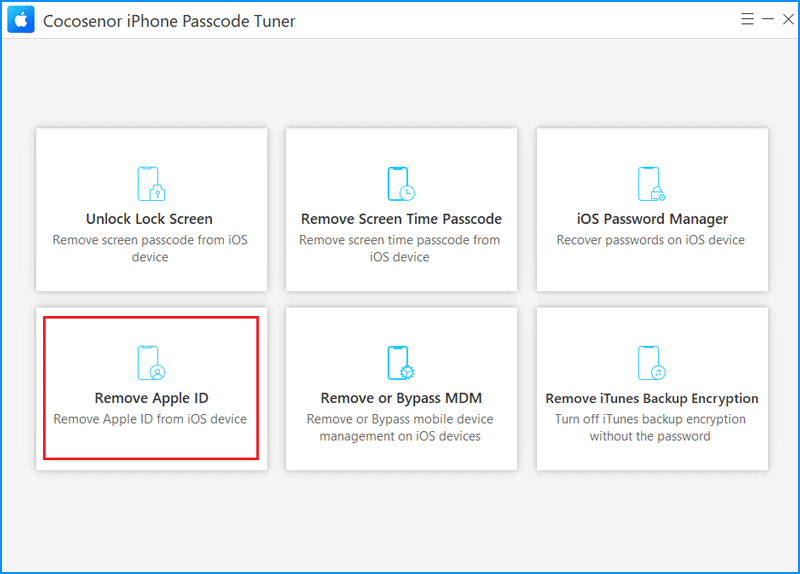
Step 2: Launch the software and select Remove Apple ID in the main interface.
Step 3: Connect your iPhone to the PC via a USB cable. After that, unlock your iPhone and hit Trust This Computer. Go to Settings, click the Apple ID name, and then ensure Find My iPhone is turned off.
Step 4: Tap on Start to remove Apple ID. Note that don’t disconnect your device during the process.
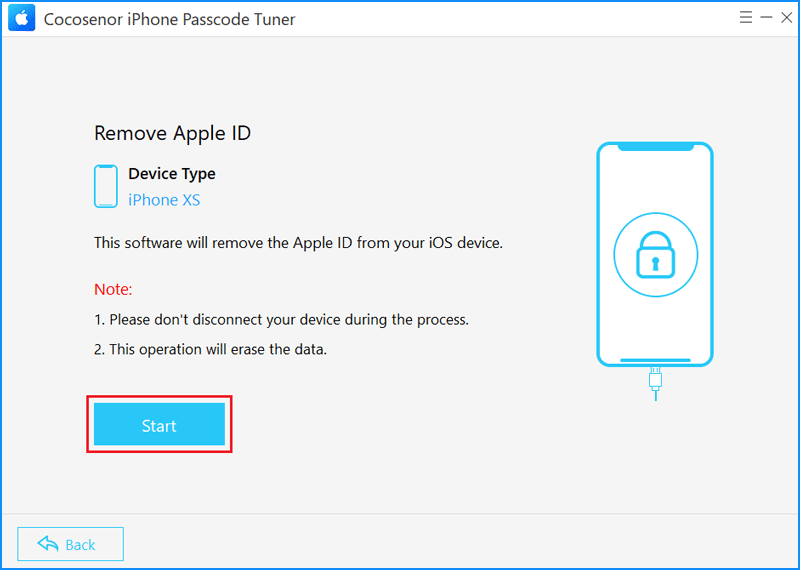
Step 5: After removing, your iPhone will restart and you can set up your device.
If you have enabled Find My iPhone and can’t turn it off, try to take the following steps.
Step 6: Ensure you have set a screen lock on your iPhone. Then enter 0000 in the box and tap on the Next button.
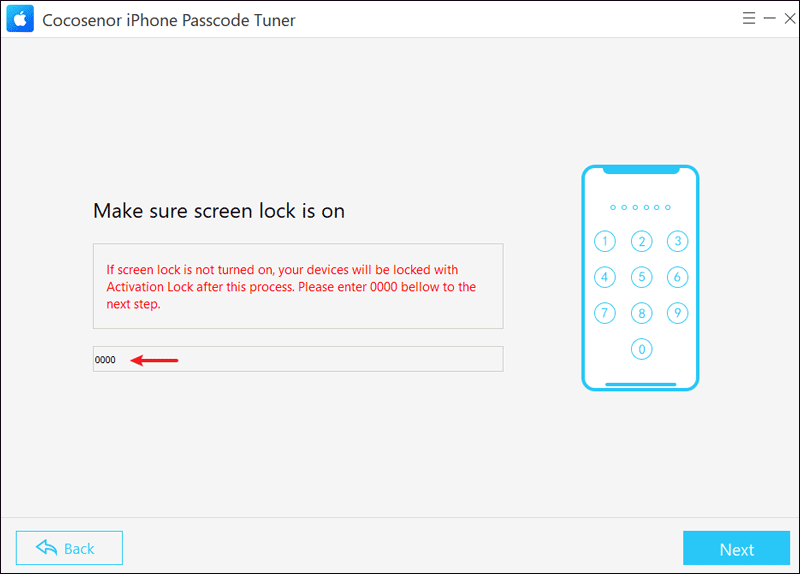
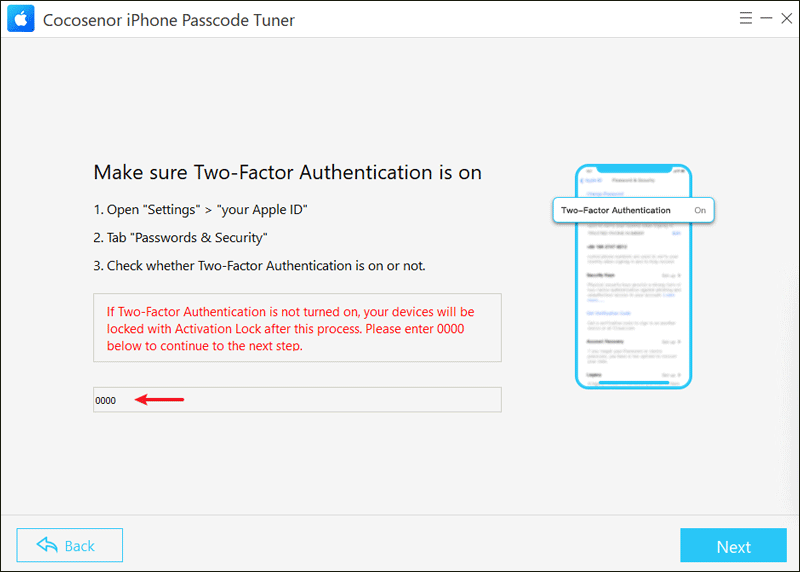
Step 7: Make sure Two-Factor Authentication is on (check it by going to Settings > Apple ID profile > Sign-In & Security > Two-Factor Authentication). Then enter 0000 and click Next.
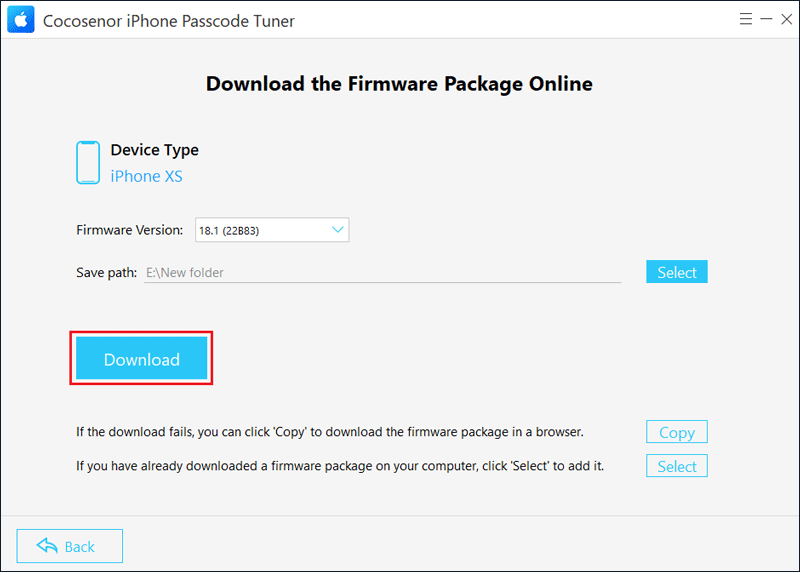
Step 8: Continue to tap on Next. After that, hit Download to get the firmware package.
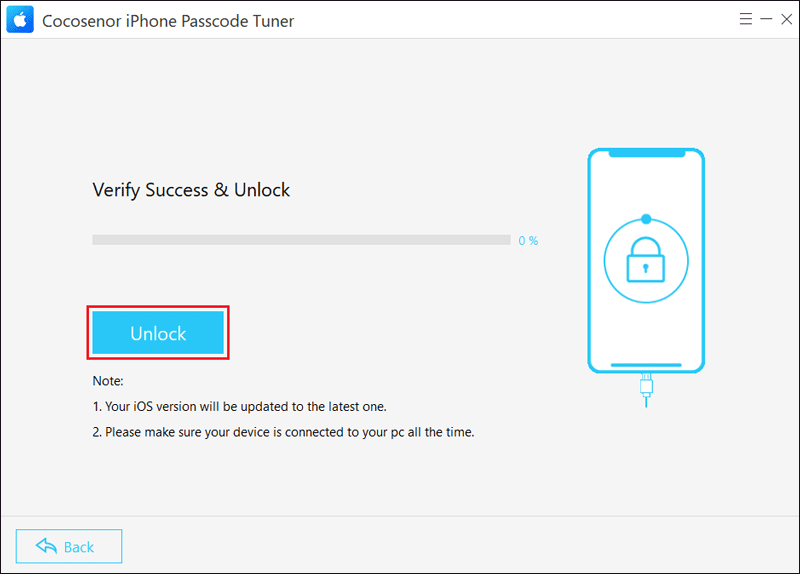
Step 9: Wait for some time until the Unlock button appears on the screen. Then click Unlock.
Step 10: After “Removed Apple ID Successfully” pops up on the screen, continue to tap on Next. And then you can set up your iPhone.
If you still encounter an iCloud Activation Lock, unlock it by choosing Unlock with Passcode > tap on Use Device Passcode > Enter the screen passcode.

