Protect Outlook Email and Folder with Password
When open Outlook, we will normally see folders such as Inbox, Drafts, Sent Items, Deleted Items, and so on under an email account.
In fact, we can create more folders and subfolders to classify emails. We can also password protect Outlook email and folder to avoid information leaking. How to do it? Users of Outlook 2010/2013/ 2016 can follow these guides.
- Guides
- Firstly, create a password protected Outlook folder
- Secondly, create subfolders under the password protected Outlook folder
- Thirdly, sort emails into the protected subfolders
Firstly, create a password protected Outlook folder
For example, if you want to password protect Outlook 2016 emails and folders, just follow the steps:
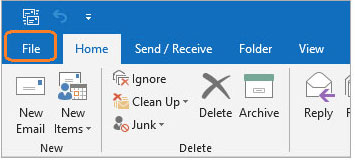
1. Open Outlook 2016, click File.
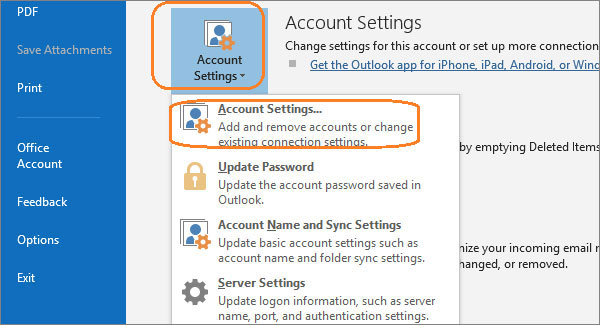
2. Click Account Settings to select Account Settings…
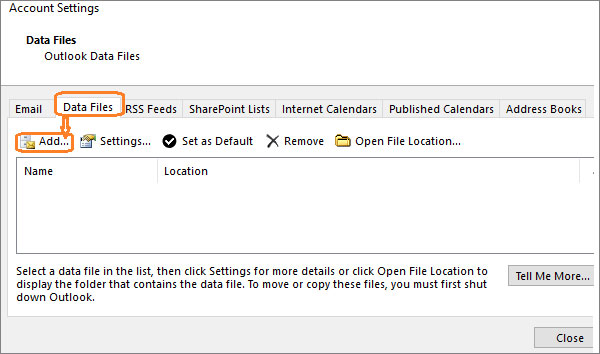
3. Under Account Settings, click Data Files, click Add…
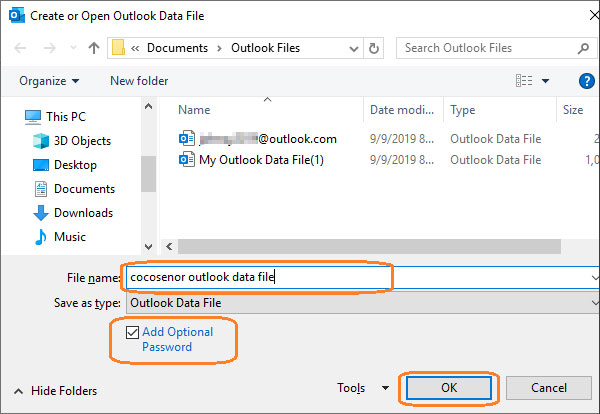
4. Give a name to your Outlook data file folder, tick on Add Optional Password, click OK to continue.
5. Enter password and in verify password box enter the same password once more. Don't select "Save this password in your password list." Just click OK.
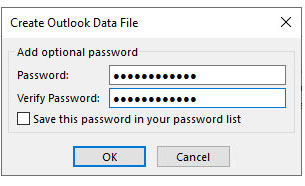
Note: If you have selected "Save this password in your password list," this password protected Outlook data file folder will be opened without password. This is not safe for your Outlook data..
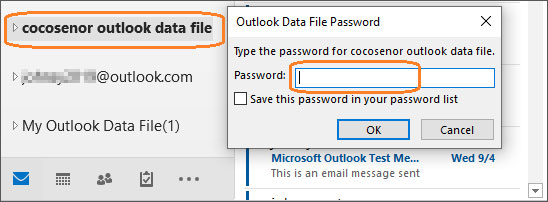
The new created folder will display on the folder list at left in Outlook. You can click on it and enter password to activate it.
Secondly, create subfolders under the password protected Outlook folder
It is recommended to create subfolders under Outlook data file folder and sort emails into different subfolders so that your emails won't be mixed up.
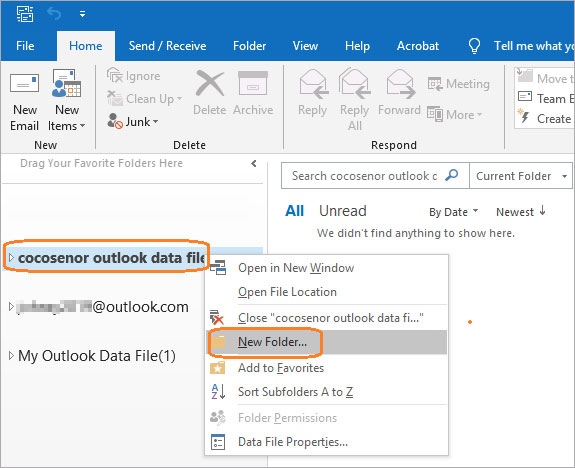
Right click the folder name, select New Folder.
Enter a name for the new subfolder, you can type a company name or any name you like. Here I create three subfolders and give "A", "B", "C" to represent companies' name.
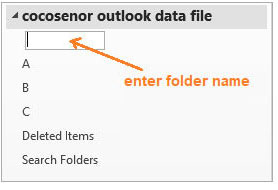
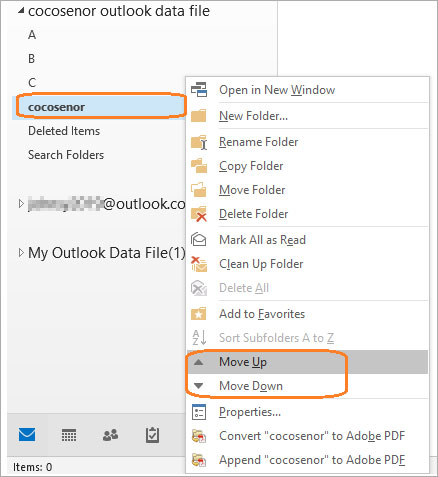
If you want to move up or move down the folder, just right click on the folder to execute.
Thirdly, recommend to sort emails into the subfolders you have created
This is very easy, right click on the selected emails under the email account, move your mouse cursor over the Move option, and choose the target subfolders.
If you don't use Outlook very often, and there have only a few emails sent and received in Outlook, you can move emails into the protected Outlook data file folder directly without creating subfolders.
Conclusion:
Therefore, create a password protected Outlook data file folder and move your emails into this folder or the subfolder of it, all things are protected. When someone open your Outlook, they will be requested to enter the password for opening this Outlook data file folder, if they cannot enter the correct password, they cannot access the emails in this password protected Outlook data file folder.
If you are using Outlook 2010, Outlook 2013, you can try the above method to password protect Microsoft Outlook email and folder too.
Tips: Please do remember to note down the password or save it to a safe place.

