How to Add/Edit User Account on Surface Windows 8.1

When you bought and set up your Surface, an administrator account is created for you based on your information. With this administrator account, you can create, modify, or remove other user accounts on your Surface. Here will take Windows 8.1 on Surface Pro 3 as example. The steps on Surface Pro 4/3/2 with Windows 10/8.1/8 are similar.
- Guide Steps
- Part 1: To add a Microsoft account on your Surface (Windows 8.1)
- Part 2: To create a local account on your Surface (Windows 8.1)
- Part 3: How to change other user's account type on your Surface
- Part 4: How to remove user accounts from your Surface
Part 1: To add a Microsoft account on your Surface (Windows 8.1)
Step 1: Swipe in from right side of screen, select Settings, Change PC settings, Accounts.
Step 2: On the Accounts setting, select Other accounts, and tap on the Add an account button on the right panel.
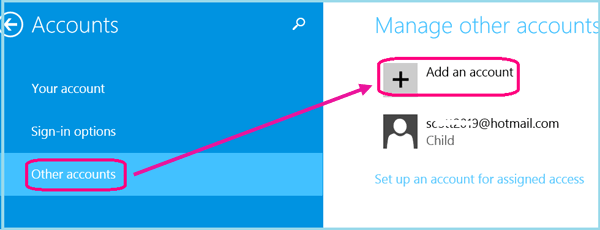
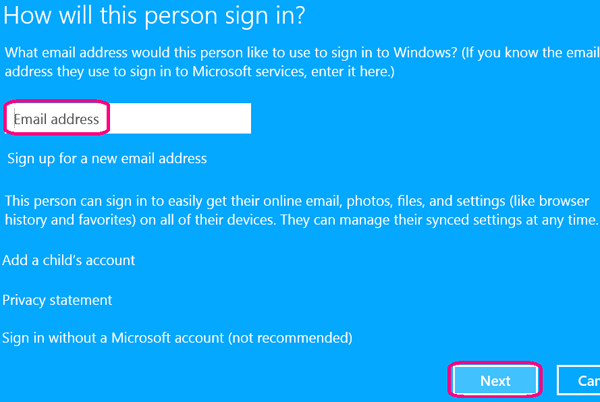
Step 3: Enter the Email address for your account, and tap on Next.
Step 4: Tap on Finish button to close the screen, and you will find that a new account is added.
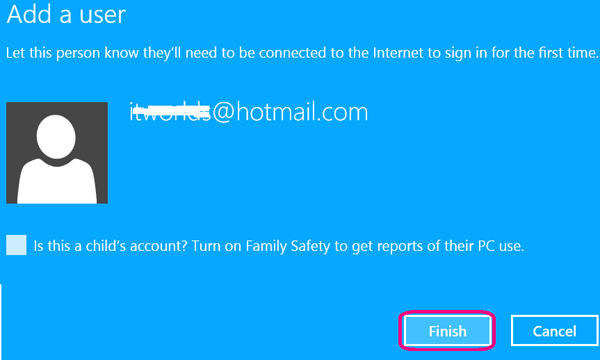
Tips: If this is a child account, check the check box to turn on Family Safety to get reports of their PC use. Do not have an email address?
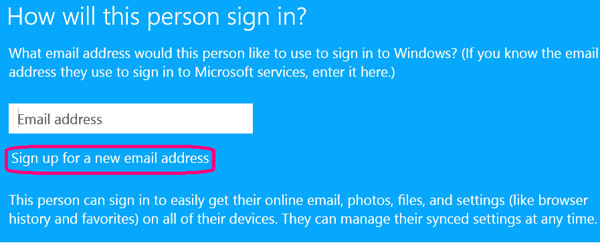
Step 5: If do not have an email address, tap on the link Sign up for a new email address, and follow the on-screen instructions to create a Microsoft account.
Tips: Be sure to connect to the internet the first time sign in with the new Microsoft account. When you sign in with the new Microsoft account, enter the Microsoft account password, follow the on-screen instructions to setup your settings.
Part 2: To create a local account on your Surface (Windows 8.1)
Step 1: Settings >> Change PC settings >> Accounts, select Other accounts, and then tap on Add an account.
Step 2: On the bottom of the screen, tap on the link Sign in without a Microsoft account.

Step 3: Select Local account if you are sure to add a local account on your Surface.
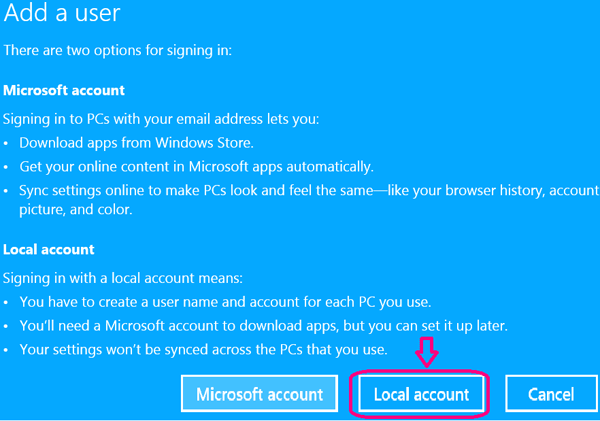
Step 4: Enter user name, password, password hint, tap on Next.
If want to change the local account password, see Surface local account password change/remove.
Note:
If you are sign in your Surface with a local account, you have to sign in with a Microsoft account again, when you want to use Microsoft services (like Xbox, OneDrive, or other services). So Microsoft highly recommends you to create a Microsoft account not a local account.
Part 3: How to change other user's account type on your Surface
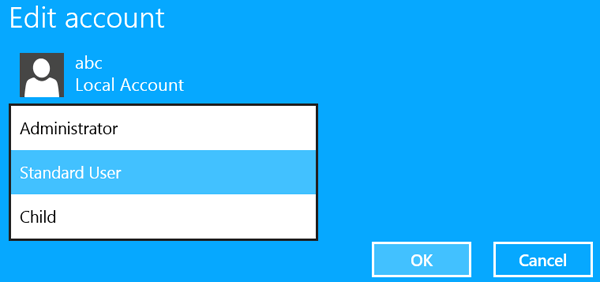
There are three types of account on your Surface - administrator, stander, and child account. With an administrator account, you can change other user's account type on your Surface.
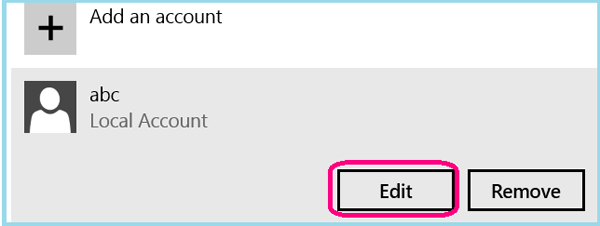
Step 1: Login with an administrator account, Settings >> Change PC settings >> Accounts >> Other accounts, on the right panel select a user account, tap on Edit button.
Step 2: Below your account, tap on the text box, you will see the Administrator, Standard User, and Child account types, select one, and tap on OK.
Tips: If want to add a child account on your Surface as a family member, see create a child account on Surface and set right limits.
Part 4: How to remove other user accounts from your Surface
With the administrator account, you also can remove the other users from your Surface. But you can't remove the account that is using currently.
Step 1: Sign in your Surface with and administrator account, go to the accounts settings, select Other accounts.
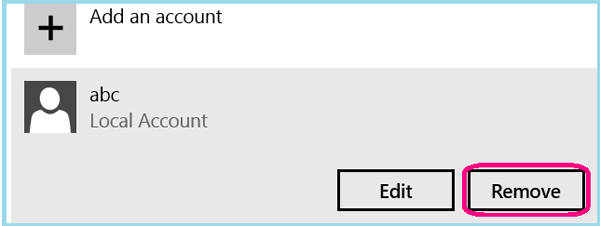
Step 2: On the right panel, select a user account, tap on Remove button.
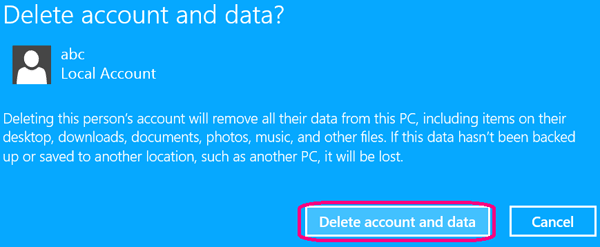
Step 3: Tap on Delete account and data, and then the user account and data will be deleted.
Related Articles
- Create a Child Account on Surface and Set Right Limits
- How to Unlock Your Surface Tablet When Forgot Password
- Reset Surface Pro 3 password on Windows 8.1/10
- Create HomeGroup on Your Surface to Share Files with Other Devices
- Surface Local Account Password – Change/Remove
- Switch to Microsoft Account or Local Account on Surface Pro

