Switch to Microsoft Account or Local Account on Surface Pro
When you are using a local account on your Surface, you may need to switch to a Microsoft account in order to use your OneDrive, Xbox, Skype, and Windows Store services on your Surface. Or you just want to sign in to your Surface with a local account instead of the Microsoft account. Here will take Surface Pro 3 with Windows 8.1 as example to show you the details steps.
- Guide Steps
- Part 1: Switch local account to Microsoft account on your Surface
- Part 2: Disconnect Microsoft account to sign in with local account
Part 1: Switch local account to Microsoft account on your Surface
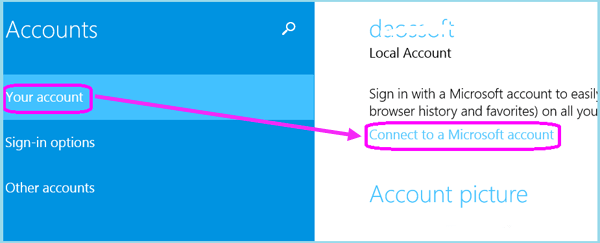
Step 1: Go to your Accounts settings by this way: Settings → Change PC setting → Accounts → Your account.
Step 2: On the right side of your accounts setting screen, you will see the "Connect to a Microsoft account" link below your account, tap on the link to go on.
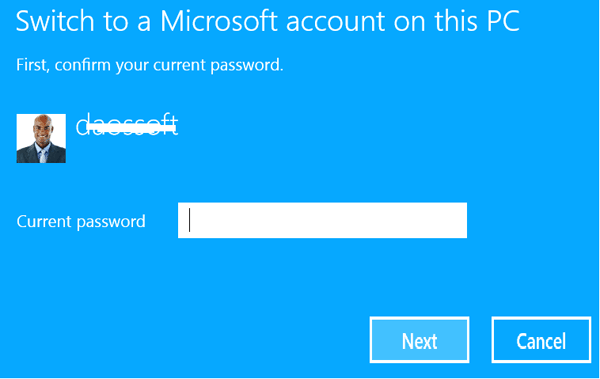
Step 3: Enter your local account current password and tap on "Next" to continue.
Case 1: Already have a Microsoft account
If you already have one Microsoft account to sign in the other Microsoft services like Xbox, Hotmail, Outlook.com, OneDrive, or Skype, you also can use it to sign in your Surface.
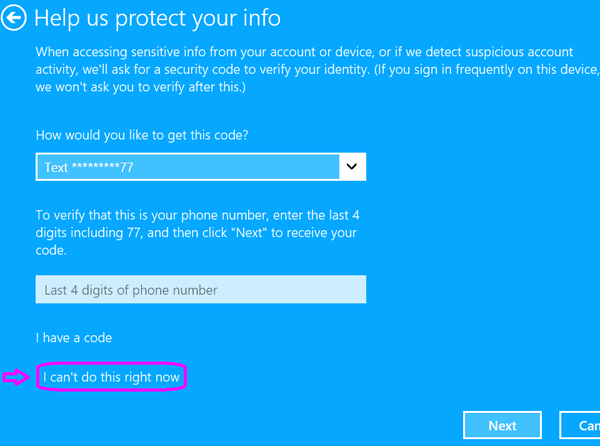
step 1: Enter your Microsoft account email address and password on the text box, tap on "Next". You may be asked to get a security code to verify your identity, select your phone or email to get the code. If don't want to verify your identity, tap on the link "I can't do this right now".
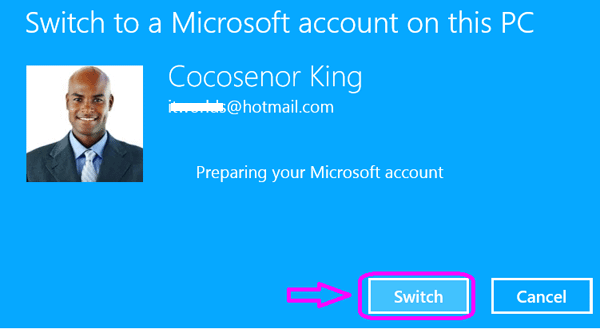
Step 2: Tap on "Switch" button to switch local account to your Microsoft account. And then the next time you will need to login your Surface with the Microsoft account email address and password.
Case 2: Do not have a Microsoft account
If you don't have a Microsoft account, you can sign up for a new one with the email address you use most often from Gmail, Outlook.com, Yahoo, or create a new one.
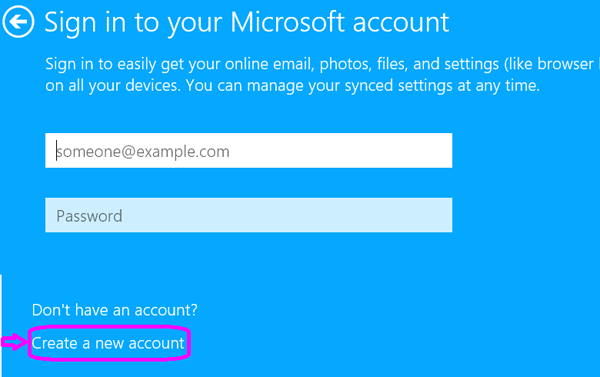
step 1: Tap on the link "Create a new account" below the screen.
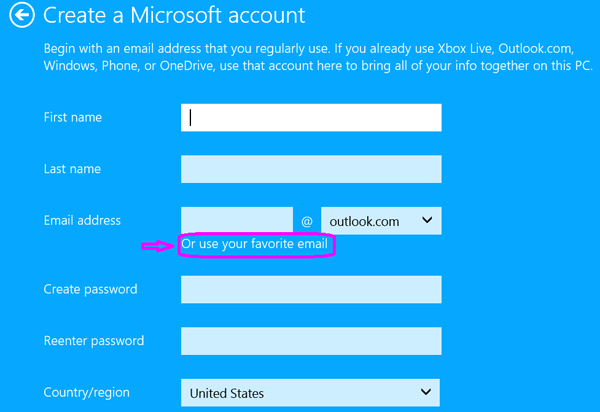
Step 2: Enter your personal and security info to create a Microsoft account. If you already have an email address, tap on the link "Or use your favorite email", and follow the instructions on the screen to create a Microsoft account for your Surface.
Tips: Can't switch your local account to Microsoft account?
If you can't switch your Local account to Microsoft account, you can try to add a new user account with the Microsoft account email and password. And then sign out of the local account and login with your Microsoft account instead.
Part 2: Disconnect Microsoft account to sign in with local account
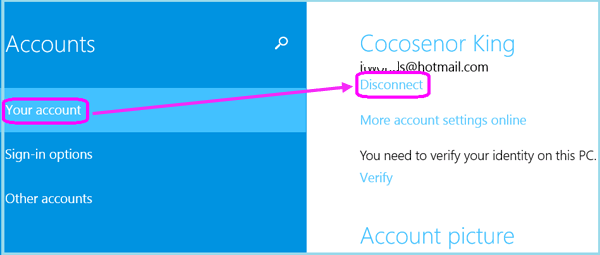
Step 1: Go to Accounts settings, select "Your account" on the left panel, and then tap on the link "Disconnect" below your Microsoft account.
Step 2: Enter your current Microsoft account password to verify your account.
Step 3: Enter your local account user name and password, tap on "Next".
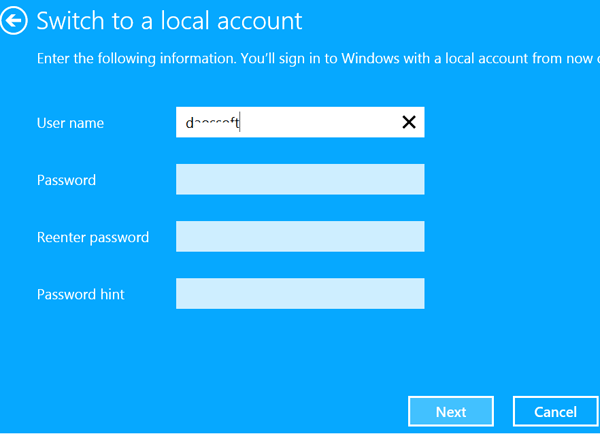
Step 4: Tap on the "Sign out and finish" button to sign out of your Microsoft account, and then sign in with your local account.
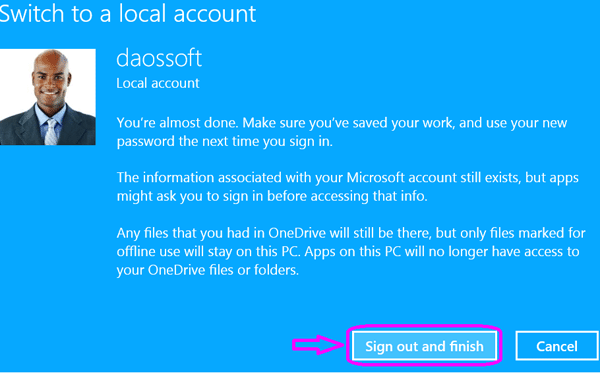
Tips: You will sign out of your Microsoft account, so make sure you've saved your work, and remember the new password that you will need to sign in the next time. If on your Surface is Windows 10, you also can refer to the two articles below:
1. How to switch local account to Microsoft account on your Windows 10
2. Sign in Windows 10 with local account instead of Microsoft account
Related Articles
- Surface Local Account Password – Change/Remove
- How to Unlock Your Surface Tablet When Forgot Password
- How to Reset Microsoft Account Password in Windows 8
- Create Windows 10 Microsoft Account and Local Account
- Sign in Windows 10 with Local Account Instead of Microsoft Account
- Switch Local Account to Microsoft Account on Windows 10

