Full Guide to Back Up and Restore Registry in Windows 10

To troubleshoot some Windows bugs or errors, one of the ways recommended by many netizens is to make changes to Registry, where the settings control much of how your windows work. It’s fairly easy for us to modify some values or keys, but wrongly editing the contents may cause some software to run unstably or lead your computer to crash. Therefore, you should back up the Registry before editing.
- Contents:
- Part 1: The Brief Introduction of Registry Editor
- Part 2: How to Manually Back Up the Windows Registry
- Part 3: How to Restore the Windows System Registry Easily
Part 1: The Brief Introduction of Registry Editor
The Windows Registry is a powerful database that stores configuration settings for the operating system and applications, allowing users to view and modify its keys and values. Understanding how to manage the Registry, particularly backing it up and restoring it, can help prevent potential issues caused by unwanted changes or corruption.
Part 2: How to Manually Back Up the Windows Registry
Backing up the Windows Registry is essential, especially if you plan to make modifications. Here’s how to do it manually:
Way 1. Open Registry Editor to Export the Database
Step 1: Press Win + R keys together. Then type regedit in the Run box and click OK. Then tap on Yes to allow this app to make changes to your device.

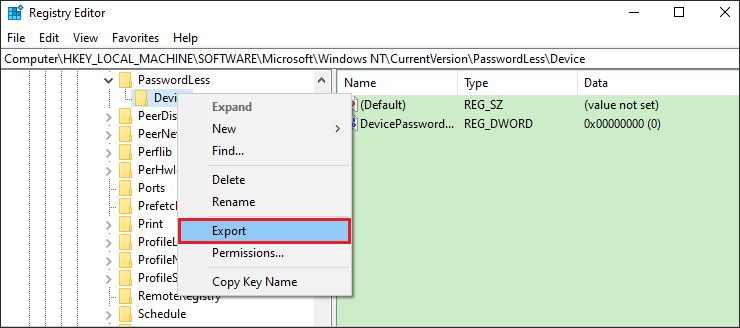
Step 2: To back up the entire Registry, you can right-click on Computer and choose Export.

You can also create a backup of a specific registry key. Likewise, right-click the target key and select Export.
Step 3: Choose a location to save the backup file. After that, you can name it and confirm the export range: all or selected branch.
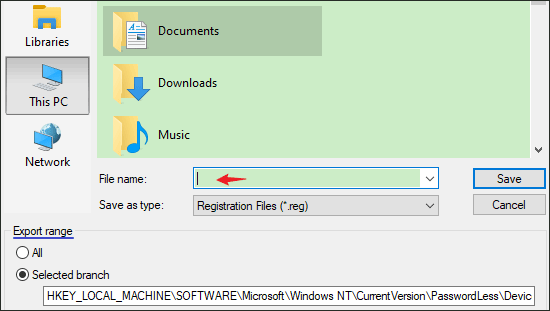
Step 4: After double-checking the key is what you want to save, you can click the Save button.
Way 2. Create a Restore Point to Back Up the Registry
Step 1: In the Windows Search bar, type in Create a restore point and open it.

Step 2: Under System Protection tab, select the system drive and then hit Configure. Ensure you have turned on system protection and click OK.
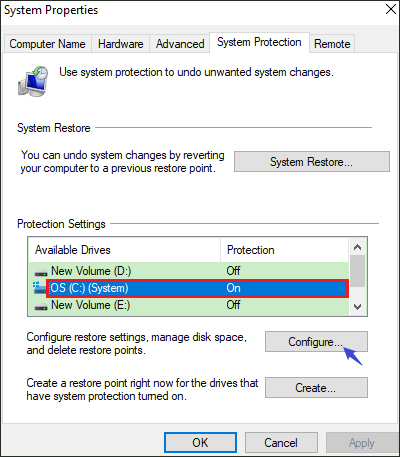
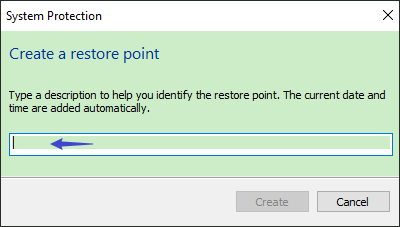
Step 3: Go back to the System Protection menu. Next, click the Create button and then type a description to help you recognize the restore point. Then tap on Create and wait a while until it is created successfully. After that, click Close.
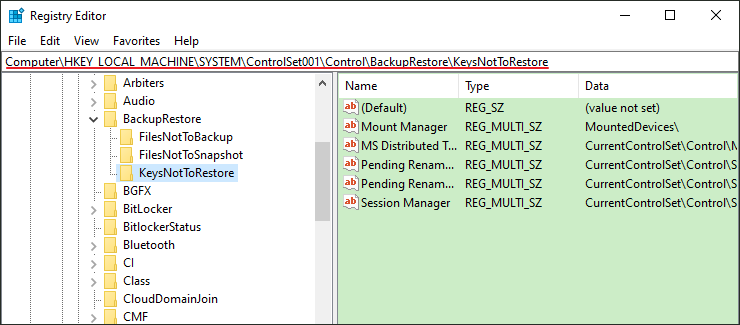
Note: Most of the Registry keys are backed up after creating a system restore point. The rest of the keys are here: HKEY_LOCAL_MACHINE\System\ControlSet001\Control\BackupRestore\KeysNotToRestore. If needed, you can launch Registry, navigate to this path and back it up.
Part 3: How to Restore the Windows System Registry Easily
Restoring the Registry from a backup or a restore point all can help you undo registry changes, even on an unbootable computer. But you’d better make a backup of all files on your drive in case of serious damage.
Way 1. Restore the Windows Registry from a Backup
Step 1: After opening Registry Editor, go to File > Import. Select the exported REG file (ensure it’s the right one) and tap on Open.
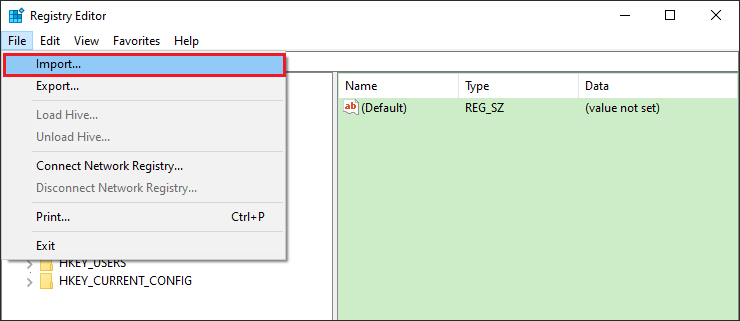
Step 2: Once importing is completed, navigate to the path in Registry and confirm whether it is restored. If not, restart the computer.
Way 2. Restore the Windows Registry from a Restore Point
Step 1: Type Create a restore point in the Windows Search. Then open it and go to System Protection > System Restore.
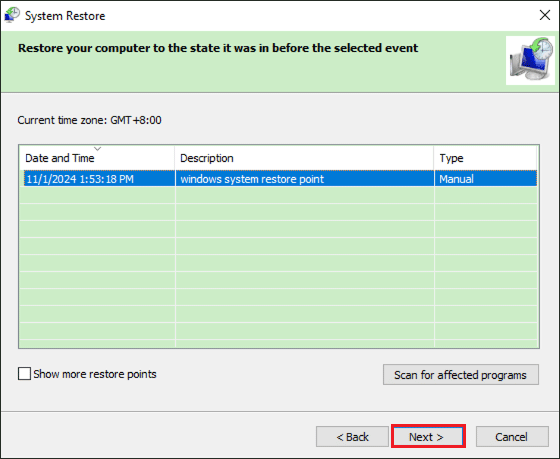
Step 2: Click the Next button and choose the restore point that includes the Registry backup. After that, continue to tap on Next and follow the onscreen instructions to restore to the previous state.
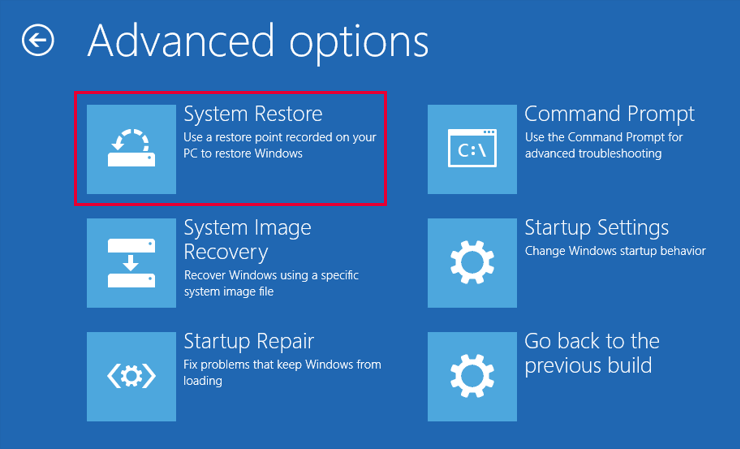
Step 3: If you can’t start the computer after changing values in Registry, at that time you need to enter WinRE by pressing F9/F11/F12 when boot logo displays on the screen. Then click Troubleshoot > Advanced options > System Restore. Next, follow the wizards to perform a system restore.
