How to Recover Deleted Files from Recycle Bin after Empty
On Windows operating system, if you simply delete a file by right-clicking and selecting "Delete", the file will be removed to Recycle Bin, a temporary storage space set apart in the Windows storage drive. And if later you need to recover deleted files, go to Recycle Bin and right-click the files you want, and select Restore. Before clicking Restore, remember to check the original location of the deleted files so that you can find them after restoring.
But what if you deleted files from Recycle Bin, or emptied Recycle Bin due to insufficient storage? Is there any way to recover deleted files from Recycle Bin after empty on Windows 10? Yes, and this article is going to represent you the process.
Recover Deleted Files from Recycle Bin on Windows 10
Step 1: Download and install Cocosenor DataTuner on your Windows 10 computer. Launch it after successful installation.
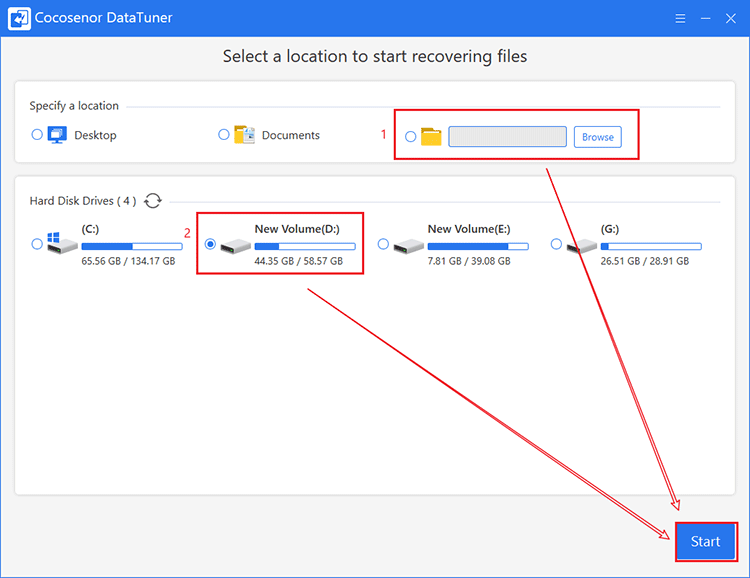
Step 2: Select a location to start scanning.
On the Home page of Cocosenor DataTuner, choose a location or hard disk drive for it to scan.
You can try to specify the location to which the deleted files were originally stored on Windows 10.
If you can’t remember the exact folder, try to recollect the original disk drive where the file(s) or folder(s) were stored and choose the drive. For instance, if you long for restoring a file from Recycle Bin which was originally from D drive, or a folder of D drive, you can choose to scan D drive.
Click Start to start scanning.
Step 3: Select files that need to be restored.
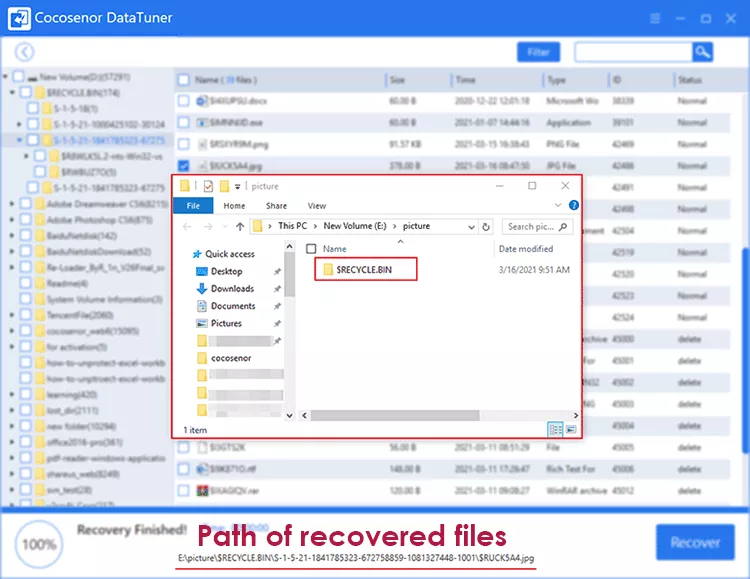
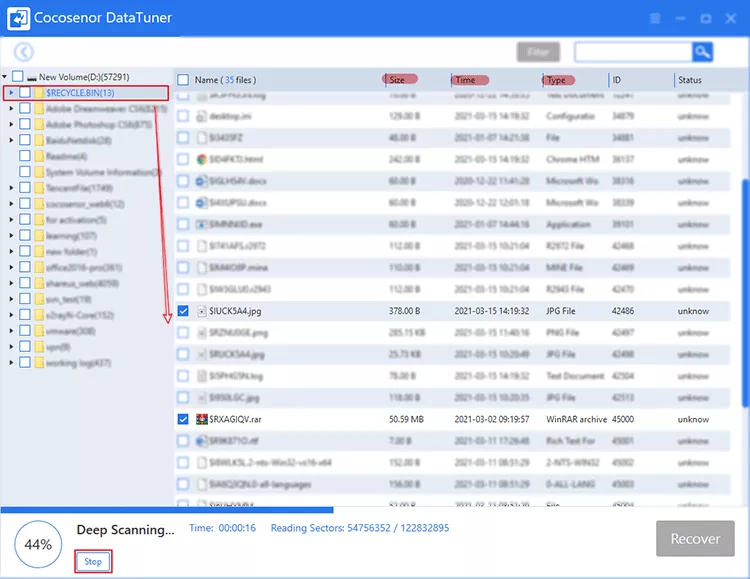
During scanning, the folders on the drive being scanned will be listed on the left pane. Double-click the folder named “$Recycle.Bin”, the files below this directory will show up on the right pane. You can look for your lost files from Recycle Bin here. If you find it, click Stop on the left bottom corner to stop scanning so that you don’t have to wait such a long time.
Tip: Some of the listed files will be named differently from the original ones. You have to identify them through size, deleted time and type of files.
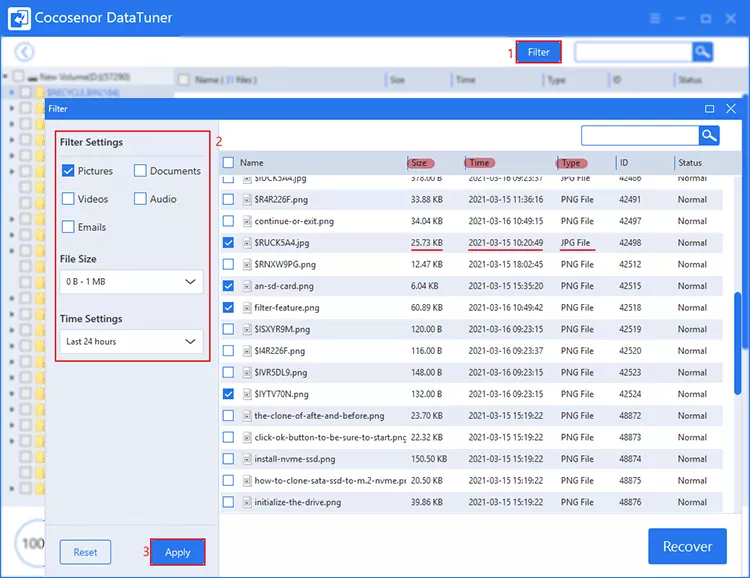
Most time, there will be a bunch of files listed on the right pane when scanning is over. So, it’s not that easy to find the file(s) or folder(s). That’s why we need Filter feature.
Finish the Filter Settings including File Type, File Size and Time Settings. The more information you can provide to the software, the easier you can find the file. Then click Apply. Figure out if the files on the right pane are the ones that need to be restored via information like Size, Time and Type.
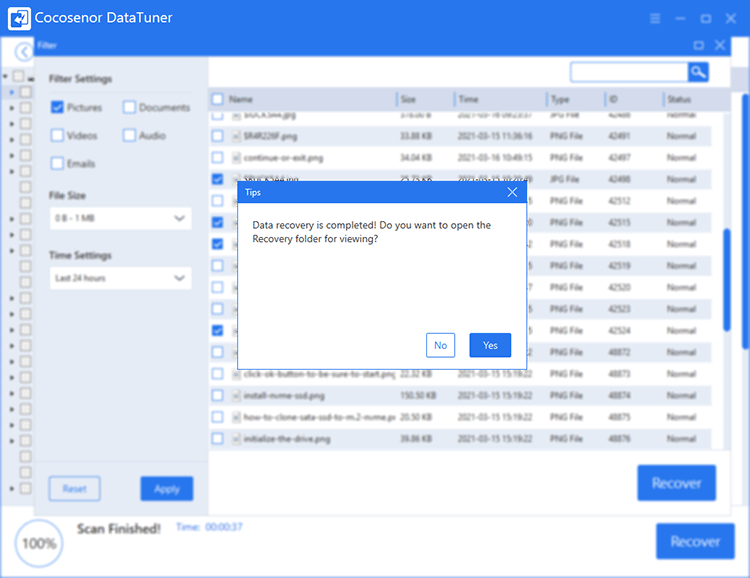
Step 4: Recover deleted files from Recycle Bin.
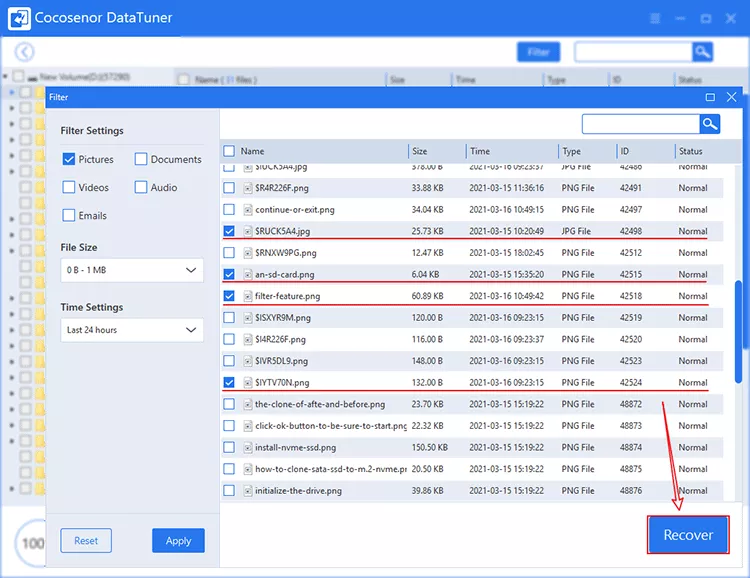
After selection, click Recover to recover deleted files from Recycle Bin.
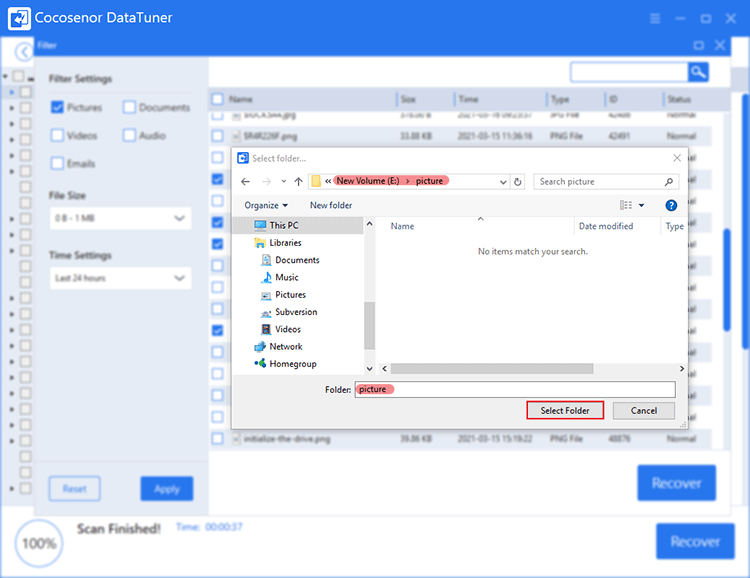
Choose a safe place to recover files and note that you can’t choose the original location, in this case it is D drive. Save recovered files to folders somewhere else except D drive.
After recovering, choose to stay on this page to check if there is anything left or exit the software to end recovery. The recovered files will be saved in a folder named “Recycle Bin” created by software under the folder you chose just now.