3 easy ways to activate/hidden built-in Administrator account in Windows 7
In Windows 7, a built-in administrator account with blank password is created by default, and the administrator account name is call "Administrator".

A built-in administrator account without password and has lot more administrator privileges than a regular account, can help you to troubleshoot problems, also may put you into security risk. So, the built-in administrator account is disabled by default in all clean installations and upgrades of Windows 7. If you indeed need the built-in administrator to troubleshoot a specific problem, you can enable it with the following methods. But keep in mind, if you don't need it any more, disable and hidden it.
The methods below to enable default administrator account in Windows 7 are based on the case that you have logged into system with and regular account that has administrator privilege.
If you are locked out of Windows 7 computer, or you can't boot into system normally, go and see how to enable Administrator account in Windows 7 without logging in.
- Activate/hidden built-in Administrator account in Windows 7:
- Way 1: Activate Administrator account in Windows 7 using cmd
- Way 2: Enable from Local Users and Groups
- Way 3: Enable from Local Security Policy
- Disable the built-in administrator account in Windows 7
Way 1: Activate Administrator account in Windows 7 using cmd
The easiest way to activate default administrator account in Windows 7:
1. Click on Start, on the search bar type in: command prompt. On the search result right click on Command Prompt, and then select "Run as administrator".
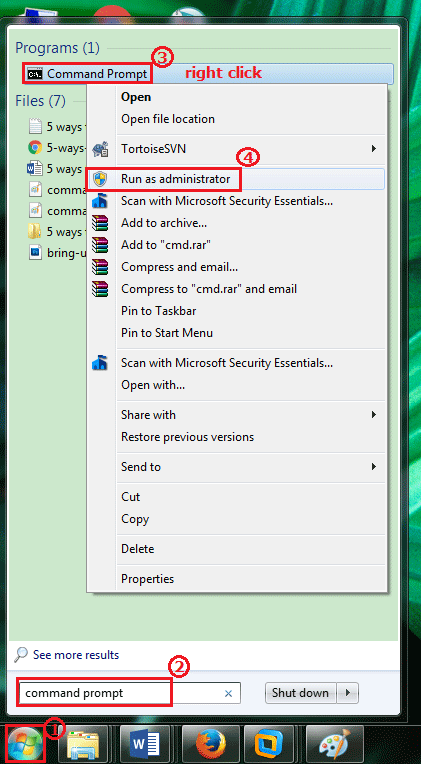
2. On Command Prompt window type in the command:
net user administrator /active:yes
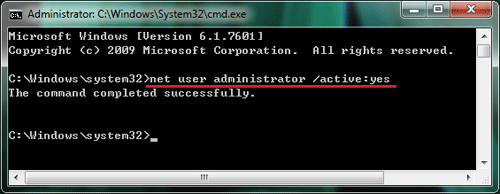
3. Log out of system, and you will see the Administrator account is on the logon screen. Click on the Administrator account, you will login without password.

Way 2: Enable from Local Users and Groups
1. Right-click on Computer on desktop, select "Manage" to open Computer Management.
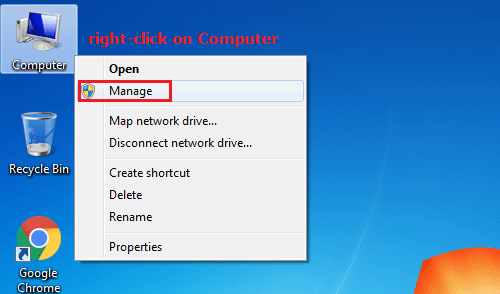
2. Expand Local Users and Groups, click on Users, and then double-click on Administrator.
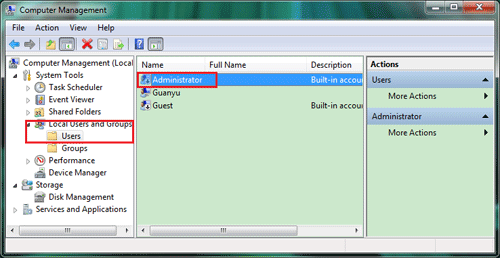
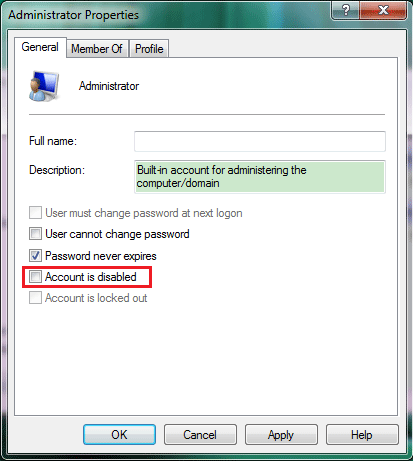
3. On the Administrator Properties, clear the check box next to "Account is disable", and then click on OK to enable the Administrator account.
Way 3: Enable from Local Security Policy
1. Press "Windows + R" to open Run. Type in: secpol.msc, and click on OK to open Local Security Policy.

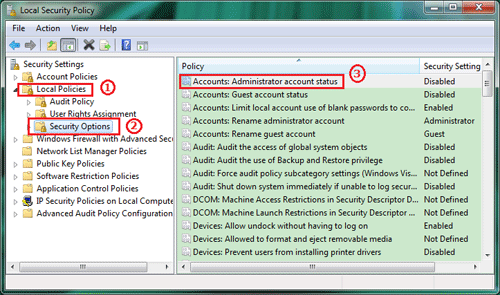
2. Locate Local Policies >> Security Options, and on the right site you will see this option "Accounts: Administrator account status", double click on it to open the Properties.
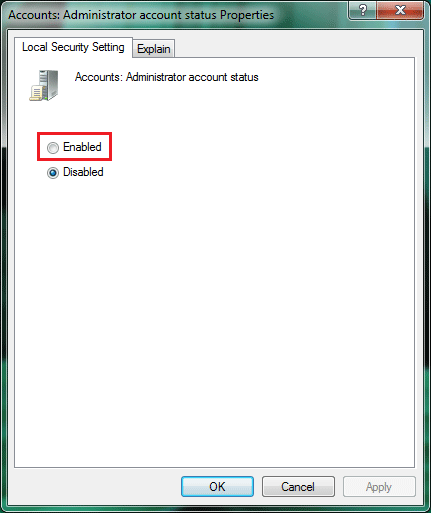
3. On the Local Security Setting tab, select "Enable" and click on OK.
Disable the built-in administrator account in Windows 7
You can select the opposite option on way 2 and way 3 to disable the default built-in administrator account, or disable it on command line.
1. Open Command Prompt as administrator.
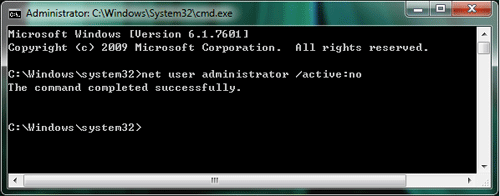
2. Use the command on below to disable the administrator account:
net user administrator /active:no
