
Fix the Video Error -- Cannot Play Video Codec Not Supported
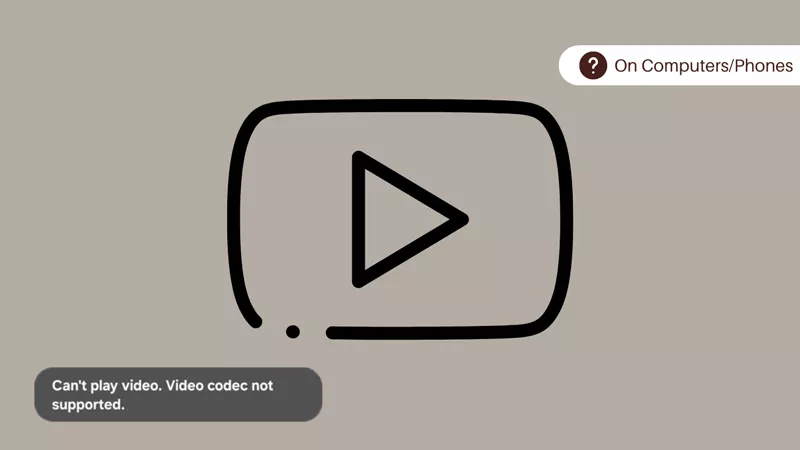
If you’ve ever tried to open a video and received the “Video Codec Not Supported” error, you know how frustrating it can be. This error typically occurs when the unplayable video file is encoded with a codec that your media player doesn’t recognize or support. Fortunately, there are several ways that can help you fix it. Just read this article and then you can get back to enjoying your videos.
- Contents:
- Method 1: Open the Video with Another Media Player
- Method 2: Download and Install the Missing Video Codec
- Method 3: Convert the Video File to a Supported Format
- Method 4: Check and Update the Media Player Version
- Method 5: Use File Repair Tuner to Fix the Video Error
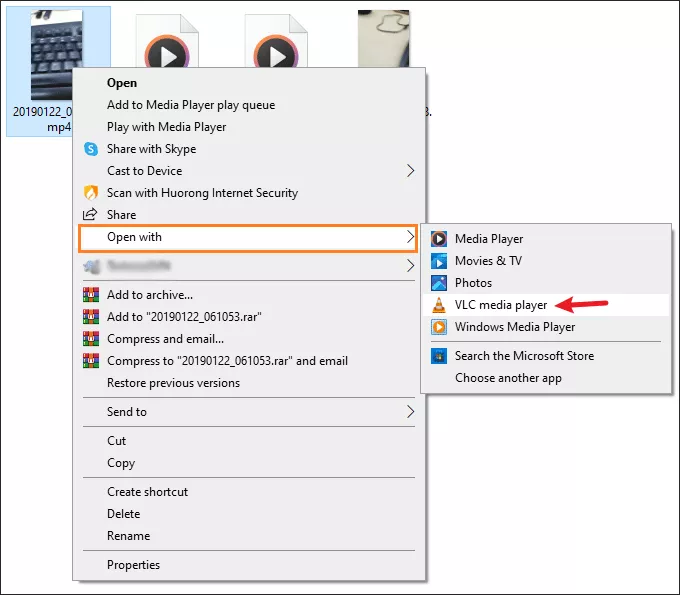
Method 1: Open the Video with Another Media Player
If your media player lacks support for certain video codecs, the “Video Codec Not Supported” error can appear on your computer’s screen. Switching to a more frequently used media player with broader codec support is an easy fix.
Step 1: Maybe the default media player restricts the video playback, so download an alternative media player like VLC Media Player.
Step 2: After installing the program, right-click the video file and choose Open with. Then choose VLC media player.
Method 2: Download and Install the Missing Video Codec
The video file error may be caused by a missing codec that your media player needs to decode the video file. Installing a codec pack can resolve this by providing the necessary codecs.
Step 1: If you don’t know which codec is missing, download K-Lite Code Pack which contains all codecs.
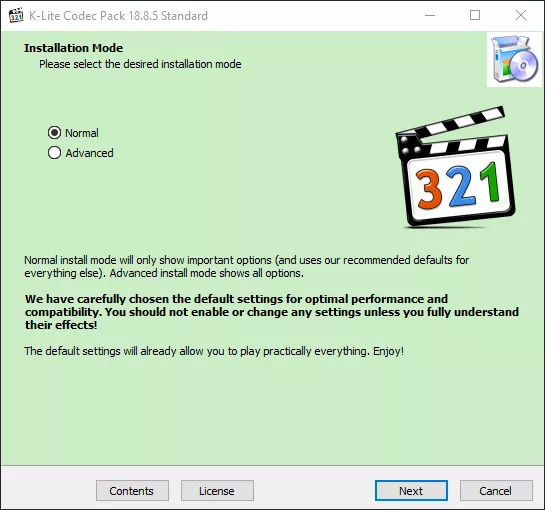
Step 2: After downloading it, reopen your media player and see if the “video codec not supported” error still shows up.
Method 3: Convert the Video File to a Supported Format
If the media player still can’t play the video, convert it to a more widely supported format like MP4, MOV or AVI. Video converters are easy to use and can ensure the video is compatible with most media players.
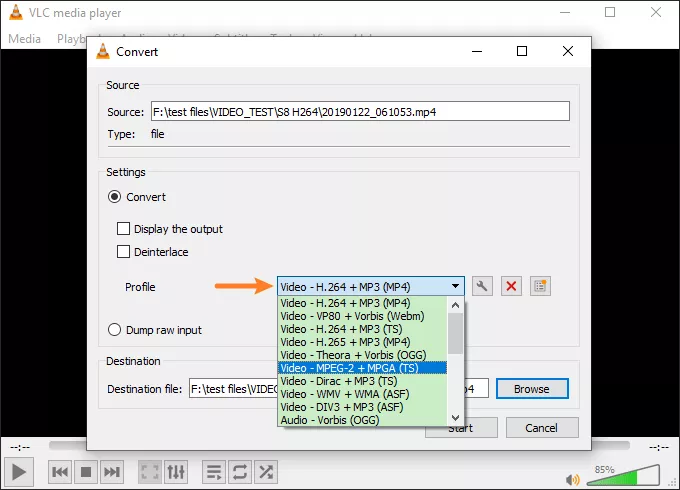
Step 1: Download the video conversion app VLC Media Player. Then open it and click Media > select Convert/Save.
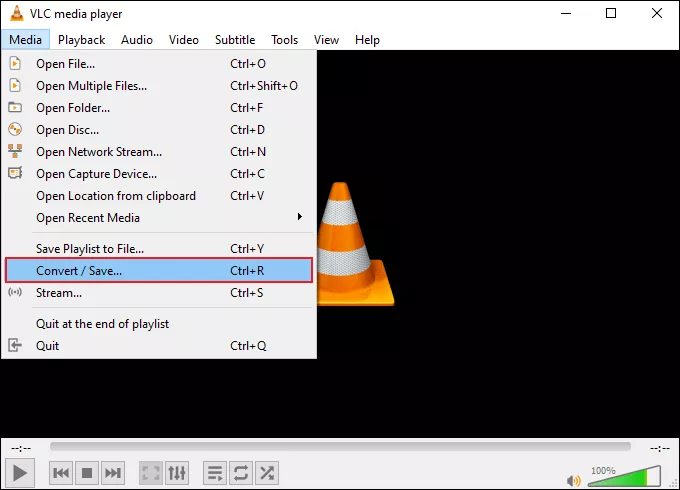
Step 2: Click on +Add > Choose the video file. After that, hit Convert/Save at the bottom.
Step 3: Choose a common video format. Next, tap on Browse and find a destination to export the file. Then hit the Start button.
Method 4: Check and Update the Media Player Version
The fourth way is to check whether you are using an outdated media player version, which might lack support for newer codecs. Keeping your media player up to date ensures compatibility with the latest codecs and bug fixes.
Step 1: Open Microsoft Store > Click Downloads (or Library) in the sidebar.
Step 2: Tap on Check for updates. If the Windows Media Player update is available, it will automatically install the latest version.

Method 5: Use File Repair Tuner to Fix the Video Error
Sometimes, the problem might not be the codec, but a corrupted video file. When files are damaged, they can trigger codec errors. A tool like Cocosenor File Repair Tuner can fix damaged video files, helping to resolve this error.
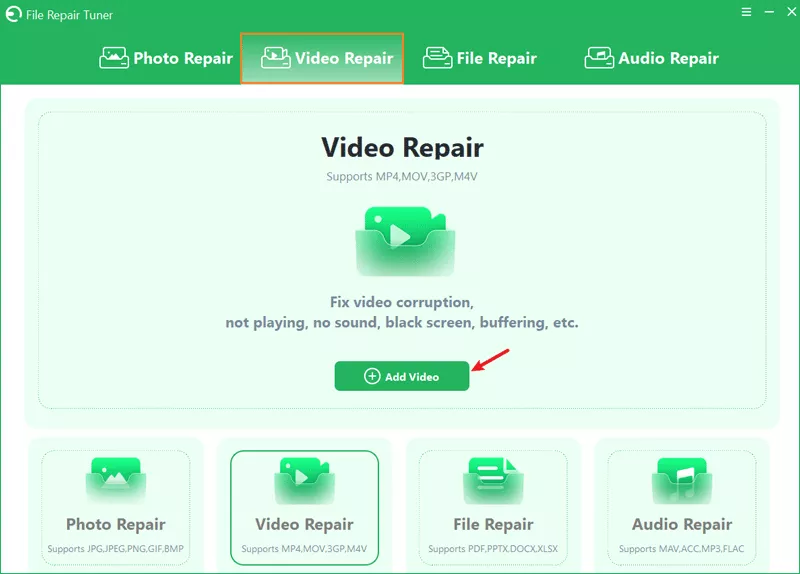
Step 1: Download and install the software on your Windows PC. Then open the video file repair tool and choose Video Repair.
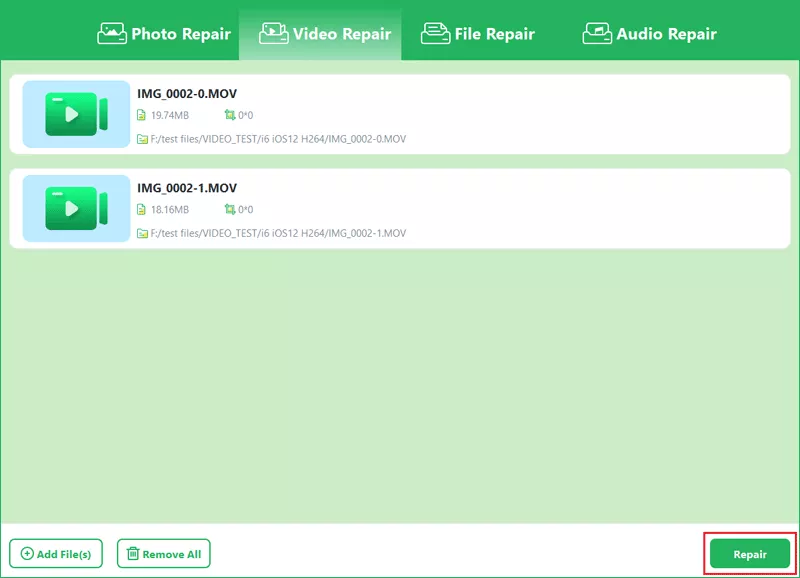
Step 2: Click on Add Video. Find and select all the unplayable video files.
Step 3: After adding the files, tap on the Repair button.
Step 4: When “Repair Completed” appears on the screen, click OK and then Save.
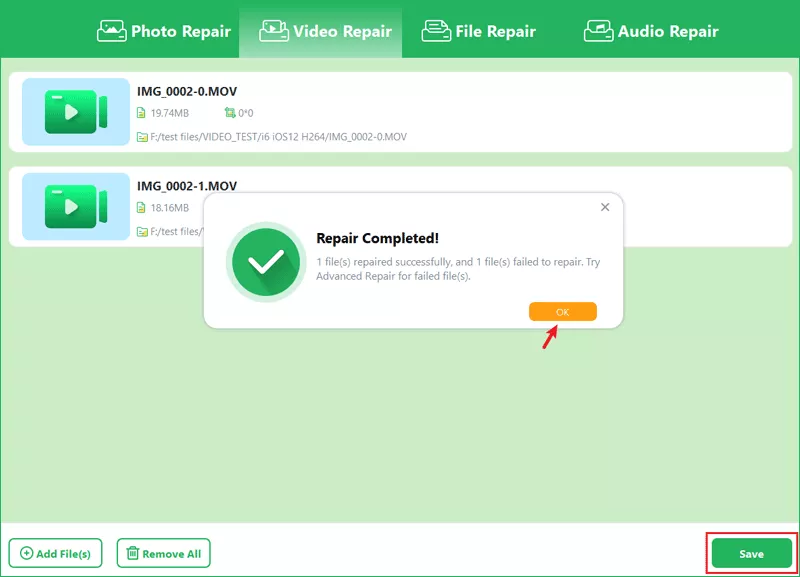
Step 5: You can preview the repaired video before saving it. If the error can’t be fixed, choose Advanced Repair next to the Save option.
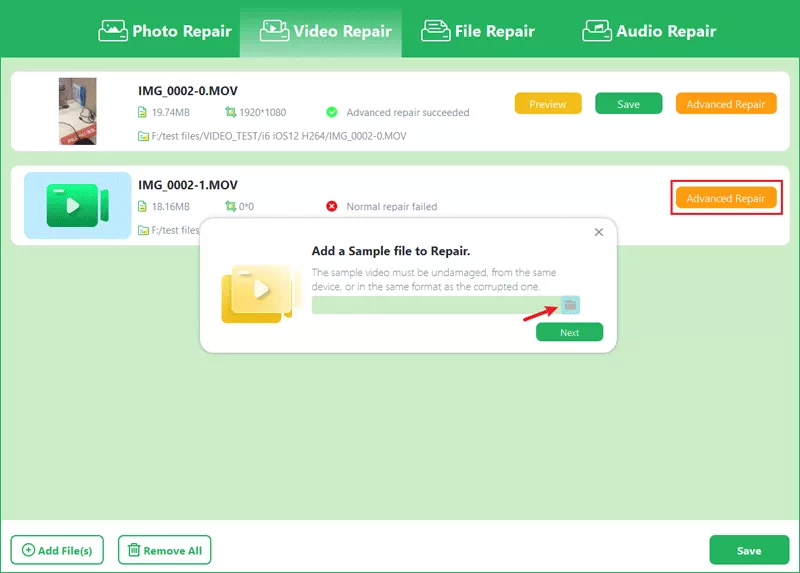
Step 6: Add an undamaged sample file from the same device. After that, hit Next and choose one repair mode.