How to Turn Off One More Minute on Screen Time iOS 17/18

It is common for parents to turn on Screen Time on their kids’ iPhone, and even set a passcode to lock the Screen Time settings. But the child always wants to get rid of the control and extends more time to play games or use social apps. So, he taps on One More Minute option when reaching the time limit. Then it has a chance to bypass the Screen Time restrictions without passcode. If you also encounter this question, read the guide to fully turn off One More Minute.
- Contents:
- Part 1: What Is One More Minute on Screen Time
- Part 2: How to Disable One More Minute on the Limited App (3 Detailed Ways)
- Part 3: How to Turn Off the Screen Time Feature Without Passcode
Part 1: What Is One More Minute on Screen Time
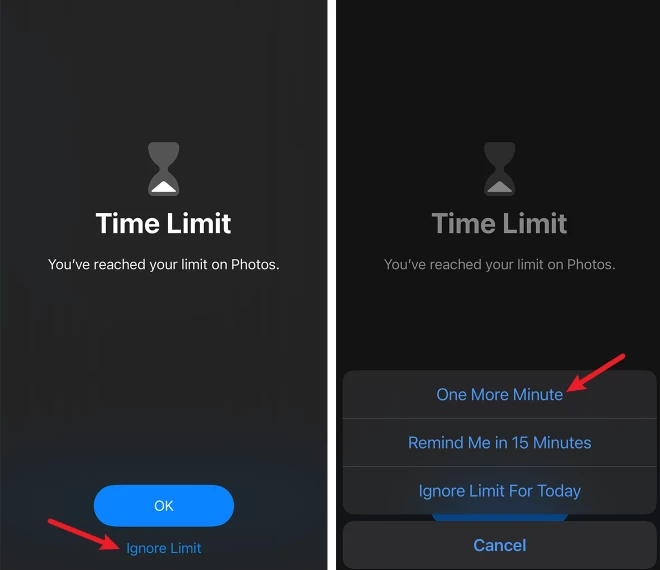
Screen Time is useful to help us or children develop healthy habits by managing the usage of iPhone/iPad. And Apple provides the One More Minute option on the restricted app. It means you can use the app one more minute when it is up to a limit. During the 60 seconds, try to end a game, save some data, leave a message or log out of the account. However, there is also a bug on One More Minute. Maybe someone can keep clicking the option without entering Screen Time passcode and then get extra time.
Part 2: How to Disable One More Minute on the Limited App (3 Ways)
There is no button to directly disable One More Minute, but the other features on Screen Time can help you fix this issue.
Way 1: Change Your Child’s Age Below 13
When using Family Sharing to create an Apple ID for the child, you can’t choose the real birthday for those who are 13 or older. Otherwise, the One More Minute will appear after using the Apple ID to lock Screen Time. Thus, try to set the birth date below 13 on the Apple website or create a new account and select another age.
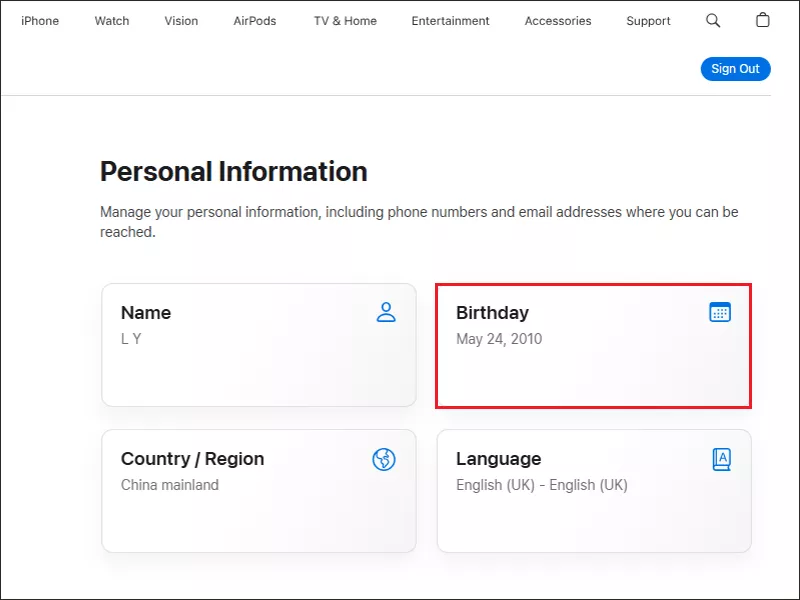
Step 1: Sign into account.apple.com and then click Personal Information on the sidebar.
Step 2: Tap on Birthday and change the data. After that, send an email request to the family organizer.
Step 3: The organizer will receive an email with instructions to approve the request.
Way 2: Turn on Downtime on Screen Time
Activating the Downtime feature can restrict the unallowed apps and then reduce the use of iPhone during the downtime although it can't block One More Minute. Just go to Settings and set up a downtime on Screen Time.
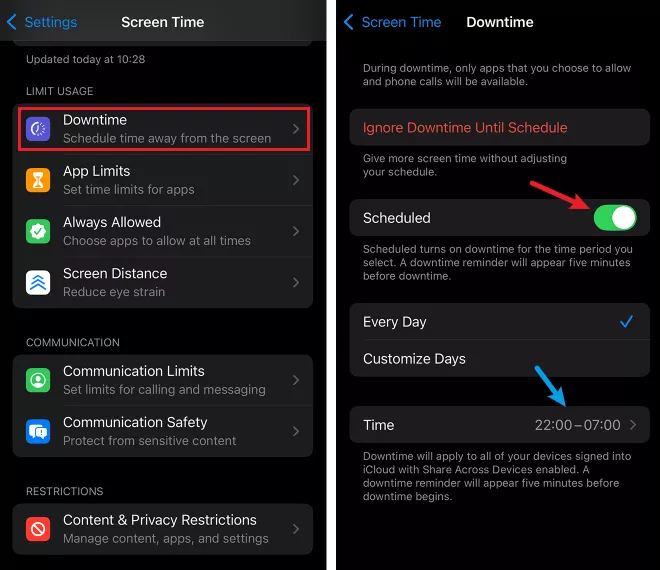
Step 1: Launch Settings and select Screen Time.
Step 2: Click on Always Allowed. Next, choose the allowed calls and apps at all times.
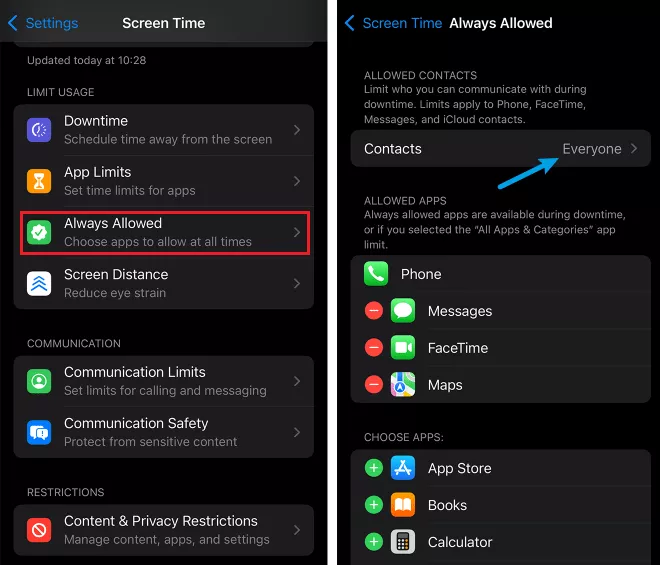
Step 3: Go back and select Downtime. Then turn on the feature.
Step 4: Choose Every Day or Customize Days. After that, select the start and end times (such as from 8 PM to 7 AM).
Notes: After the downtime begins as scheduled, only phone calls, Messages and several apps can be used.
Way 3: Set Time Limits for Individual Apps
Each app can be limited to 12 hours on Screen Time, just choosing its App Limits option. After you enable the feature, the One More Minute issue can be fixed quickly.
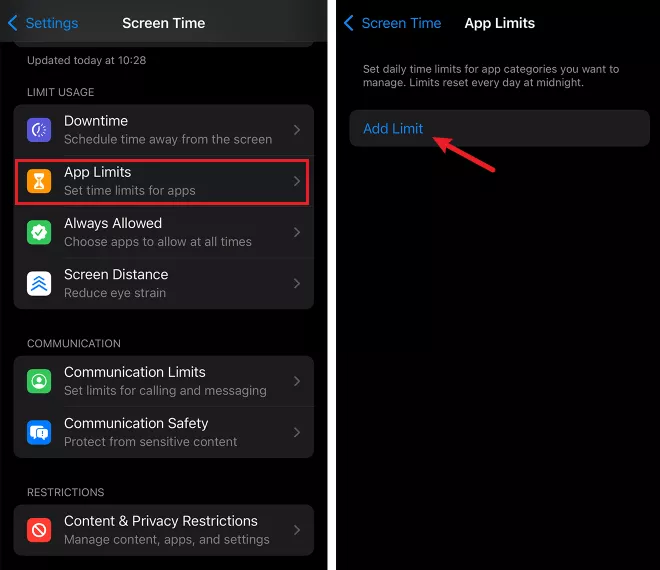
Step 1: Open Settings > Select Screen Time > Click App Limits. Hit the Add Limit button.
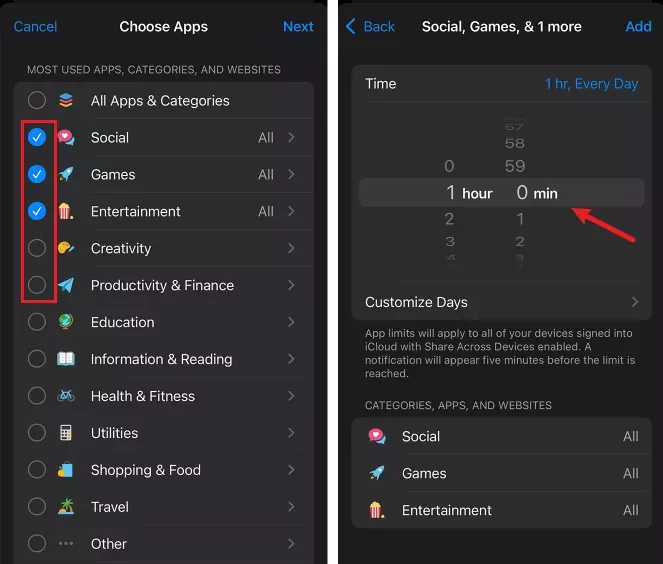
Step 2: Select one or more app categories (or choose one app in the category). Then tap on Next.
Step 3: Set the time allowed to use. And click the Add button.
Part 3: How to Turn Off the Screen Time Feature Without Passcode
If you forget Screen Time passcode one day, you can find the “Forgot Passcode” button to unlock it using Apple ID. Alternatively, download some powerful unlocking software and use it to remove the lock.
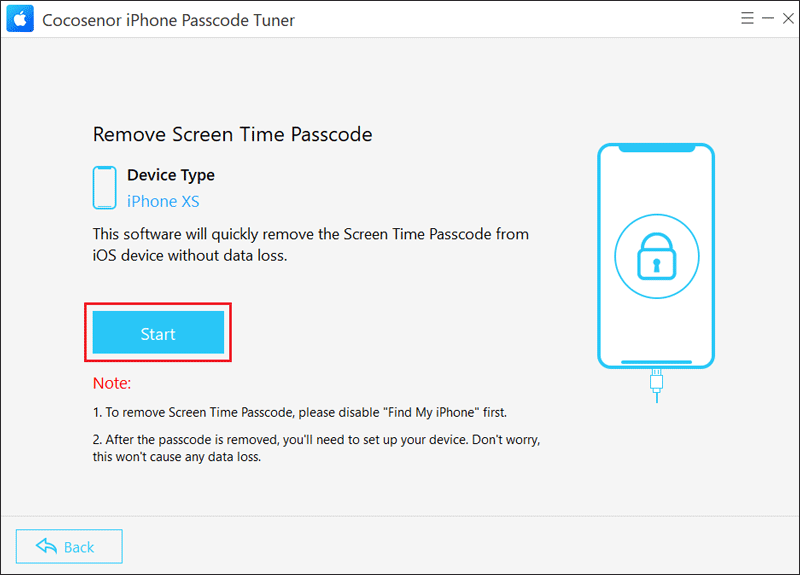
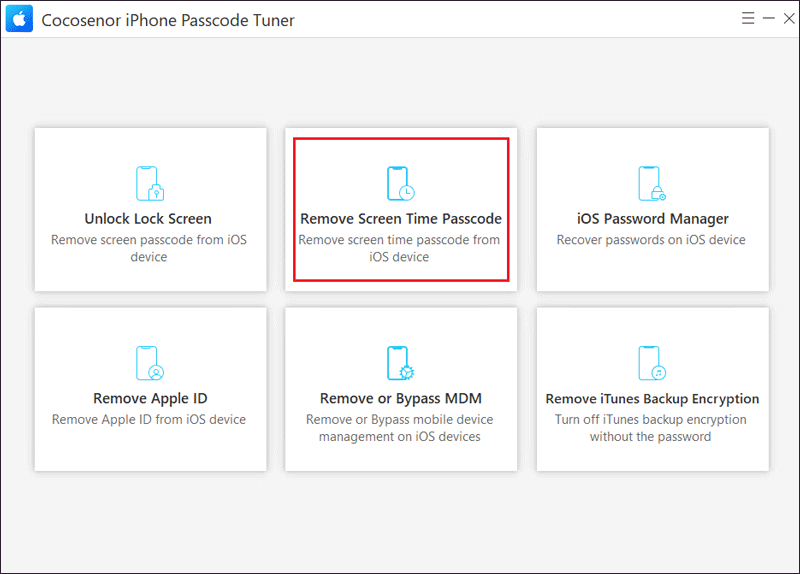
Step 1: Download and install Cocosenor iPhone Passcode Tuner on your computer. Then open the program and choose Remove Screen Time Passcode.
Step 2: Connect the iPhone to the PC via a USB cable. After that, check whether Find My iPhone is disabled (Settings > the Apple ID name > Find My).
Step 3: Click the Start button. After a while, it will be unlocked without data loss.