
Create a Bootable USB Recovery Drive for Surface
When the Windows on your Surface don't start, or the built-in recovery info has been removed from your Surface, you can use your USB recovery drive to access the recovery tool and solve problems. Especially reset your Surface to factory settings with the USB recovery drive.
- Two ways to create USB recovery drive for your Surface:
- Way 1: Create a bootable USB drive with recovery image
- Way 2: Create a USB recovery drive on your Surface
Way 1: Create a bootable USB drive with recovery image
If you can't get the recovery tools on your Surface, and haven't created a recovery drive from your Surface before, download the Surface image files from Microsoft Surface official site, create a bootable USB recovery drive for your Surface to solve problems.
Tips:
To create a bootable USB recovery drive for your Surface, an external USB with available storage is needed. For Surface RT, and Surface 2, the USB should be at least 8 GB. For Surface 3, and Surface Pro 1/2/3/4, the USB should be at least 16 GB in size.
Step 1: Download a recovery image for your Surface.
1. Get into a PC that is accessible to the internet.
2. Open the web site: download recovery image for Surface, and sign in with your Microsoft account.
Tips: If you don't sign in with a Microsoft account, you won't see the download dialog.
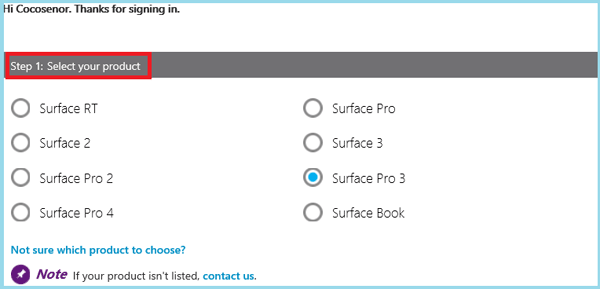
3. Click on Step 1: Select your product, and then the Surface models will be showed for you. Select your Surface model and it will jump to the next dialog.
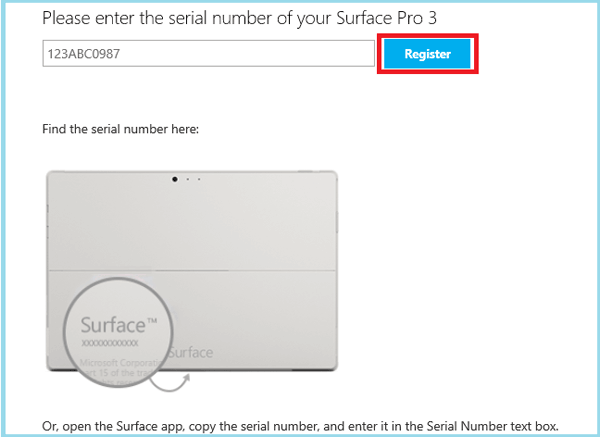
4. Enter the serial number of your Surface, and click on "Register".
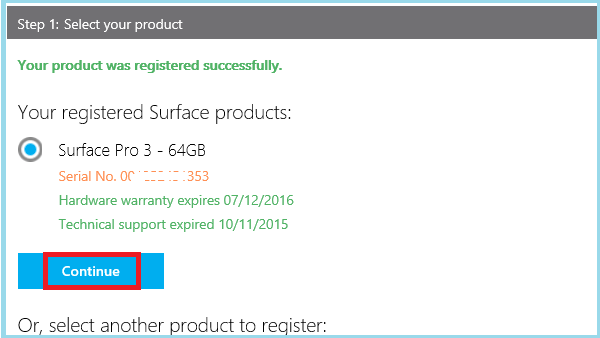
5. When registered successfully, click on "Continue".
6. Click on "Download" button and begin to download recovery image for your Surface.
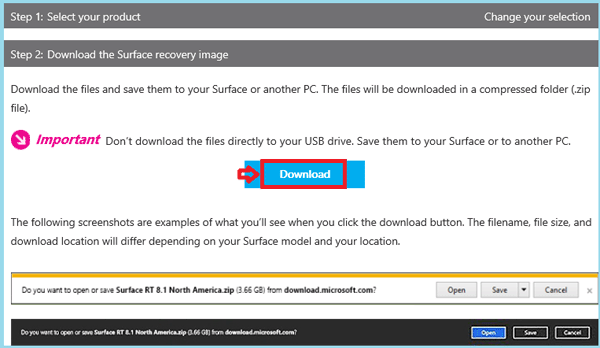
Tips: Don't download the files directory to your USB drive, save them to the PC device. It will take you about 3 hours to download the recovery image file, make sure you have enough time, and wait for it patiently.
Step 2: Format the USB drive to FAT32 prior.
While waiting for the downloading, you can formatted your USB drive to FAT32 prior.
1. Insert the USB drive into the PC.
2. Open File Explorer, right-click on the USB drive, and select "Format".
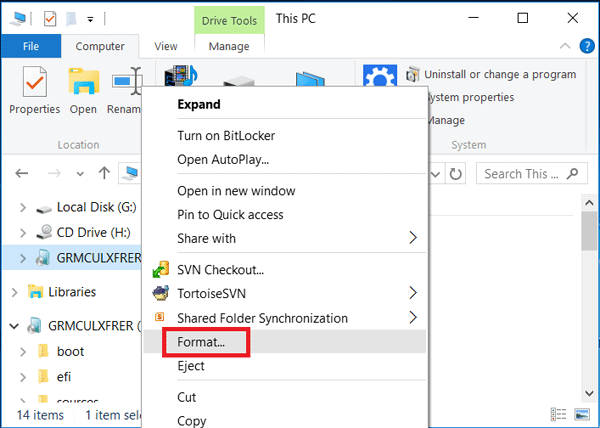
3. Under File System, select "FAT32", and then click on "Start".

Tips:
Your USB will be formatted, and everything on it will be erased. Make sure no important data on it, if have, move it to other place.
Step 3: Create a USB recovery drive for your Surface.
1. When your Surface recovery image is downloaded, copy it to the USB drive that has been format to FAT32 prior.
2. Double click on the recovery image zip file, and decompress the recovery image on the USB drive.
Step 4: Use the USB recovery drive to boot and reset your Surface.
With the USB recovery drive created for your Surface, you can reset your Surface to factory settings when you get problems on it. For more info to reset your Surface, see How to reset Surface tablet with a USB flash drive.
Way 2: Create a USB recovery drive on your Surface
You can create a USB recovery drive on your Surface, if there is nothing wrong on your Surface, and the recovery partition hasn't been removed from your Surface.
Step 1: Open your Surface, and login to Windows.
Step 2: Prepare a USB drive that has available storage, and insert it into the USB port on your Surface.
Step 3: Format the USB drive to FAT32 prior.
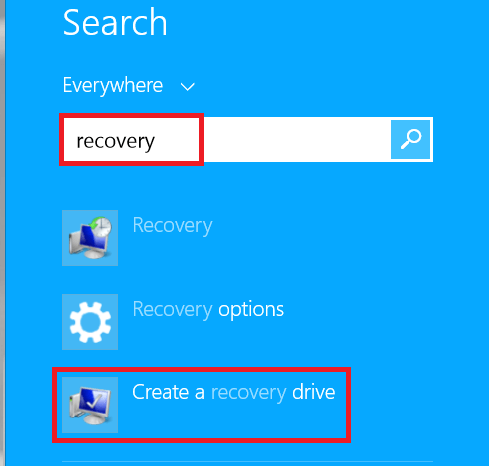
Step 4: Swipe in from the right side of your Surface screen, tap on "Search". On the search box enter: recovery. Select "Create a recovery drive".
Step 5: When the User Account Control dialog pops up, tap on "Yes" to continue.
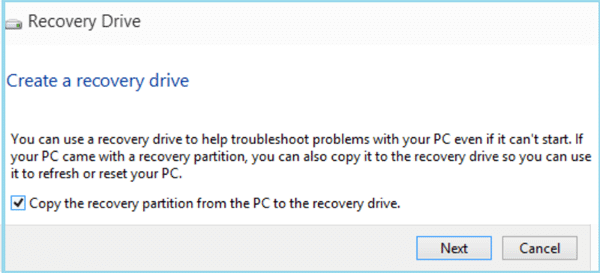
Step 6: Select "Copy the recovery partition from the PC to the recovery drive", and tap on "Next".
Step 7: Select your USB drive, indicate whether there is enough space available on your USB. If yes, tap on "Next" to continue.
Step 8: Tap on "Create" button.
The recovery image and recovery tools will be copy to the USB drive. Make sure your Surface is stay awake during the copy progress that will take about 15 minutes.
Step 9: After the recovery tools are copied to your USB drive, you can: Select "Delete the recovery partition" to remove the recovery tools from your Surface. Tap on "Finish" if want to keep the recovery info on your Surface.
Step 10: Unplug the USB drive from your Surface and keep it in a safe place.
You can use the USB recovery drive to start and restore your Surface when having problems.
You also can free up storage space for your Surface by deleting the recovery partition after the recovery image and recovery tools were moved to the USB drive.
But make sure to keep the USB drive to a safe place, and don't use it to store other data.