How to Create an Encrypted Container File with BitLocker on Windows

It’s easy to create an encrypted container file used to protect your important data. First, you need to create a virtual hard drive file and then initialize the disk drive in Disk Management. Second, use BitLocker to lock it on Windows, like other physical drives.
- How to Create an Encrypted Container File with BitLocker
- Part 1: How to Create a Virtual Hard Drive File in Disk Management
- Part 2: How to Encrypt the Disk Image with BitLocker in File Explorer
Part 1: How to Create a Virtual Hard Drive File in Disk Management
A virtual hard drive (VHD) is a file that acts like a physical hard drive. So it's undoubted that you can use the drive to store files within a secure environment. Here's how to create one on your computer.
Step 1: Open Disk Management
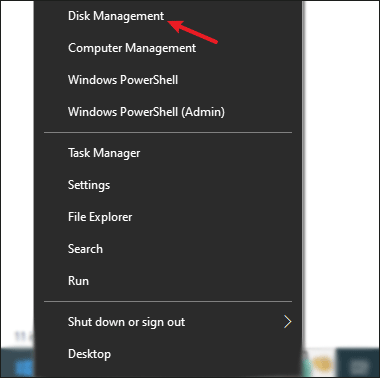
Press Windows + X together to open the Quick Access Menu. Then select Disk Management.
Step 2: Create a New VHD
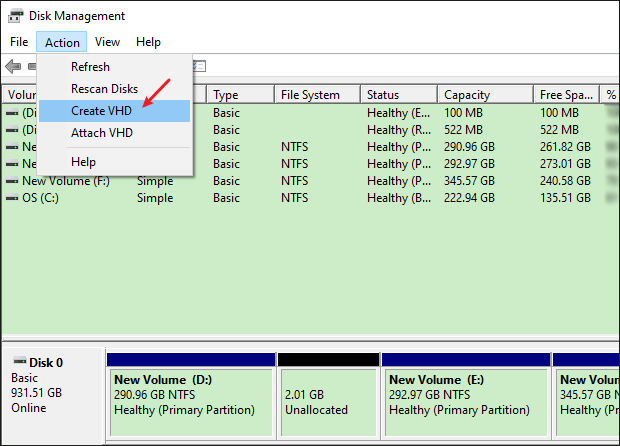
1. In the Disk Management window, click on Action in the top menu. Next, select Create VHD.
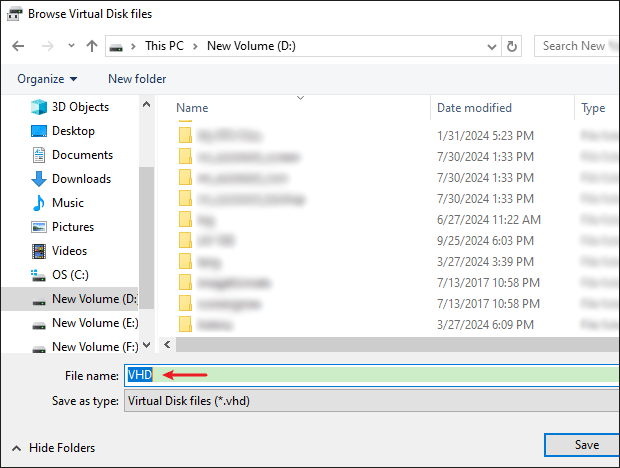
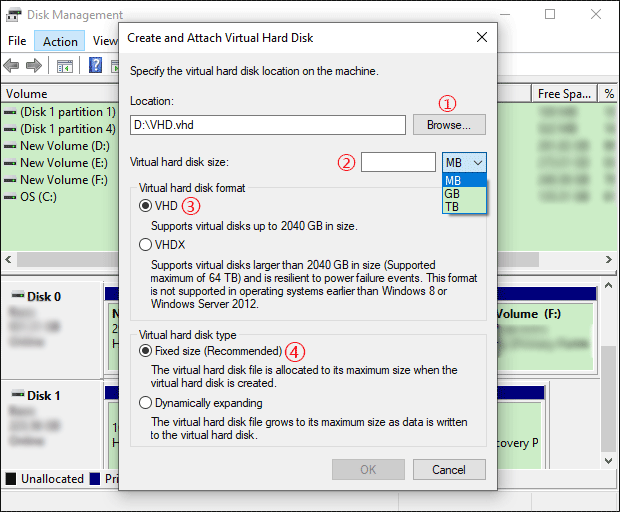
2. In the dialog box, Click Browse to choose where to save the VHD file. After that, name the file and tap on Save.
3. Choose the size of the VHD. Make sure it’s large enough to accommodate the files you plan to store.
4. Select the disk format VHD (up to 2040 GB in size) and the virtual disk type Fixed size. Click OK to create the VHD.
Step 3: Initialize the VHD
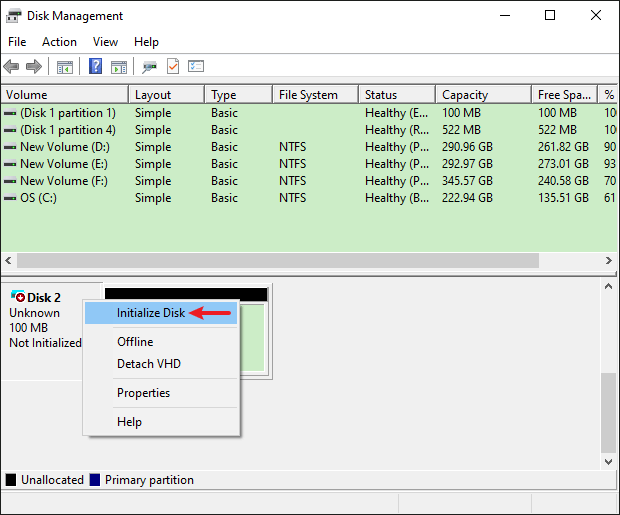
1. The VHD will appear as an uninitialized disk in the Disk Management. Right-click on the disk and select Initialize Disk.
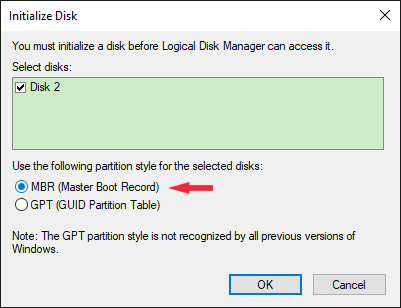
2. Choose either MBR (Master Boot Record) or GPT (GUID Partition Table) as the partition style and click OK. MBR style is compatible with all versions of Windows systems.
Step 4: Create a New Volume
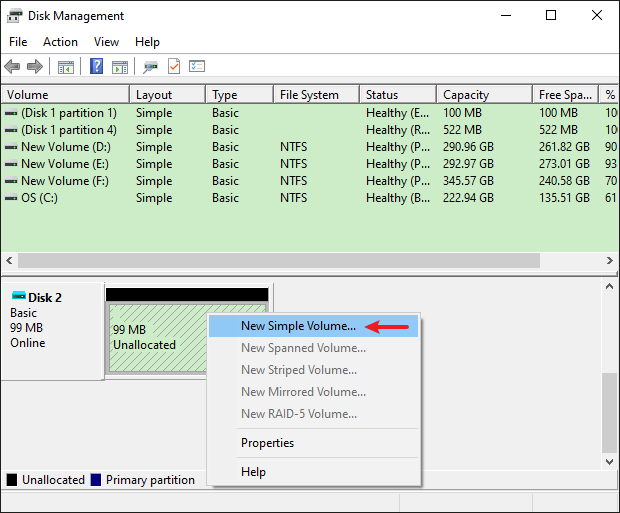
1. Right-click on the unallocated space of the initialized VHD and select New Simple Volume.
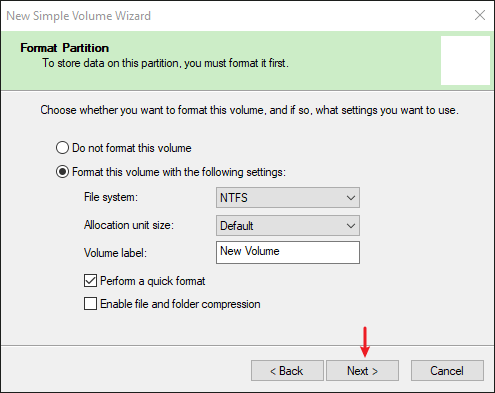
2. Click Next and choose a volume size. Then assign a drive letter and tap on Next. Finally, you must format this volume (choose NTFS) before using and click Next.
3. Click Finish to complete creating the volume.
Step 5: Mount the VHD
Once the volume is created, the VHD should be automatically mounted as a drive which can be accessed via File Explorer. If it is not mounted, attach the VHD manually by opening Disk Management > Action > Attach VHD > Browse > Choose VHD file > OK.
If you want to detach it from the disk list, you can right-click the drive in Disk Management and click Detach VHD.
Part 2: How to Encrypt the Disk Image with BitLocker in File Explorer
Once you have a VHD, keep data safe with BitLocker encryption. Now you can enable BitLocker and set a password to lock it.
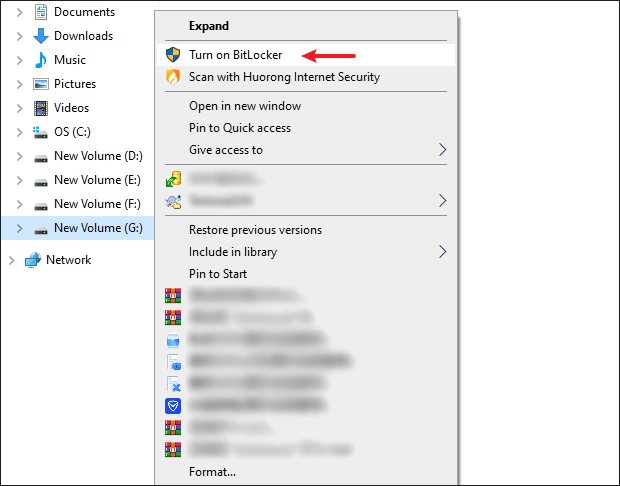
Step 1: Right-click the created VHD in File Explorer or This PC and select Turn on BitLocker.
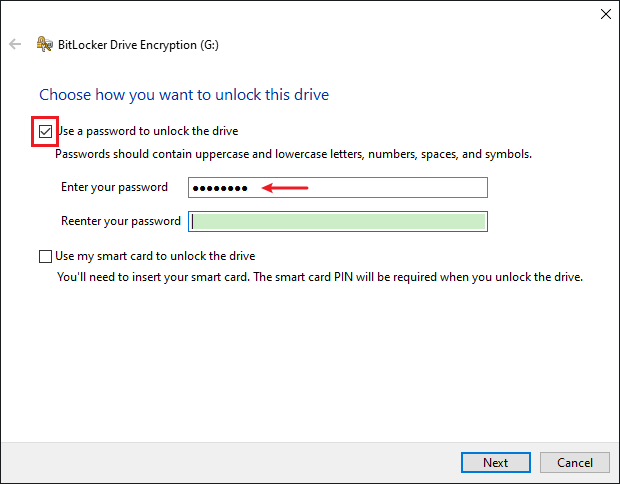
Step 2: Choose Use a password to unlock the drive. After that, enter an 8-digit password and click Next.
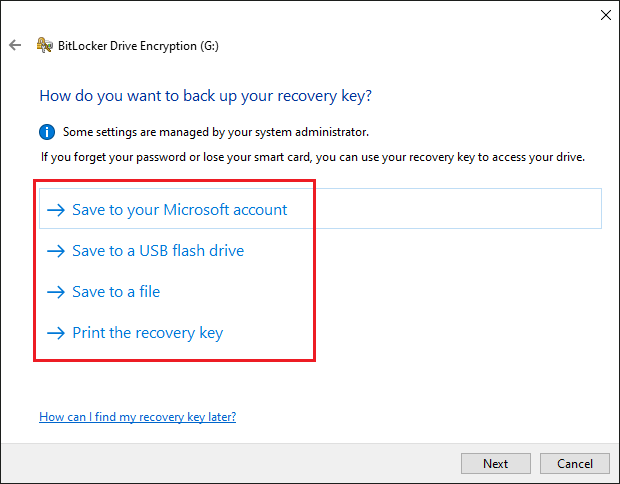
Step 3: Choose a location to save your recovery key in case you forget the password. After saving, tap on Next.
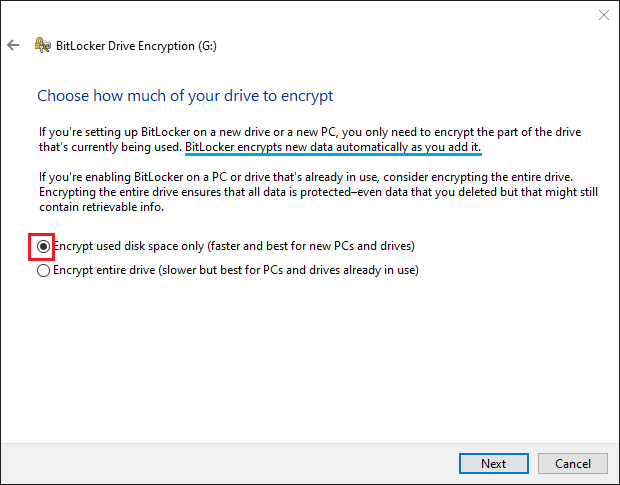
Step 4: Select Encrypt used disk space only. If you want to encrypt the entire disk space, you can choose another one. Then hit Next.
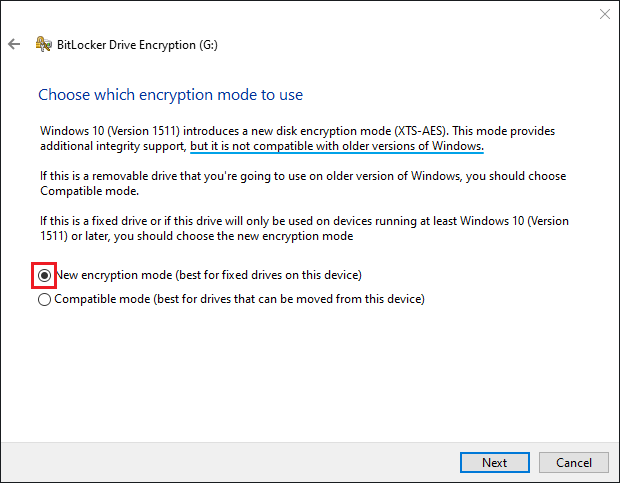
Step 5: Choose an encryption mode (New encryption mode or Compatible mode). And tap on Next.
Note: The encrypting process may take some time, depending on the size of the drive and the amount of data. You can continue using your computer during this time.
Conclusion
Once the encryption is completed, your virtual hard drive is a secure container for your files now. You can access it like any other drive on your system, but it will remain protected until you unlock it with BitLocker. If you want to lock or unlock the drive more easily, you can download Cocosenor BitLocker Tuner to manage BitLocker with a simple right-click.

