How to Fix the “Disk is Write Protected” Error on USB Drive
Encountering the “Disk is Write Protected” error on a USB drive can be frustrating, especially when you need to move, delete, or format files. This issue is common and can occur due to various reasons, such as physical locks and malware attacks. Fortunately, there are multiple methods you can try to resolve it. Here’s a step-by-step guide.
- Contents:
- Method 1: Check the Physical Lock on Your USB Drive
- Method 2: Edit the Registry to Disable Write Protection
- Method 3: Remove Write Protection via Command Prompt
- Method 4: Open Your Antivirus Software to Run a Scan
- Method 5: Format Write-protected Disk in Disk Management
Method 1: Check the Physical Lock on Your USB Drive
Some USB drives come with a physical switch that enables write protection. If this switch is enabled, you won’t be able to modify or delete files on the drive.
Now check whether there is a switch along the side of the USB drive, generally with a label like Lock or Write Protection. If there is one, you can slide the switch to Off or Unlock. Then reinsert the USB drive into your computer and check if the write protection error still appears.
Method 2: Edit the Registry to Disable Write Protection
Windows may block file modifications through a registry setting that enforces write protection. You can manually disable this setting via the Windows Registry Editor.
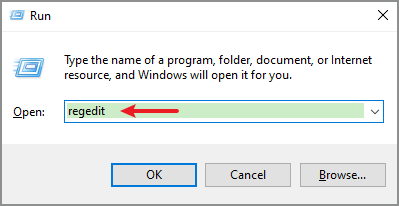
Step 1: Press Windows + R together to open the Run box. After that, type in regedit and click OK.
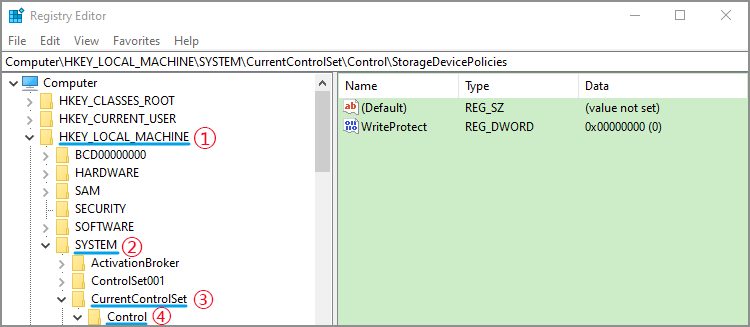
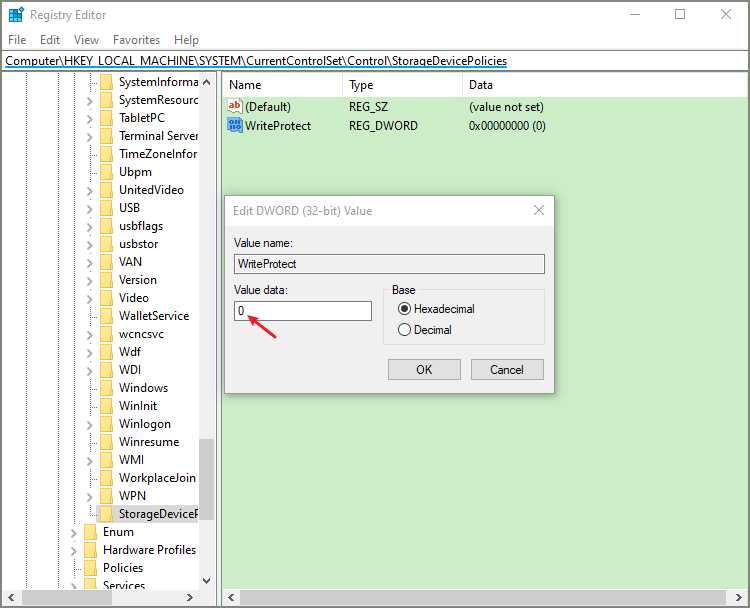
Step 2: After opening the Registry Editor, navigate to the location Computer\HKEY_LOCAL_MACHINE\SYSTEM\CurrentControlSet\Control\StorageDevicePolicies
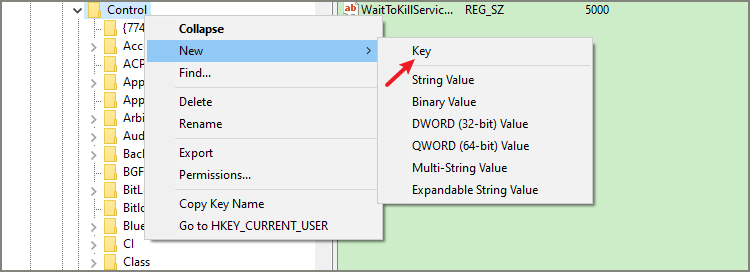
Note: If you can’t find StorageDevicePolicies, you need to create it manually. Right-click on Control, select New > Key, and name it StorageDevicePolicies.
Then right-click the blank space on the right panel and select New > DWORD (32-bit) Value. After that, rename the file as WriteProtect.
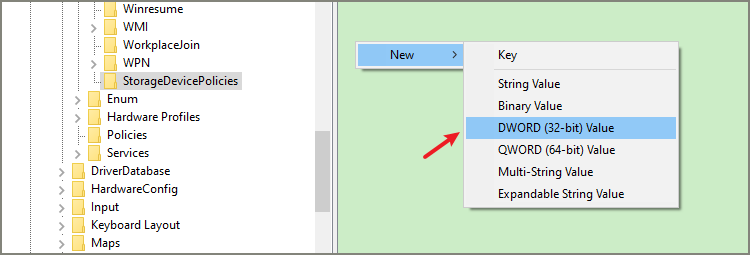
Step 3: On the right panel, double-click WriteProtect and change the value from 1 to 0. After making the changes, restart your computer and check if the issue is resolved.
Method 3: Remove Write Protection via Command Prompt
You can also remove write protection using the Windows Command Prompt and the diskpart utility.
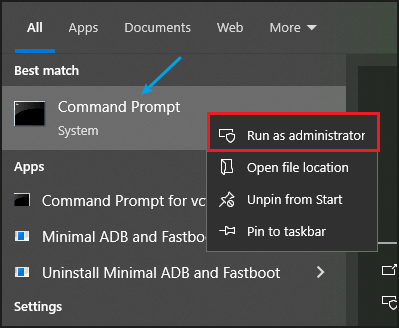
Step 1: In the Windows Search bar, type CMD. And then right-click Command Prompt and choose Run as administrator.
Step 2: Type diskpart to launch the disk partitioning tool and press Enter.

Step 3: In the command line, type list disk and press Enter.
Step 4: Type select disk # (replace # with your disk number). After that, press the Enter key.
Step 5: Next, type attributes disk clear readonly to disable write protection and press Enter.

Method 4: Open Your Antivirus Software to Run a Scan
In some cases, malware can cause the failure of file modification by enabling write protection. Running a thorough antivirus scan may help you get out of trouble.
You should update your antivirus software so that it can detect the latest threats. Then run a full system scan, including the USB drive. Remove detected threats and try accessing the drive again.
Method 5: Format Write-protected Disk in Disk Management
If none of the above methods work, formatting the USB drive may be the only option. However, this will erase all the data on the drive, so be sure to back up any important files if possible.
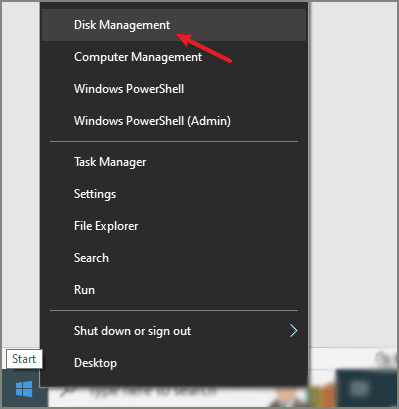
Step 1: Press Windows + X and select Disk Management from the menu.
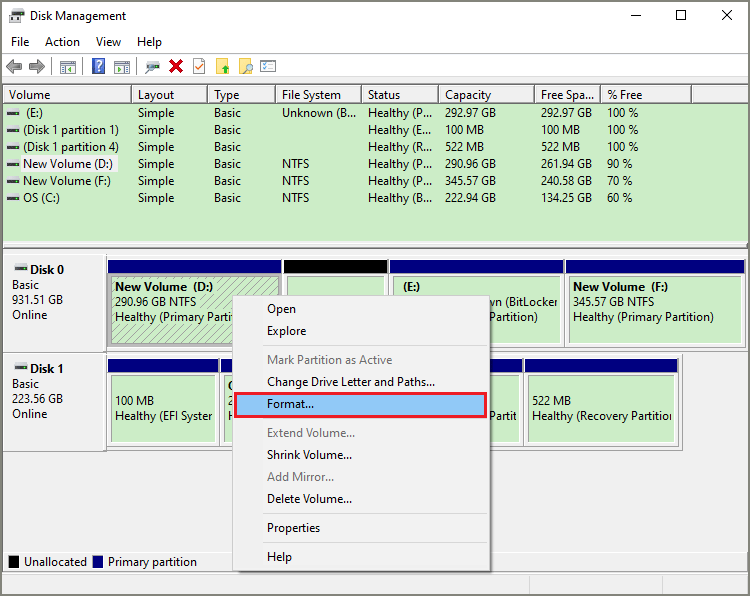
Step 2: Right-click on the USB drive and choose Format.
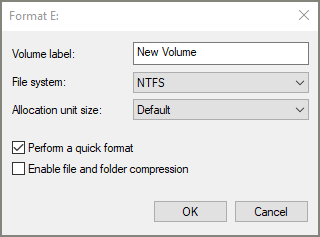
Step 3: Select a file system (e.g., NTFS, FAT32) and click OK. Then reinsert the USB Drive.
Conclusion
The Disk is Write Protected error can be caused by a variety of issues, but the methods listed above should help resolve the problem in most cases. If you want to keep your files safe more easily, it’s recommended for you to encrypt a drive via BitLocker or use some third-party software to lock files, like Cocosenor File Lock Tuner.

